
In this article, we will implement login and registration in Laravel, with a focus on developing controllers, models, migrations, and routing – all of which are essential parts of a Laravel framework.
Before we start, ensure you have the following installed:
- PHP: Make sure you have PHP installed on your system.
- Composer: Install Composer, a PHP package manager, if you haven’t already.
You can also refer to the official documentation using this link.
Check this out! This article covers how to setup a Laravel environment on Windows.
I. Create a New Laravel Project
1. Select the file directory where you want to create your project.
2. Open your terminal or command prompt with directory of your choosing
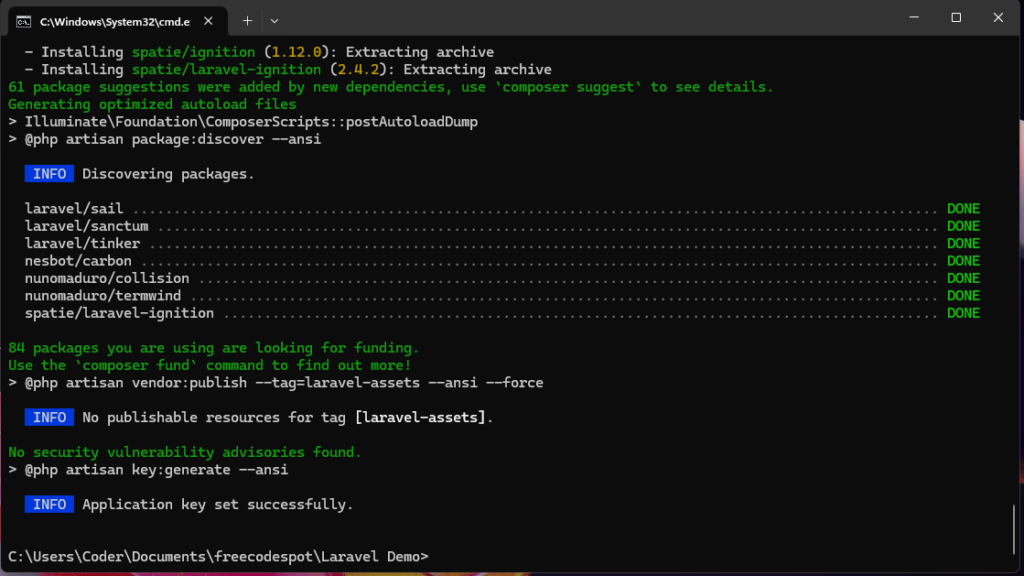
3. Run the following command to create a new Laravel project named “logindemo”:
composer create-project laravel/laravel logindemoWait for the installation to finish. It should look like this once finished.
This will create a project folder named “logindemo” in your local directory. Open the folder with Visual Studio code or your preferred code editor. In my case, I will use visual studio code.
II. Database Configuration
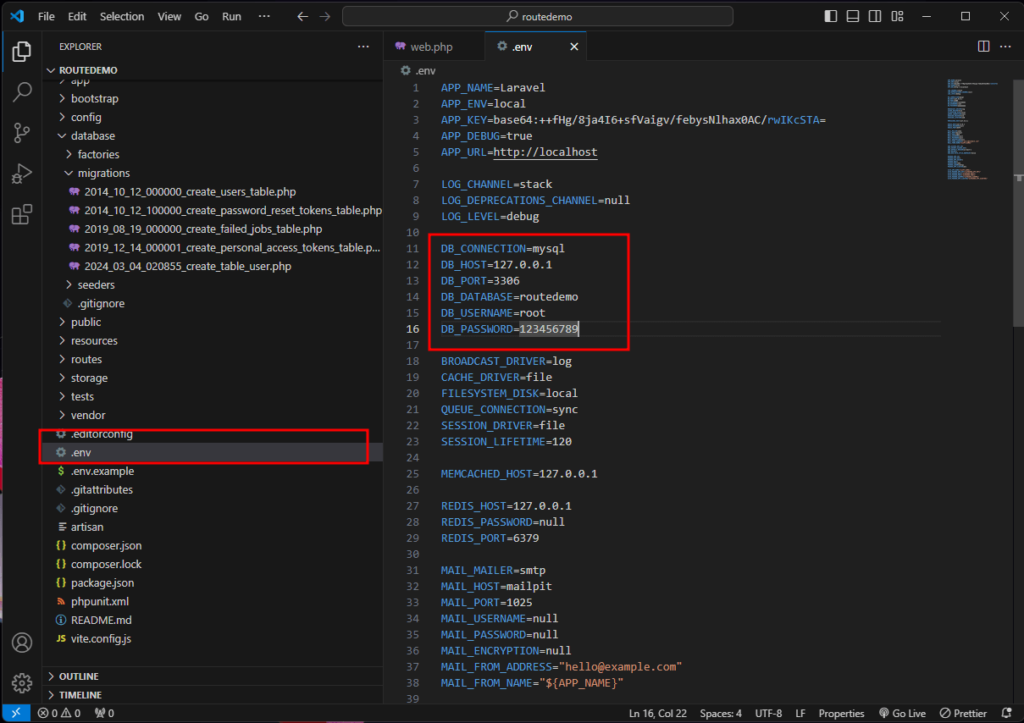
Configure your database credentials in the .env file. The following entry should be pointed to your actual local database.
DB_CONNECTION=mysql
DB_HOST=your_database_host
DB_PORT=your_database_port
DB_DATABASE=your_database_name
DB_USERNAME=your_database_username
DB_PASSWORD=your_database_password
III. Create a User Model and Migration
Now, we need to create a User model. This will be used to create a migration file and later access the table using this model. The User model and migration were already created during installation, so there is no need for us to do anything, but to know how to create a model and migration, follow the steps below.
1. Open the command prompt or in my case, I’ll use the Visual Studio Code terminal
2. Run the command below to create a User model and a migration file.
php artisan make:model User -m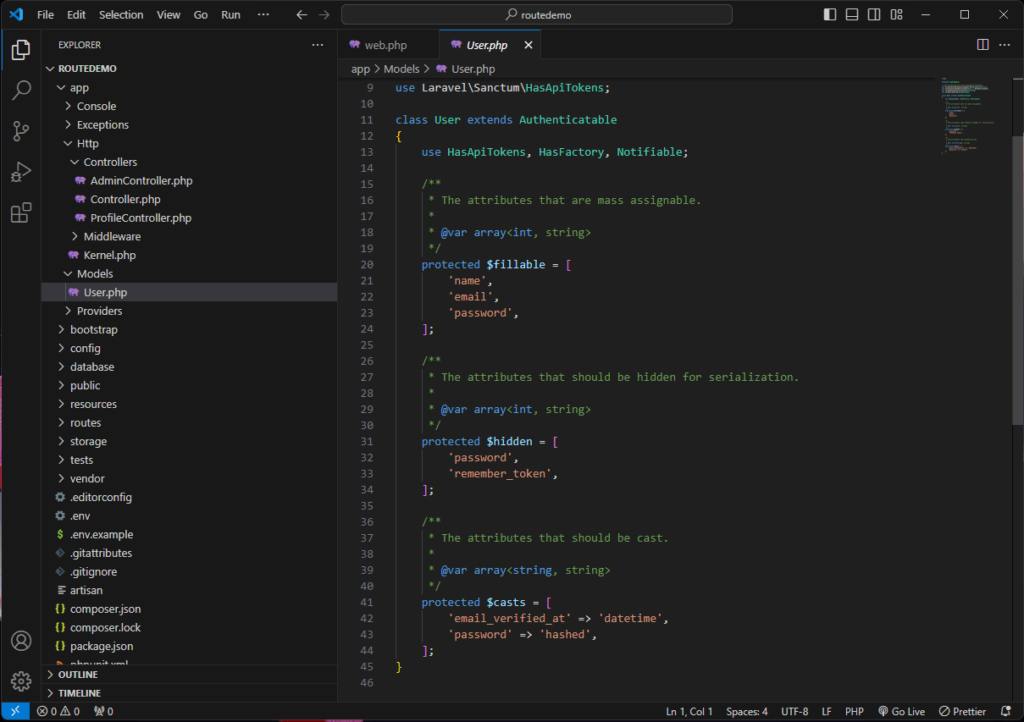
3. Once, the User model is created, create the migration file using the command below.
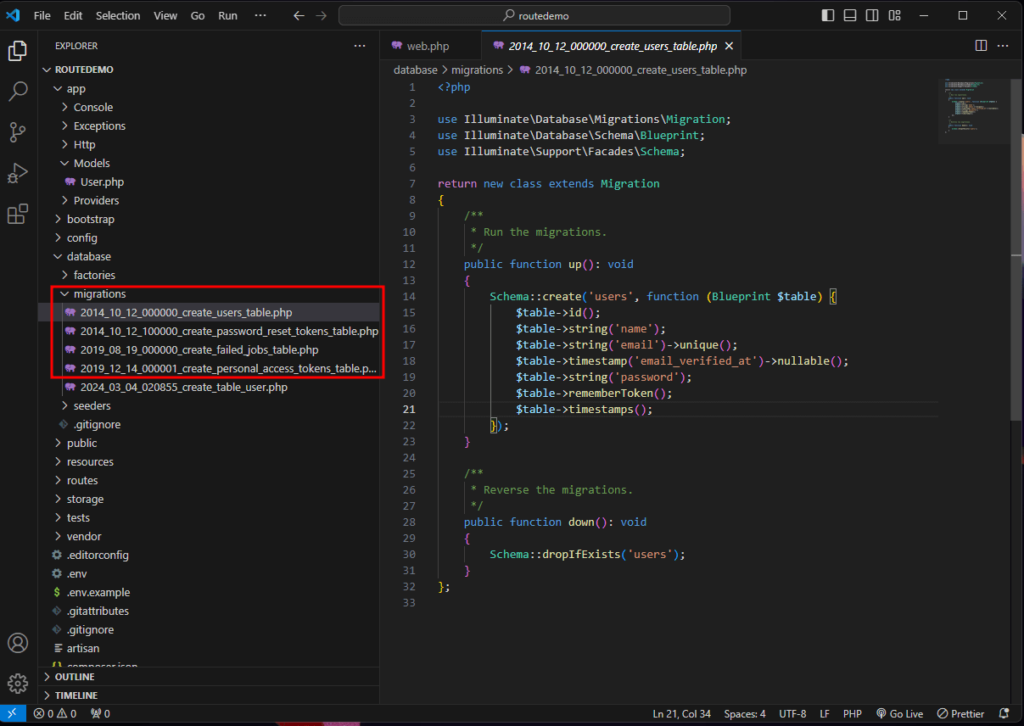
php artisan make:migration create_table_name4. Open the file and make sure to check and add the columns you need for the User. To locate the file navigate to database » migrations then choose the name that you use to create the migration. Below is the default migration script for creating the users table.
public function up(): void
    {
        Schema::create('users', function (Blueprint $table) {
            $table->id();
            $table->string('name');
            $table->string('email')->unique();
            $table->timestamp('email_verified_at')->nullable();
            $table->string('password');
            $table->rememberToken();
            $table->timestamps();
        });
    }


    /**
     * Reverse the migrations.
     */
    public function down(): void
    {
        Schema::dropIfExists('users');
    }
See the image below for your reference on where this file can be located.
IV. Run Migration
After setting up the migration file, we should make sure to configure our project’s database settings. To do that, open the .env file and check for database entry. See the screenshot below.
Now, open the terminal and run the following command.
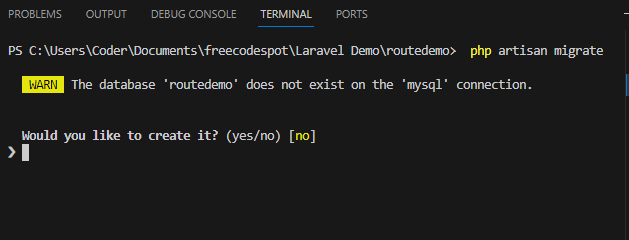
php artisan migrateThis will execute all migration files on your project and create the tables for us. If the database already exists this will create the table automatically but if it does not, you will be prompted with this message.
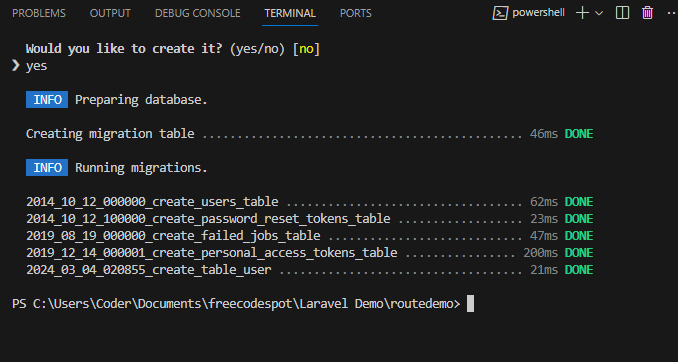
Type yes and press enter from your keyboard. This command will create the database for you, including the tables in declared on your migration file. You should be able to see this confirmation message once the migration is done.
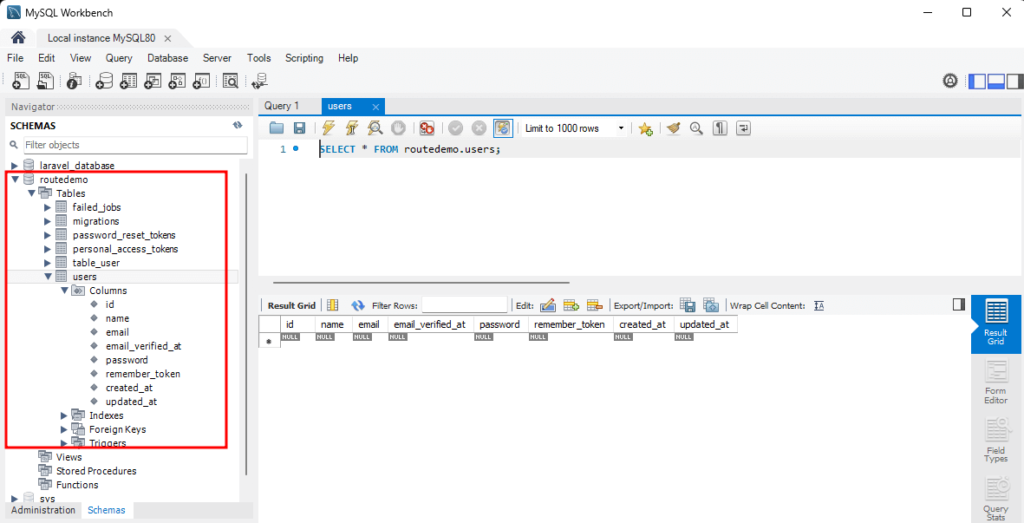
Verify the tables by opening your MySQL database, you can use the command line or use MySQL workbench to easily access the database and tables.
V. Create a controller
We will create two controllers for this demo: AuthController which is responsible for user authentication, and AdminController for the dashboard.
Below is the list method for AuthController:
| Method | Description |
| authenticateUser() | Method to authenticate the user |
| showRegistrationForm() | Display the registration form |
| register() | Create a new user entry on the database |
| showLoginForm() | Display the login form |
| login() | Process user authentication |
For AdminController we will use this as a dummy controller that can only be accessed when the user is authenticated.
Now, let’s create the controller and method mentioned above. To do that, open the terminal and execute the command below.
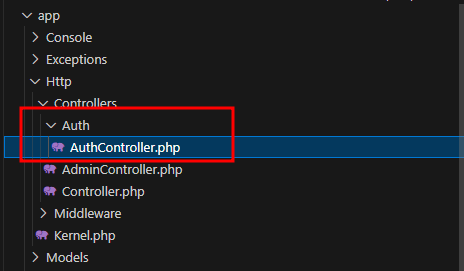
php artisan make:controller Auth\AuthControllerThis will create an AuthController file inside Http » Controllers » Auth. See the image below for your reference.
VI. Create AuthController Method
First, let’s create a reusable authentication method. The purpose of this method is to authenticate the user and can be reused by any method inside the AuthController.
 protected function authenticateUser(Request $request)
    {
        $credentials = $request->only('email', 'password');

        if (Auth::attempt($credentials)) {
            $request->session()->regenerate();
        } else {
            throw ValidationException::withMessages(['msg' => 'Record not found']);
        }
    }
Second, create a method that will return the registration view.
 public function showRegistrationForm()
    {
        return view('auth.register');
    }
Third, create a method that will process the post data from the registration form. This method will create a user entry on the database and login the user.
public function register(Request $request)
    {
        $request->validate([
            'name' => 'required|string|max:250',
            'email' => 'required|email|max:250|unique:users',
            'password' => 'required|min:8|confirmed'
        ]);

        $user = User::create([
            'name' => $request->name,
            'email' => $request->email,
            'password' => Hash::make($request->password)
        ]);

        $this->authenticateUser($request);

        return redirect()->route('dashboard')->with('success', 'You have successfully registered and logged in!');
    }
Fourth, create a method that will return the login view.
public function showLoginForm()
    {
        return view('auth.login');
    }
Fifth, create a method that will authenticate the user input from the login form.
public function login(Request $request)
    {
        $credentials = $request->validate([
            'email' => 'required|email',
            'password' => 'required'
        ]);

        $this->authenticateUser($request);


        return redirect()->route('dashboard')->with('success', 'You have successfully logged in!');
    }
Sixth, create a logout method. This method can only be accessible when a user is authenticated.
public function logout(Request $request)
    {
        Auth::logout();
        $request->session()->invalidate();
        $request->session()->regenerateToken();
        return redirect()->route('login');
    }
Lastly, we can set accessibility for this method. For example, we don’t want the logout method to be accessible by a guest user. Right? The script below will allow all other methods to be accessible by the guest except for the logout method. Copy and paste the code snippet below on top of all the other methods.
public function __construct()
    {
        $this->middleware('guest')->except([
            'logout'
        ]);
    }
VII. Create View(Blade Template)
Now, It’s time to create the UI or views in Laravel. Before we start here is a list of views that we are going to create.
Laravel views directory: resources » views
| Blade | Folder Location | Description |
| layout.blade.php | layouts | The main html layout for our application |
| navigation.blade.php | layouts | This is the HTML script for the navigation menu |
| login.blade.php | auth | This is the login UI |
| register.blade.php | auth | This is the Registration UI |
| dashboard.blade.php | admin | This is the dummy admin dashboard UI |
If you are wondering which file is loaded when you first run your project. You can verify it from the route config inside web.php. Below is the default route for a fresh copy of Laravel.
Route::get('/', function () {
    return view('welcome');
});
To locate the welcome view, navigate to resources » views then you can see a file named welcome.blade.php. That is the default UI loaded when you first run your application. We will discuss more about routing later after we create all the blade templates we need for this demo.
1. Create Layouts
Let’s create a folder inside views named layouts. This folder will contain all the main templates that we will implement. Now, create a new file, name it layout.blade.php. Copy the code snippet below.
<!DOCTYPE html>
<html lang="en">
<head>
    <meta charset="UTF-8">
    <meta name="viewport" content="width=device-width, initial-scale=1.0">
    <meta http-equiv="X-UA-Compatible" content="ie=edge">
    <title>Login And Registration Demo | www.freecodespot.com</title>
    <link rel="stylesheet" href="https://cdn.jsdelivr.net/npm/bootswatch@4.5.2/dist/cerulean/bootstrap.min.css" integrity="sha384-3fdgwJw17Bi87e1QQ4fsLn4rUFqWw//KU0g8TvV6quvahISRewev6/EocKNuJmEw" crossorigin="anonymous">

    <script src="https://cdn.jsdelivr.net/npm/@popperjs/core@2.9.2/dist/umd/popper.min.js" ></script>
    <script src="https://cdn.jsdelivr.net/npm/bootstrap@5.0.1/dist/js/bootstrap.min.js" integrity="sha384-Atwg2Pkwv9vp0ygtn1JAojH0nYbwNJLPhwyoVbhoPwBhjQPR5VtM2+xf0Uwh9KtT" crossorigin="anonymous"></script>
</head>
<body>


      @include('layouts.navigation')

    <div class="container">
        @yield('content')
    </div>

</body>
</html>
There are two things you need to take note from the script above. These are the following.
@include('layouts.navigation')» This includes an external blade file under the folder named layouts and file name navigation.blade.php.@yield('content')» This will display content that has been defined in a child view.
2. Create Navigation Menu
Create the navigation template. In the same folder layouts, create a new file named navigation.blade.php. Open the file and copy the code snippet below.
<nav class="navbar navbar-expand-lg navbar-dark bg-primary">
    <a class="navbar-brand" href="{{ URL('/') }}">Laravel Demo</a>
    <button class="navbar-toggler" type="button" data-toggle="collapse" data-target="#navbarColor01" aria-controls="navbarColor01" aria-expanded="false" aria-label="Toggle navigation">
      <span class="navbar-toggler-icon"></span>
    </button>

    <div class="collapse navbar-collapse" id="navbarColor01">
      <ul class="navbar-nav mr-auto">
        @if(Auth::check())


        <li class="nav-item dropdown">
            <a class="nav-link dropdown-toggle" data-bs-toggle="dropdown" href="#" role="button" aria-haspopup="true" aria-expanded="false">{{ Auth::user()->name }}</a>
            <div class="dropdown-menu">
              <form id="logout-form" method="POST" action="{{ route('logout') }}">
                @csrf
                <a class="dropdown-item" href="#" onclick="document.getElementById('logout-form').submit();">Logout</a>
              </form>

            </div>
          </li>


        @else
            <li class="nav-item">
                <a class="nav-link {{ (request()->is('login')) ? 'active' : '' }}" href="{{ route('login') }}">Login</a>
            </li>
            <li class="nav-item">
                <a class="nav-link {{ (request()->is('register')) ? 'active' : '' }}" href="{{ route('register') }}">Register</a>
            </li>
        @endif
      </ul>
    </div>
  </nav>
3. Create Login UI
Now, create another folder inside views named auth. Inside the folder create a new file named login.blade.php. Open the file and copy the code snippet below.
@extends('layouts.layout')


@section('content')


<div class="row justify-content-center mt-5">
    <div class="col-md-8">


        <div class="container my-5">
            <div class="border rounded p-4">
                <h5 class="text-center mb-4">Login Form</h5>


                    @if($errors->has('msg'))
                    <div class="alert alert-danger">
                        {{$errors->first('msg')}}
                    </div>
                    @endif


                <form action="{{ route('authenticate') }}" method="post">
                    @csrf
                    <div class="mb-3 row">
                        <label for="email" class="col-md-4 col-form-label text-md-end text-start">Email Address</label>
                        <div class="col-md-6">
                            <input type="email" placeholder="Input email address" class="form-control @error('email') is-invalid @enderror" id="email" name="email" value="{{ old('email') }}">
                            @if ($errors->has('email'))
                                <div class="invalid-feedback">{{ $errors->first('email') }}</div>
                            @endif
                        </div>
                    </div>
                    <div class="mb-3 row">
                        <label for="password" class="col-md-4 col-form-label text-md-end text-start">Password</label>
                        <div class="col-md-6">
                            <input type="password" placeholder="Input password" class="form-control @error('password') is-invalid @enderror" id="password" name="password">
                            @if ($errors->has('password'))
                                <div class="invalid-feedback">{{ $errors->first('password') }}</div>
                            @endif
                        </div>
                    </div>
                    <div class="mb-3 row">
                        <button type="submit" class="col-md-3 offset-md-5 btn btn-primary">Login</button>
                    </div>
                </form>
            </div>
        </div>

    </div>
</div>

@endsection
Notice the following from the code above.
@extends('layouts.layout')» This uses the layout.blade.php template that we created a while ago.@section('content')» This code is a blade identifier that this section is the content that will be displayed on@yield(“content”)from the main layout
4. Create Register UI
The next view that we need to create is the registration view. Inside the auth folder create another file named register.blade.php. Open the file and copy the code snippet below.
@extends('layouts.layout')


@section('content')


<div class="row justify-content-center mt-5">
    <div class="col-md-8">


        <div class="container my-5">
            <div class="border rounded p-4">
                <h5 class="text-center mb-4">Registeration Form</h5>
                @if($errors->has('msg'))
                <div class="alert alert-danger">
                    {{$errors->first('msg')}}
                </div>
                @endif
                <form action="{{ route('create') }}" method="post">
                    @csrf
                    <div class="mb-3 row">
                        <label for="name" class="col-md-4 col-form-label text-md-end text-start">Name</label>
                        <div class="col-md-6">
                            <input type="text" placeholder="Name" class="form-control @error('name') is-invalid @enderror" id="name" name="name" value="{{ old('name') }}">
                            @if ($errors->has('name'))
                                <div class="invalid-feedback">{{ $errors->first('name') }}</div>
                            @endif
                        </div>
                    </div>
                    <div class="mb-3 row">
                        <label for="email" class="col-md-4 col-form-label text-md-end text-start">Email Address</label>
                        <div class="col-md-6">
                            <input type="email" placeholder="Email" class="form-control @error('email') is-invalid @enderror" id="email" name="email" value="{{ old('email') }}">
                            @if ($errors->has('email'))
                                <div class="invalid-feedback">{{ $errors->first('email') }}</div>
                            @endif
                        </div>
                    </div>
                    <div class="mb-3 row">
                        <label for="password" class="col-md-4 col-form-label text-md-end text-start">Password</label>
                        <div class="col-md-6">
                            <input type="password" placeholder="Password" class="form-control @error('password') is-invalid @enderror" id="password" name="password">
                            @if ($errors->has('password'))
                                <div class="invalid-feedback">{{ $errors->first('password') }}</div>
                            @endif
                        </div>
                    </div>
                    <div class="mb-3 row">
                        <label for="password_confirmation" class="col-md-4 col-form-label text-md-end text-start">Confirm Password</label>
                        <div class="col-md-6">
                            <input type="password" placeholder="Confirm Password" class="form-control" id="password_confirmation" name="password_confirmation">
                        </div>
                    </div>
                    <div class="mb-3 row">
                        <button type="submit" class="col-md-3 offset-md-5 btn btn-primary">Register</button>
                    </div>
                </form>
            </div>
        </div>
    </div>
</div>

@endsection
5. Create Admin Dashboard UI
Now, let’s create the admin dashboard UI. Create an admin folder inside view and inside create a new file dashboard.blade.php. Since this is just a dummy UI, we can make it simple. Open the file and copy the code snippet below.
@extends('layouts.layout')
@section('content')
<div class="row justify-content-center mt-5">
<div class="col-md-8">
<div class="container my-5">
<div class="border rounded p-4">
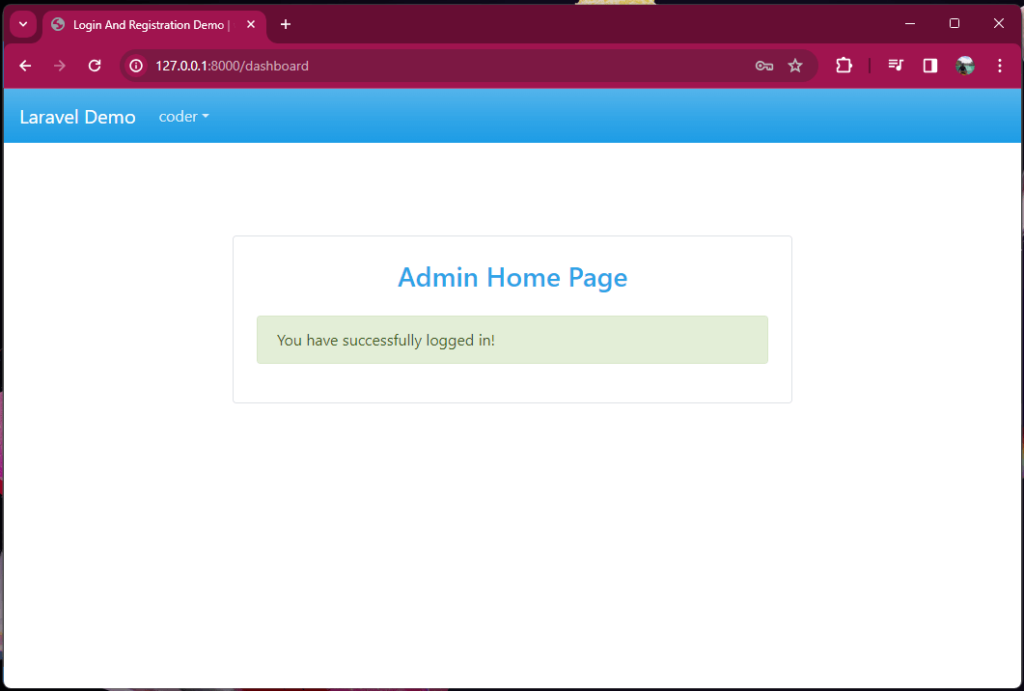
<h3 class="text-center mb-4">Admin Home Page</h3>
@if ($message = Session::get('success'))
<div class="alert alert-success">
{{ $message }}
</div>
@endif
</div>
</div>
</div>
</div>
@endsection
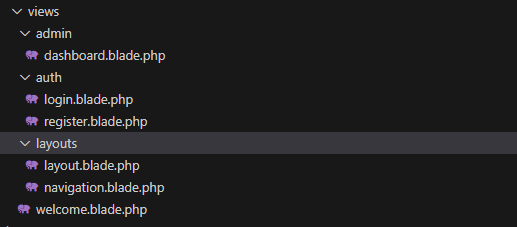
Below are the views created in the previous step.
VIII. Define Routes
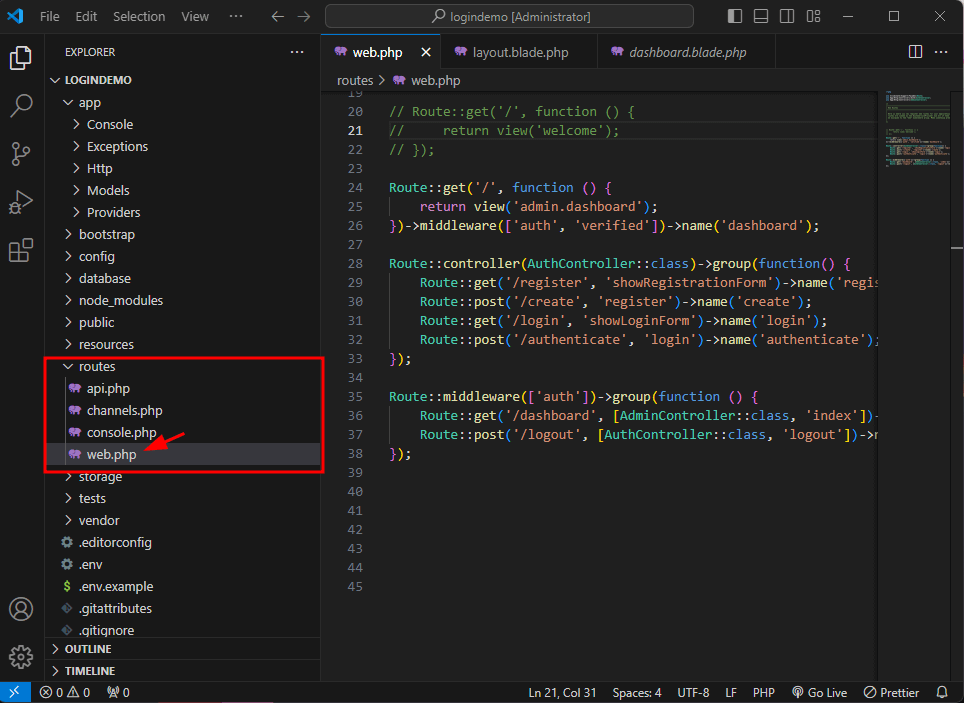
For all of this to work, we need to set a route, to do that open the web.php under routes folder.
1. Admin Dashboard Route
The first thing we will set is the root URL. This is when accessing http://127.0.0.1:8000/ this will redirect the route to the admin dashboard if the user is authenticated.
// Dashboard Route
Route::get('/', function () {
    return view('admin.dashboard');
})->middleware(['auth', 'verified'])->name('dashboard');
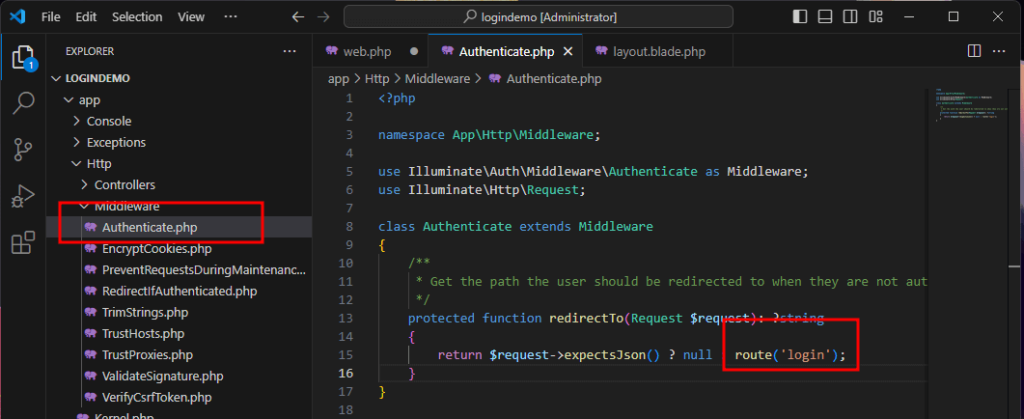
If you observe, we use the auth middleware in this route, that means if unauthenticated users access this link or URL they will be redirected to the default middleware login page. This redirect setting is handled by the auth middleware, which can also be set by modifying the default redirect route inside Authenticate.php. To open the file, navigate to app » Http » Middleware then search for Authenticate.php.
2. Login and Register Routes
Now, we can create a routes grouping for all methods that can be accessed by a guest user. To do that, copy the code snippet below.
// Authentication Routes
Route::middleware('guest')->group(function () {
    // Registration Routes
    Route::get('/register', [AuthController::class, 'showRegistrationForm'])->name('register');
    Route::post('/create', [AuthController::class, 'register'])->name('create');


    // Login Routes
    Route::get('/login', [AuthController::class, 'showLoginForm'])->name('login');
    Route::post('/authenticate', [AuthController::class, 'login'])->name('authenticate');
});
You are wondering how this route is called from the blade or html view? This code ->name('register'); is how we define route name, which means we can call this from a view using this {{ route('register') }}. You can check the navigation.blade.php that we created in the previous step.
To summarize the routes above, here is a table of all the routes created for guest access.
| Route | AuthController | Landing view(blade template) |
| register | showRegistrationForm | register.blade.php |
| create | register | dashboard.blade.php |
| login | showLoginForm | login.blade.php |
| authenticate | login | dashboard.blade.php |
3. Auth Routes
Lastly, define a route that will only be accessible by an authenticated user. That is the admin dashboard and logout method.
Route::middleware(['auth'])->group(function () {
    Route::get('/dashboard', [AdminController::class, 'index'])->name('dashboard');
    Route::post('/logout', [AuthController::class, 'logout'])->name('logout');
});
Now, we are all set, We can run our application and test the basic function that we implement.
IX. Run Application
To run the application, open the terminal then execute the command below.
php artisan serve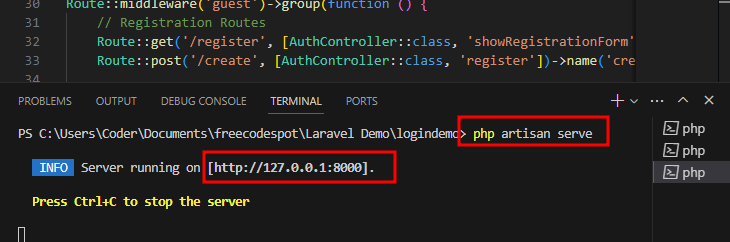
Open your browser and type the URL indicated after you run the serve command which is http://127.0.0.1:8000.
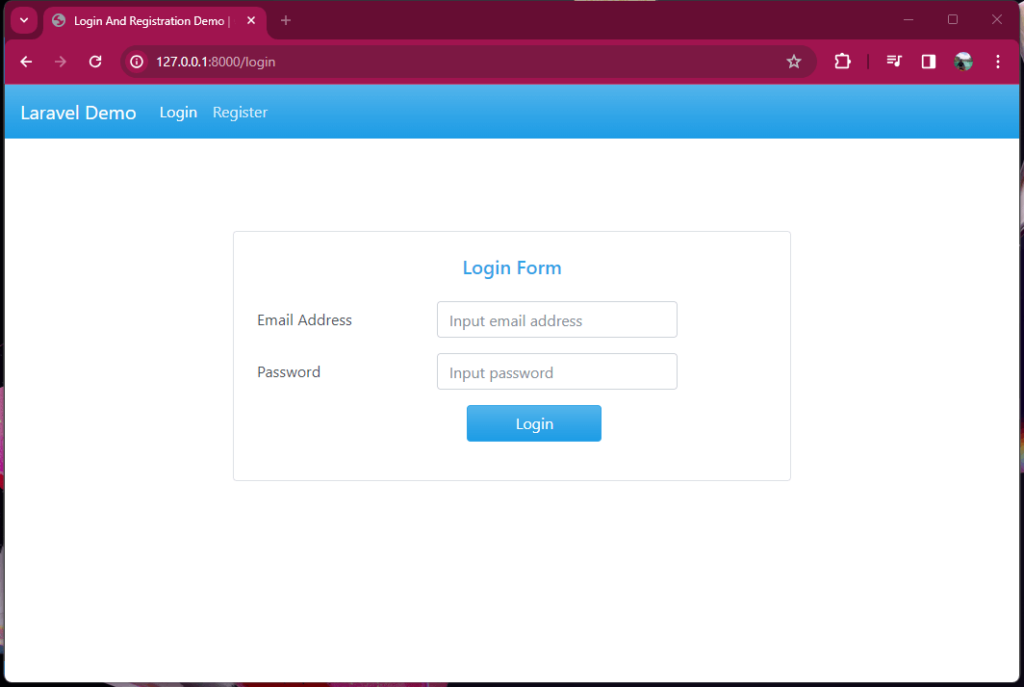
Here’s a summary of the UI that you can expect in this demo.
login.blade.php :
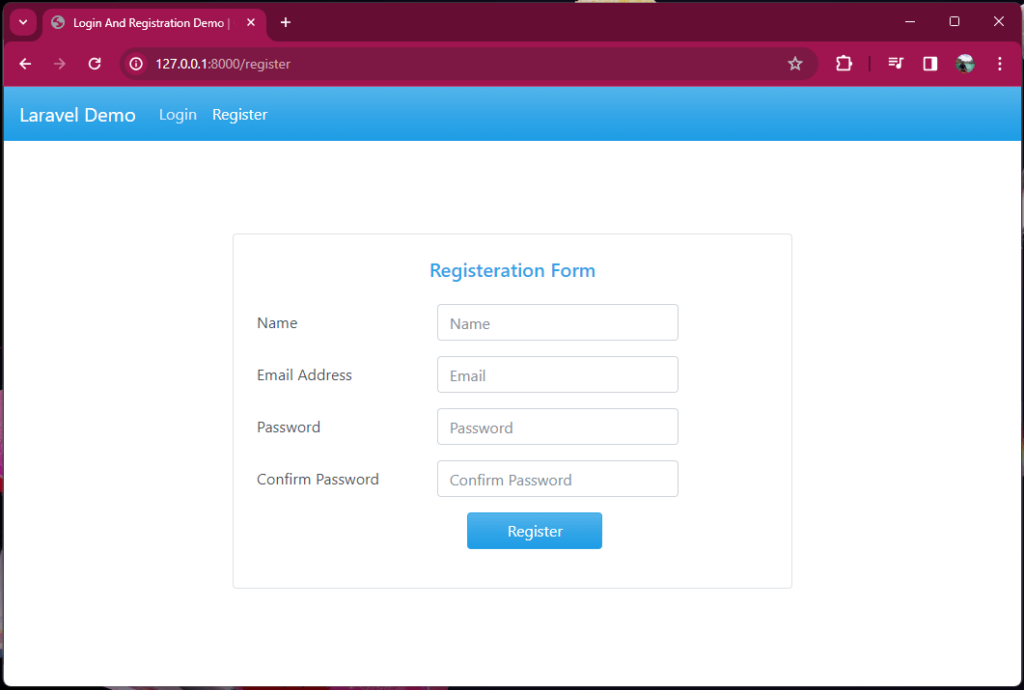
register.blade.php:
dashboard.blade.php:
Congratulation!! You have created your first Laravel application.
Common Problem:
During this demo, I encountered a problem where my changes in the code did not reflect on the browser. So I use the following script to clear all the cache.
Clear the application cache:
php artisan cache:clearClear route cache:
php artisan route:clearClear Configuration cache:
php artisan config:clearClear compiled views cache
php artisan view:clearIf for some reason it’s still not working your changes are still not showing in the browser. You can manually delete the views inside storage » framework » views.
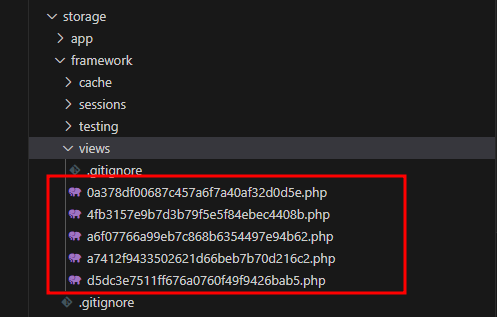
Then try to run your application and check your changes.
X. Summary
We have successfully Implement Login and Registration in Laravel 10. In the process, we have learned the important parts of a Laravel framework which are the blade template, controller, and routes. We can say that the architectural design for this framework is MVC, so if you are familiar with this design then it would be easier for you to adopt to this framework. Hopefully, this help you understand the framework and share it with your friends.
Keep coding!