This guide will walk you through integrating ASP.NET Core Identity in a .NET 8 project using Visual Studio 2022. By the end of this tutorial, you’ll have a fully functional authentication system with user registration, login, and role-based access control.
ASP.NET Core Identity is a powerful library for handling user authentication and authorization in ASP.NET Core applications. It simplifies the implementation of user management, password hashing, role management, and more.
In this tutorial, we’ll:
- Set up a new ASP.NET Core Web Application in .NET 8.
- Configure ASP.NET Core Identity.
- Apply database migrations.
- Implement registration, login, and logout functionality.
- Add role-based access control.
Advantages
- Built-in support for authentication and authorization.
- Supports role-based security and external login providers.
- Integrates seamlessly with Entity Framework Core for database management.
- Highly customizable to suit various application needs.
Before we start, Please make sure to have installed the following
- Visual Studio 2022 (17.7 or later) with .NET 8 SDK installed.
- SQL Server (or SQL Server Express) for the database.
- Basic knowledge of ASP.NET Core and Entity Framework Core.
If you already have installed all of that, then let’s start.
Setting up the Project
1. Create a New Project:
- Open Visual Studio and click on Create a new project.
- Select ASP.NET Core Web App and click Next.
- Name the project
AspNetCoreIdentityDemoand click Next.
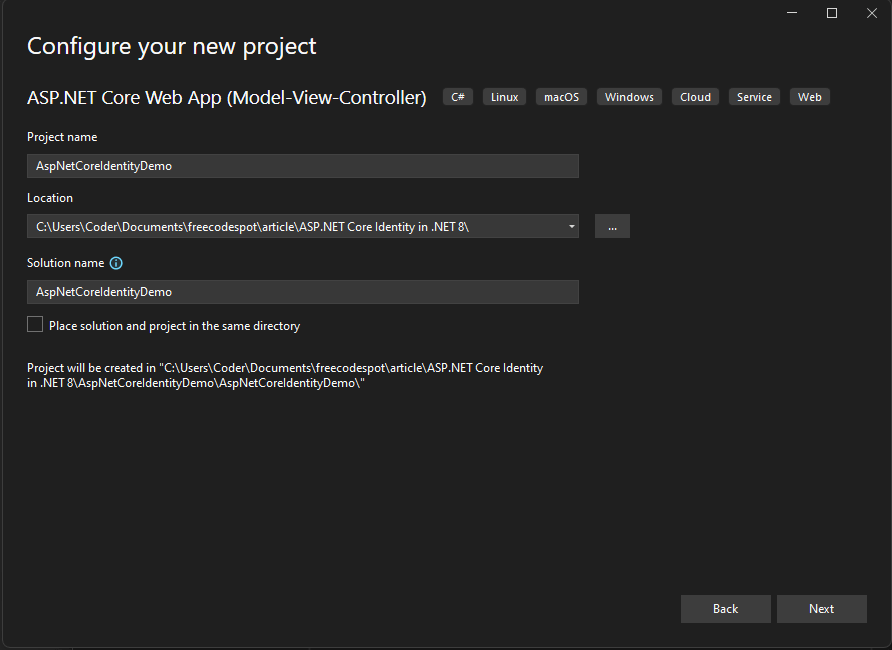
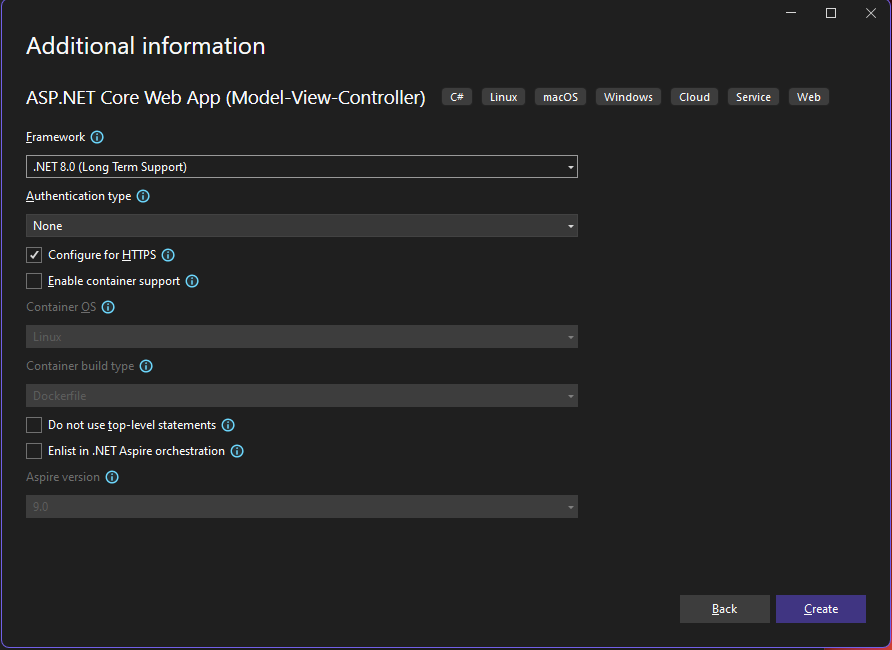
- Select .NET 8 as the framework and click Create.
2. Install Required NuGet Packages:
- Open the Package Manager Console (Tools > NuGet Package Manager > Package Manager Console) and run the following commands:
Install-Package Microsoft.AspNetCore.Identity.EntityFrameworkCore
Install-Package Microsoft.EntityFrameworkCore.SqlServer
Install-Package Microsoft.EntityFrameworkCore.Tools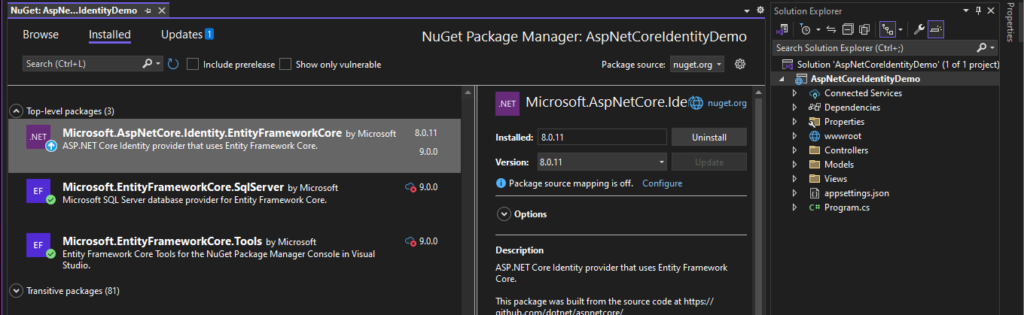
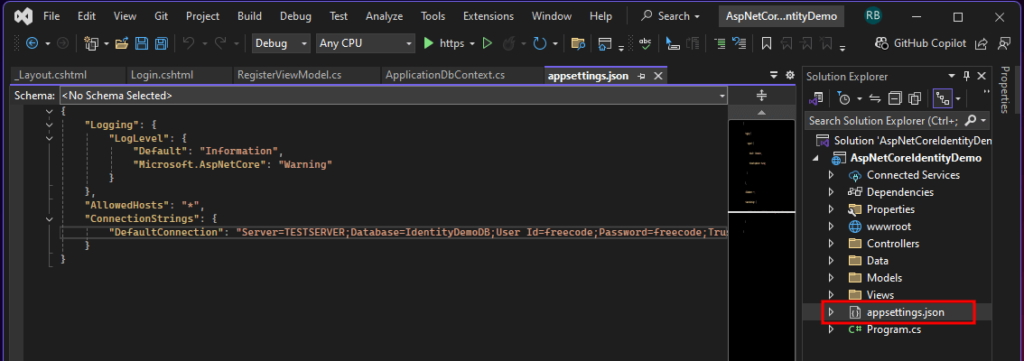
3. Update the Database Connection String:
- Open
appsettings.jsonand replace the connection string:
"ConnectionStrings": {
  "DefaultConnection": "Server=YOUR_SERVER_NAME;Database=IdentityDemoDB;Trusted_Connection=True;TrustServerCertificate=True;"
}
Replace YOUR_SERVER_NAME with your SQL Server instance name.
Creating the Project File Structure
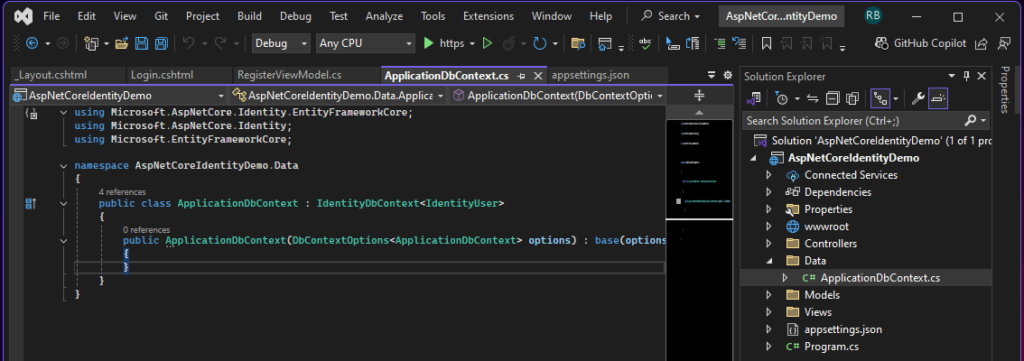
1. Configure the Identity DbContext
- Create a new folder named
Datain the root of your project. - Add a new class file named
ApplicationDbContext.cswith the following code:
using Microsoft.AspNetCore.Identity.EntityFrameworkCore;
using Microsoft.AspNetCore.Identity;
using Microsoft.EntityFrameworkCore;

namespace AspNetCoreIdentityDemo.Data
{
    public class ApplicationDbContext : IdentityDbContext<IdentityUser>
    {
        public ApplicationDbContext(DbContextOptions<ApplicationDbContext> options) : base(options)
        {
        }
    }
}
2. Configure Services in Program.cs
- Open
Program.csand modify thebuilderconfiguration:
using AspNetCoreIdentityDemo.Data;
using Microsoft.AspNetCore.Identity;
using Microsoft.EntityFrameworkCore;

var builder = WebApplication.CreateBuilder(args);

// Add services to the container
builder.Services.AddDbContext<ApplicationDbContext>(options =>
    options.UseSqlServer(builder.Configuration.GetConnectionString("DefaultConnection")));

builder.Services.AddIdentity<IdentityUser, IdentityRole>(options =>
{
    options.Password.RequiredLength = 6;
    options.Password.RequireNonAlphanumeric = false;
})
.AddEntityFrameworkStores<ApplicationDbContext>()
.AddDefaultTokenProviders();

builder.Services.AddControllersWithViews();

var app = builder.Build();

// Configure the HTTP request pipeline
if (!app.Environment.IsDevelopment())
{
    app.UseExceptionHandler("/Home/Error");
    app.UseHsts();
}

app.UseHttpsRedirection();
app.UseStaticFiles();

app.UseRouting();

app.UseAuthentication();
app.UseAuthorization();

app.MapControllerRoute(
    name: "default",
    pattern: "{controller=Home}/{action=Index}/{id?}");

app.Run();
Implementing Core Features
1. Password Strength Validation
To ensure stronger password security, you can configure the password policy in Program.cs under the AddIdentity method. Modify it as follows:
builder.Services.AddIdentity<IdentityUser, IdentityRole>(options =>
{
    options.Password.RequireDigit = true;
    options.Password.RequiredLength = 8; // Minimum password length of 8
    options.Password.RequireNonAlphanumeric = true; // At least one special character
    options.Password.RequireUppercase = true; // At least one uppercase letter
    options.Password.RequireLowercase = true; // At least one lowercase letter
})
.AddEntityFrameworkStores<ApplicationDbContext>()
.AddDefaultTokenProviders();
This ensures passwords meet the following criteria:
- At least 8 characters.
- Includes a digit (0-9).
- Includes a special character (e.g.,
@,#,$). - Contains uppercase and lowercase letters.
2. Create Login and Register ViewModels
Add a new class inside Models folder. Named it LoginViewModel.cs
namespace AspNetCoreIdentityDemo.Models
{
    public class LoginViewModel
    {
        public string Email { get; set; }
        public string Password { get; set; }
    }
}
In the same folder, create another class named RegisterViewModel.
namespace AspNetCoreIdentityDemo.Models
{
public class RegisterViewModel
{
public string Email { get; set; }
public string Password { get; set; }
public string ConfirmPassword { get; set; }
}
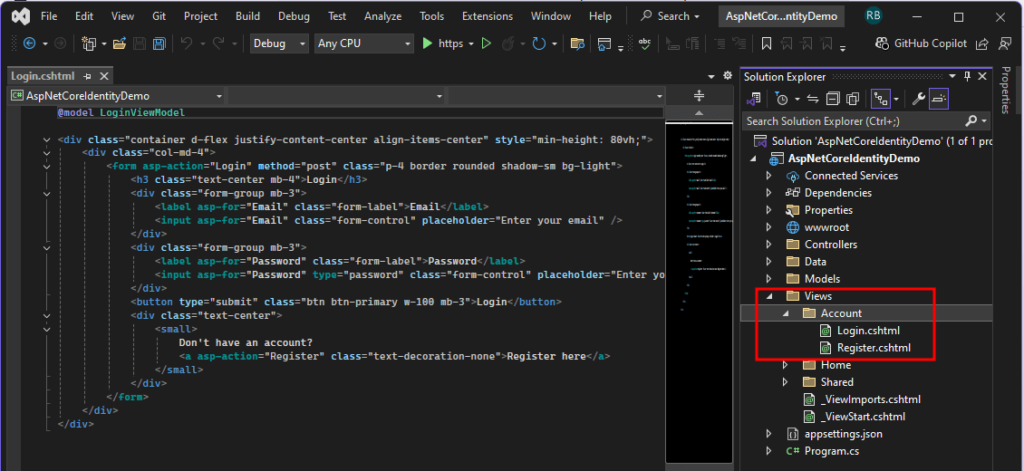
}3. Create User Registration, Login, and Logout Views
- Add a new folder named
Viewsin the root of your project. - Under
Views, create a subfolder namedAccount.
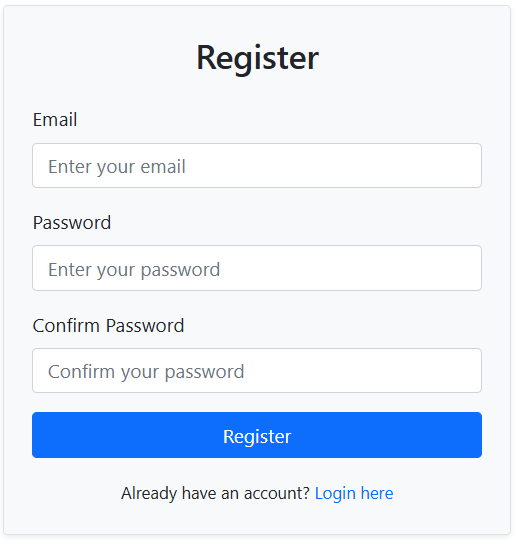
Add the Registration View
- Add a new Razor View file named
Register.cshtml:
@model RegisterViewModel

<div class="container d-flex justify-content-center align-items-center" style="min-height: 80vh;">
    <div class="col-md-4">
        <form asp-action="Register" method="post" class="p-4 border rounded shadow-sm bg-light">
            <h3 class="text-center mb-4">Register</h3>
            <div class="form-group mb-3">
                <label asp-for="Email" class="form-label">Email</label>
                <input asp-for="Email" class="form-control" placeholder="Enter your email" />
            </div>
            <div class="form-group mb-3">
                <label asp-for="Password" class="form-label">Password</label>
                <input asp-for="Password" type="password" class="form-control" placeholder="Enter your password" />
            </div>
            <div class="form-group mb-3">
                <label asp-for="ConfirmPassword" class="form-label">Confirm Password</label>
                <input asp-for="ConfirmPassword" type="password" class="form-control" placeholder="Confirm your password" />
            </div>
            <button type="submit" class="btn btn-primary w-100 mb-3">Register</button>
            <div class="text-center">
                <small>
                    Already have an account?
                    <a asp-action="Login" class="text-decoration-none">Login here</a>
                </small>
            </div>
        </form>
    </div>
</div>
This is how the UI look like:
Add the Login View
- Add a new Razor View file named
Login.cshtml:
@model LoginViewModel

<div class="container d-flex justify-content-center align-items-center" style="min-height: 80vh;">
    <div class="col-md-4">
        <form asp-action="Login" method="post" class="p-4 border rounded shadow-sm bg-light">
            <h3 class="text-center mb-4">Login</h3>
            <div class="form-group mb-3">
                <label asp-for="Email" class="form-label">Email</label>
                <input asp-for="Email" class="form-control" placeholder="Enter your email" />
            </div>
            <div class="form-group mb-3">
                <label asp-for="Password" class="form-label">Password</label>
                <input asp-for="Password" type="password" class="form-control" placeholder="Enter your password" />
            </div>
            <button type="submit" class="btn btn-primary w-100 mb-3">Login</button>
            <div class="text-center">
                <small>
                    Don't have an account?
                    <a asp-action="Register" class="text-decoration-none">Register here</a>
                </small>
            </div>
        </form>
    </div>
</div>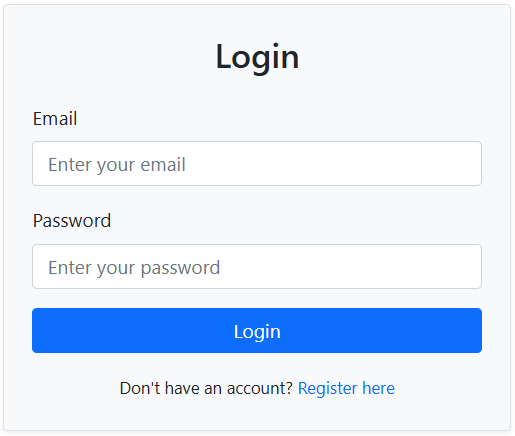
4. Add Account Controller
- Use scaffolding to add a new controller class:
- Right-click on the
Controllersfolder in Solution Explorer. - Select Add > New Scaffolded Item….
- Choose MVC Controller – Empty and click Add.
- Name the controller
AccountControllerand click Add.
- Right-click on the
- Update the
AccountController.csfile with the following code:
using AspNetCoreIdentityDemo.Models;
using Microsoft.AspNetCore.Identity;
using Microsoft.AspNetCore.Mvc;

namespace AspNetCoreIdentityDemo.Controllers
{
    public class AccountController : Controller
    {
        private readonly UserManager<IdentityUser> _userManager;
        private readonly SignInManager<IdentityUser> _signInManager;

        public AccountController(UserManager<IdentityUser> userManager, SignInManager<IdentityUser> signInManager)
        {
            _userManager = userManager;
            _signInManager = signInManager;
        }

        [HttpGet]
        public IActionResult Register() => View();

        [HttpPost]
        public async Task<IActionResult> Register(RegisterViewModel model)
        {
            if (ModelState.IsValid)
            {
                var user = new IdentityUser { UserName = model.Email, Email = model.Email };
                var result = await _userManager.CreateAsync(user, model.Password);

                if (result.Succeeded)
                {
                    await _signInManager.SignInAsync(user, isPersistent: false);
                    return RedirectToAction("Index", "Home");
                }

                foreach (var error in result.Errors)
                {
                    ModelState.AddModelError(string.Empty, error.Description);
                }
            }

            return View(model);
        }

        [HttpGet]
        public IActionResult Login() => View();

        [HttpPost]
        public async Task<IActionResult> Login(LoginViewModel model)
        {
            if (ModelState.IsValid)
            {
                var result = await _signInManager.PasswordSignInAsync(model.Email, model.Password, isPersistent: false, lockoutOnFailure: false);

                if (result.Succeeded)
                {
                    return RedirectToAction("Index", "Home");
                }

                ModelState.AddModelError(string.Empty, "Invalid login attempt.");
            }

            return View(model);
        }

        [HttpPost]
        public async Task<IActionResult> Logout()
        {
            await _signInManager.SignOutAsync();
            return RedirectToAction("Index", "Home");
        }
    }
}
5. Add Login, Register, and Logout Menu in _Layout.cshtml
- Open the
Views/Shared/_Layout.cshtmlfile and add the following code inside the navigation section:
   <ul class="navbar-nav flex-grow-1">
       @if (User.Identity.IsAuthenticated)
       {
           <li class="nav-item">
               <a class="nav-link text-dark" asp-area="" asp-controller="Home" asp-action="Index">Home</a>
           </li>
           <li class="nav-item">
               <a class="nav-link text-dark" asp-area="" asp-controller="Home" asp-action="Privacy">Privacy</a>
           </li>
           <li class="nav-item">
               <form asp-controller="Account" asp-action="Logout" method="post">
                   <button type="submit">Logout</button>
               </form>
           </li>
       }
       else
       {
           <li class="nav-item"><a class="nav-link text-dark" asp-controller="Account" asp-action="Login">Login</a></li>
           <li class="nav-item"><a class="nav-link text-dark" asp-controller="Account" asp-action="Register">Register</a></li>
       }
   </ul>
Implement Role-Based Access Control
If you want to use roles in your application, follow these steps:
Step 1: Add Roles During Application Startup
Update the Program.cs file to create default roles when the application starts.
// Seed roles
using (var scope = app.Services.CreateScope())
{
var roleManager = scope.ServiceProvider.GetRequiredService<RoleManager<IdentityRole>>();
var roles = new[] { "Admin", "User" };
foreach (var role in roles)
{
if (!await roleManager.RoleExistsAsync(role))
{
await roleManager.CreateAsync(new IdentityRole(role));
}
}
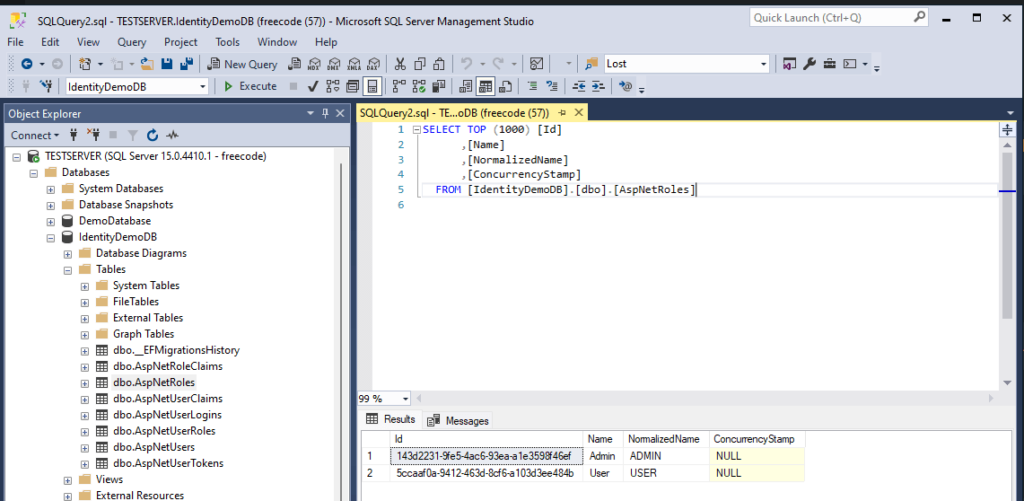
}When you run your application, this seeder will execute and add an entry to the AspNetRoles table.
Step 2: Assign Roles to Users
Modify the registration process in the AccountController to assign a default role to newly registered users.
[HttpPost]
public async Task<IActionResult> Register(RegisterViewModel model)
{
    if (ModelState.IsValid)
    {
        var user = new IdentityUser { UserName = model.Email, Email = model.Email };
        var result = await _userManager.CreateAsync(user, model.Password);

        if (result.Succeeded)
        {
            // Assign the "User" role to the newly registered user
            await _userManager.AddToRoleAsync(user, "User");

            await _signInManager.SignInAsync(user, isPersistent: false);
            return RedirectToAction("Index", "Home");
        }

        foreach (var error in result.Errors)
        {
            ModelState.AddModelError(string.Empty, error.Description);
        }
    }

    return View(model);
}
Step 3: Restrict Access to Controllers or Actions Based on Roles
You can restrict access to certain actions or controllers by adding the [Authorize(Roles = "RoleName")] attribute. For example:
Open HomeController and the following action result method.
[Authorize(Roles = "Admin")]
public IActionResult AdminDashboard()
{
    return View();
}
If you wish to add a User dashboard you can add this.
[Authorize(Roles = "User")]
public IActionResult UserDashboard()
{
    return View();
}
Now, create a view for each method by going to Views/Home.
AdminDashboard.cshtml
@{
    ViewData["Title"] = "Admin Dashboard";
}

<h1 class="text-center mt-5">Admin Dashboard</h1>
<p class="text-center">Welcome to the admin panel. Manage your application here.</p>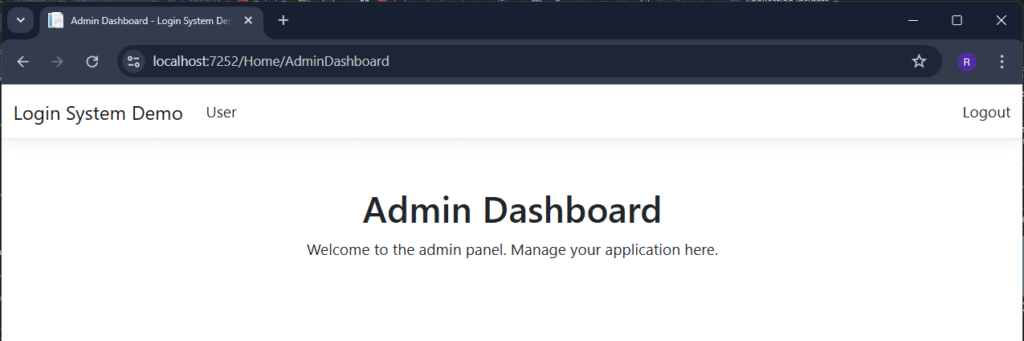
UserDashboard.cshtml
@{
    ViewData["Title"] = "UserDashboard";
}

<h1 class="text-center mt-5">User Dashboard</h1>
<p class="text-center">Welcome to the user dashboard panel. Manage your application here.</p>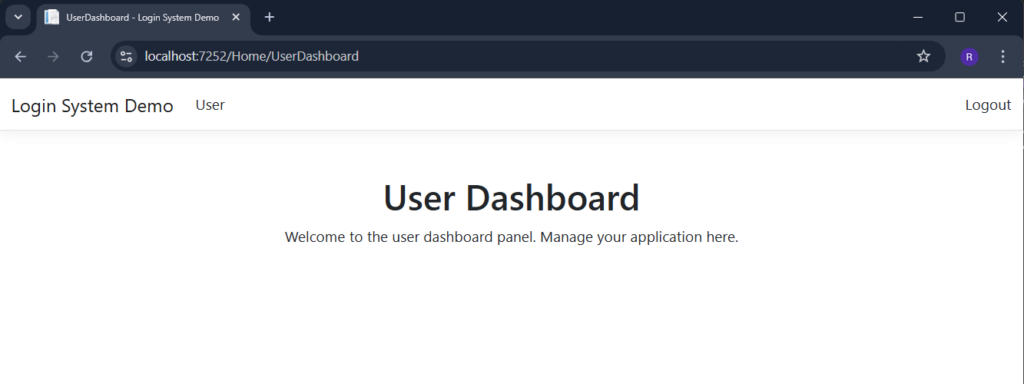
Step 4 : Create Unauthorize View
Now, let’s create a view that will be displayed if user is not allowed to access a page.
Create UnAuthorized() method inside HomeController:
 public IActionResult Unauthorized()
 {
     return View();
 }
Then inside View/Home, create Unauthorize.cshtml and add a dummy unauthorize message
@{
    ViewData["Title"] = "Unauthorized";
}

<div class="text-center">
    <h1 class="display-4 text-danger">Access Denied</h1>
    <p>You do not have permission to access this resource.</p>
    <a href="/" class="btn btn-primary">Return to Home</a>
</div>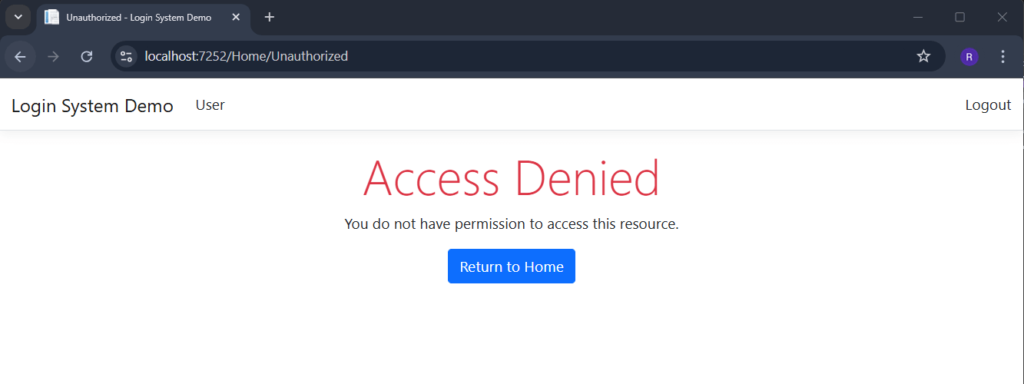
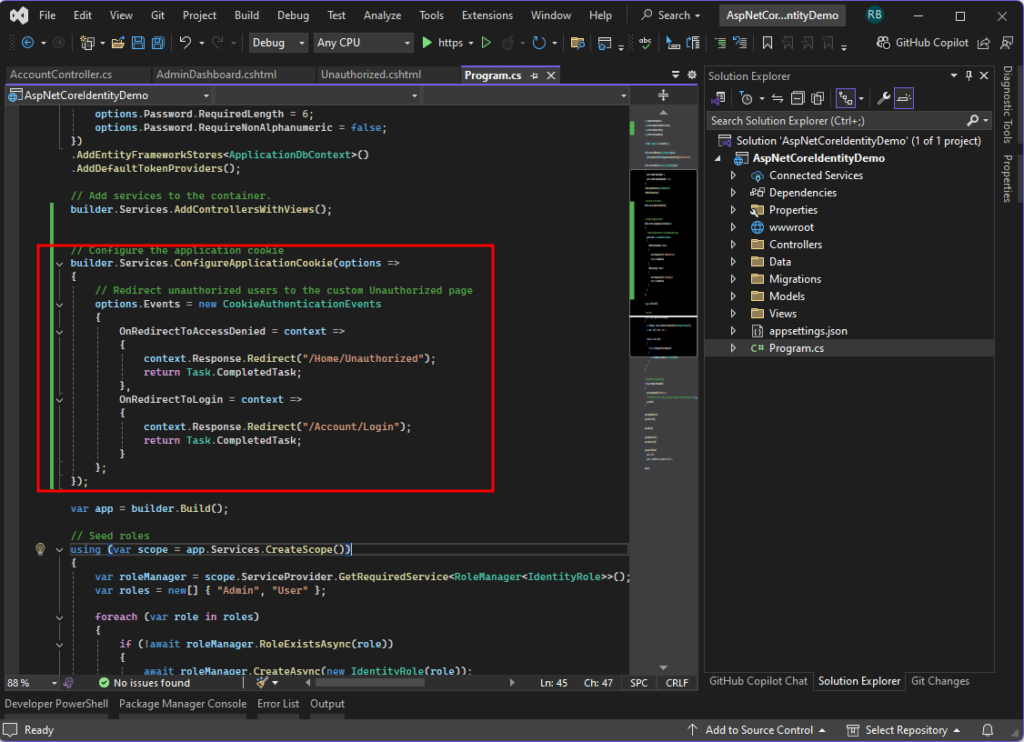
Step 5: Configure your app to properly redirect user when not authorize.
Open program.cs and add the following code.
// Configure the application cookie
builder.Services.ConfigureApplicationCookie(options =>
{
    // Redirect unauthorized users to the custom Unauthorized page
    options.Events = new CookieAuthenticationEvents
    {
        OnRedirectToAccessDenied = context =>
        {
            context.Response.Redirect("/Home/Unauthorized");
            return Task.CompletedTask;
        },
        OnRedirectToLogin = context =>
        {
            context.Response.Redirect("/Account/Login");
            return Task.CompletedTask;
        }
    };
});
Step 6: Add Conditional Navigation Links in _Layout.cshtml
Update _Layout.cshtml to display admin-specific links only for users in the “Admin” role.
  <ul class="navbar-nav flex-grow-1">
      @if (User.Identity.IsAuthenticated)
      {
          if (User.IsInRole("Admin"))
          {
              <li class="nav-item">
                  <a class="nav-link text-dark" asp-area="" asp-controller="Home" asp-action="AdminDashboard">Admin</a>
              </li>
          }else{
              <li class="nav-item">
                  <a class="nav-link text-dark" asp-area="" asp-controller="Home" asp-action="UserDashboard">User</a>
              </li>
          }

          <li class="nav-item ms-lg-auto d-flex align-items-center">
              <form asp-controller="Account" asp-action="Logout" method="post" class="m-0 p-0">
                  <button type="submit" class="btn btn-link nav-link text-dark p-0">Logout</button>
              </form>
          </li>
      }
      else
      {
          <li class="nav-item ms-lg-auto">
              <a class="nav-link text-dark" asp-controller="Account" asp-action="Login">Login</a>
          </li>
          <li class="nav-item">
              <a class="nav-link text-dark" asp-controller="Account" asp-action="Register">Register</a>
          </li>
      }
  </ul>
Applying Migrations
1. Open the Package Manager Console.
2. Run the following commands:
Create a file containing the Identity database schema:
Add-Migration InitialCreate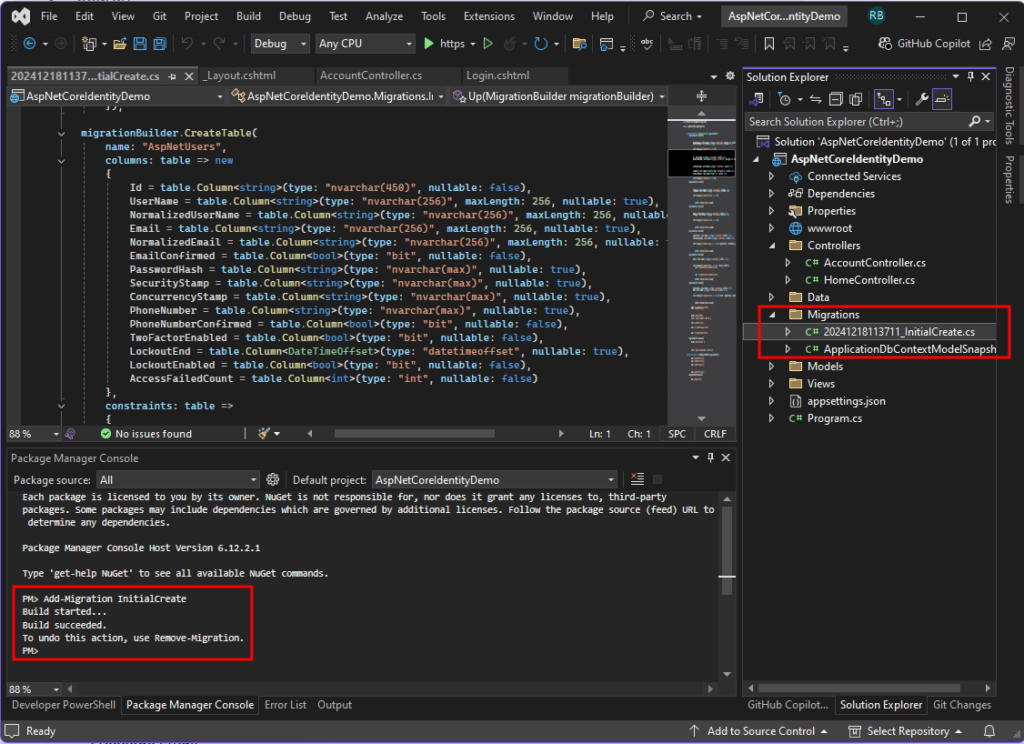
Run the previously created migration file using the following command:
Update-DatabaseVerify the database to ensure the Identity tables were successfully created.
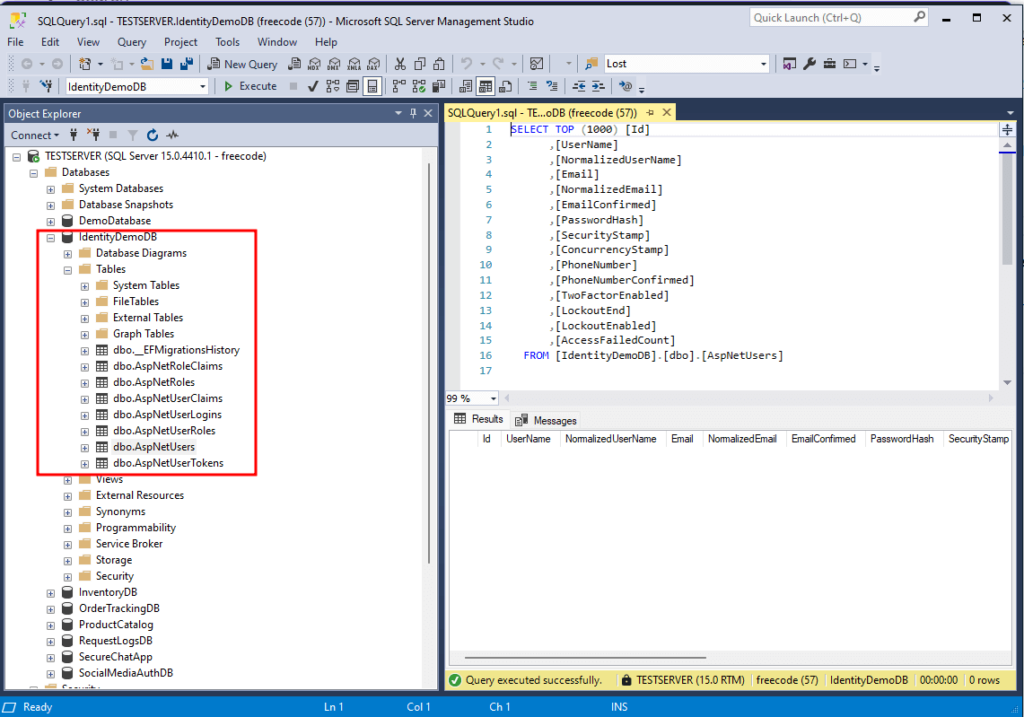
3. This will create the necessary tables for ASP.NET Core Identity in the database.
Testing the Implementation
1. Run the project (Ctrl + F5).
2. Navigate to /Account/Register to create a new account.
3. Navigate to /Account/Login to log in with the created credentials.
4. Use the Logout button to sign out.
6. Check the database for the new user in the AspNetUsers table.
7. To test the role attribute, you can access /Account/AdminDashboard for the admin role.
8. For regular user you can access this /Account/UserDashboard
Download Source Code
To download free source code from this tutorial, you can use the button below.
Note: Extract the file using 7Zip and use password: freecodespot
Summary
In this tutorial, we implemented ASP.NET Core Identity in a .NET 8 project. We configured the database, added user registration, login, and logout functionality, and set up role-based access control. This serves as a foundation for building secure web applications with user authentication.