In this tutorial, we will secure Web API using Basic Authentication in ASP.NET MVC. There are multiple ways to implement authentication in ASP.NET MVC WEB API. You can handle the authentication using the built-in security of IIS(through Windows Security), where you deploy your WEB API Application, or you can create your own authentication inside your WEB API. This is where basic authentication comes in handy. We can implement this authentication by adding Authorization with a Filter.
Basic authentication sends the user’s credentials in plain text over the wire. It is merely a username and password encoded as a base64. If you were to use basic authentication, you should use your Web API over a Secure Socket Layer (SSL).
Later on in this tutorial, you will see how we can Secure Web API using Basic Authentication on a newly created ASP.NET MVC project. But before we proceed, please make sure to have the latest Visual Studio installed on your machine.
If you already have this on your machine you can proceed with the steps below.
I. Create a new ASP.NET MVC WEB API
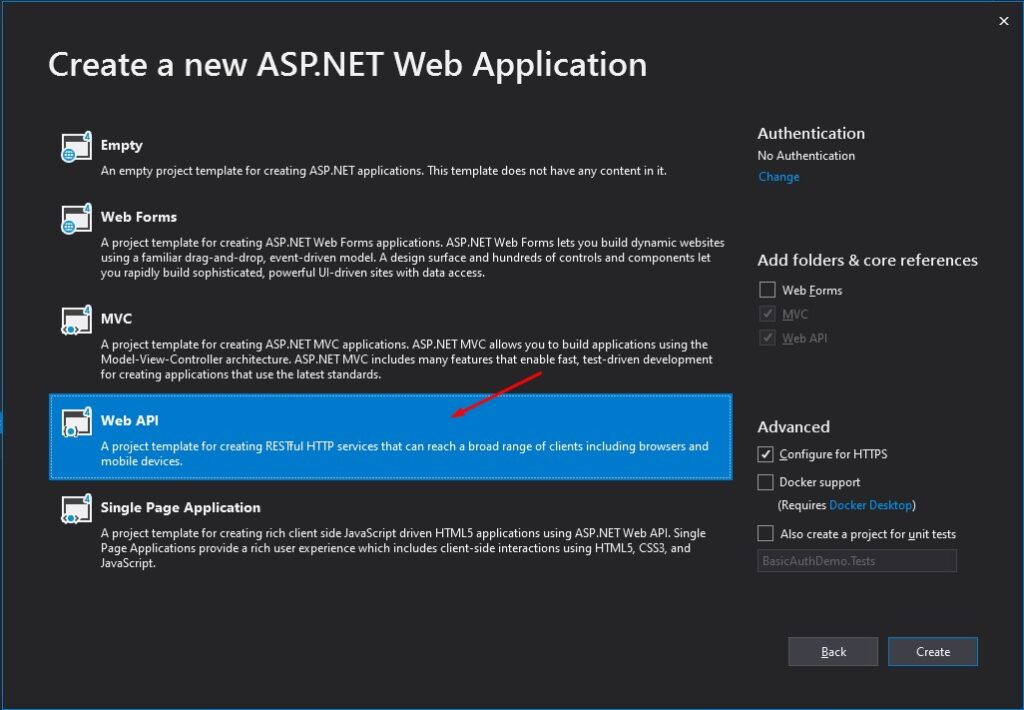
- First, create your ASP.NET WEB Application(.NET Framework). To do that just follow the steps below.
- Select File > New > Project.
- Select ASP.NET Web Application(.NET Framework). Name the project BasicAuthDemo to have the same namespace as my project. Click OK.
- Select Web API.
- Lastly, Click on Create.
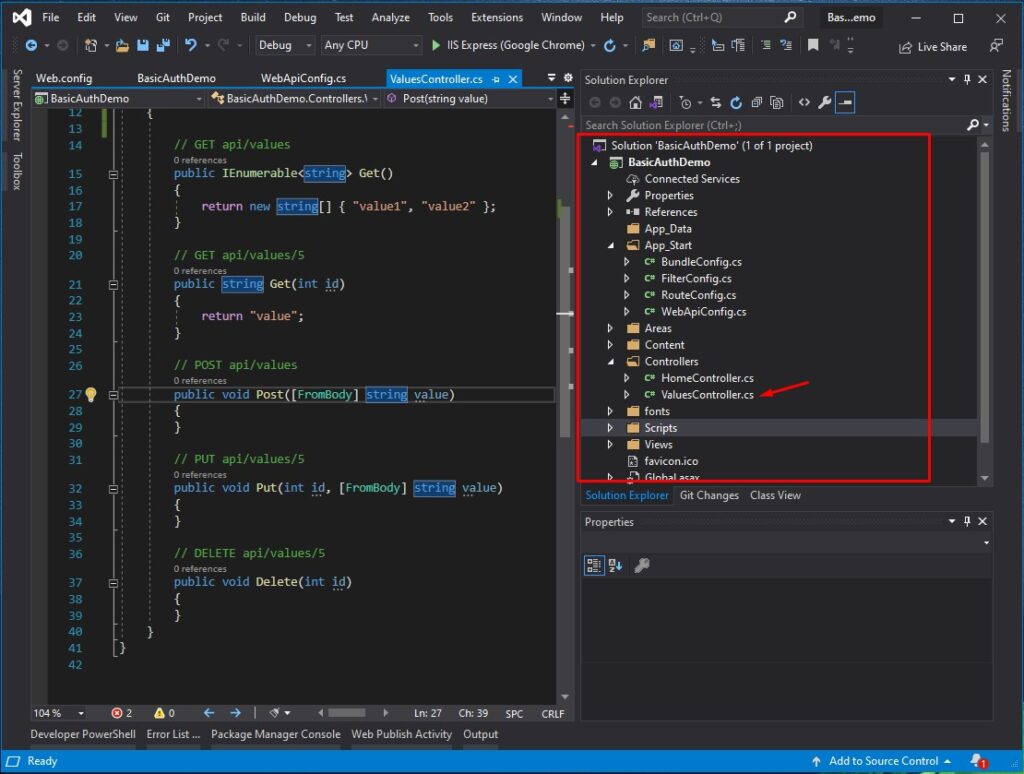
This is the default folder structure of the new ASP.NET MVC Web API Template.
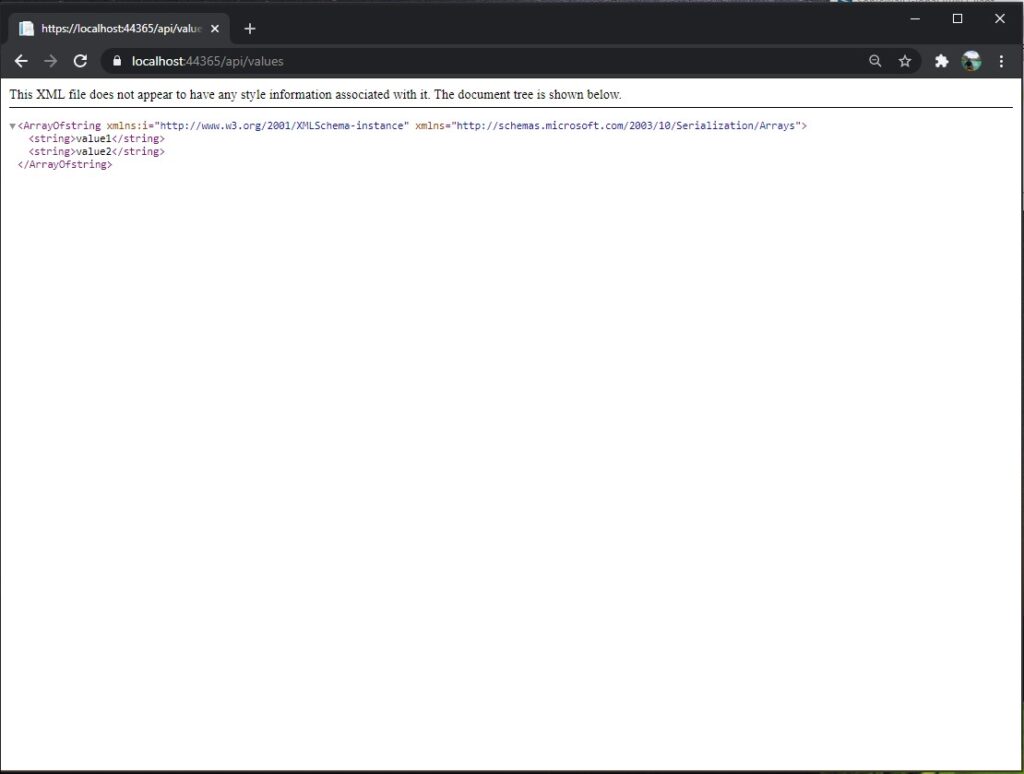
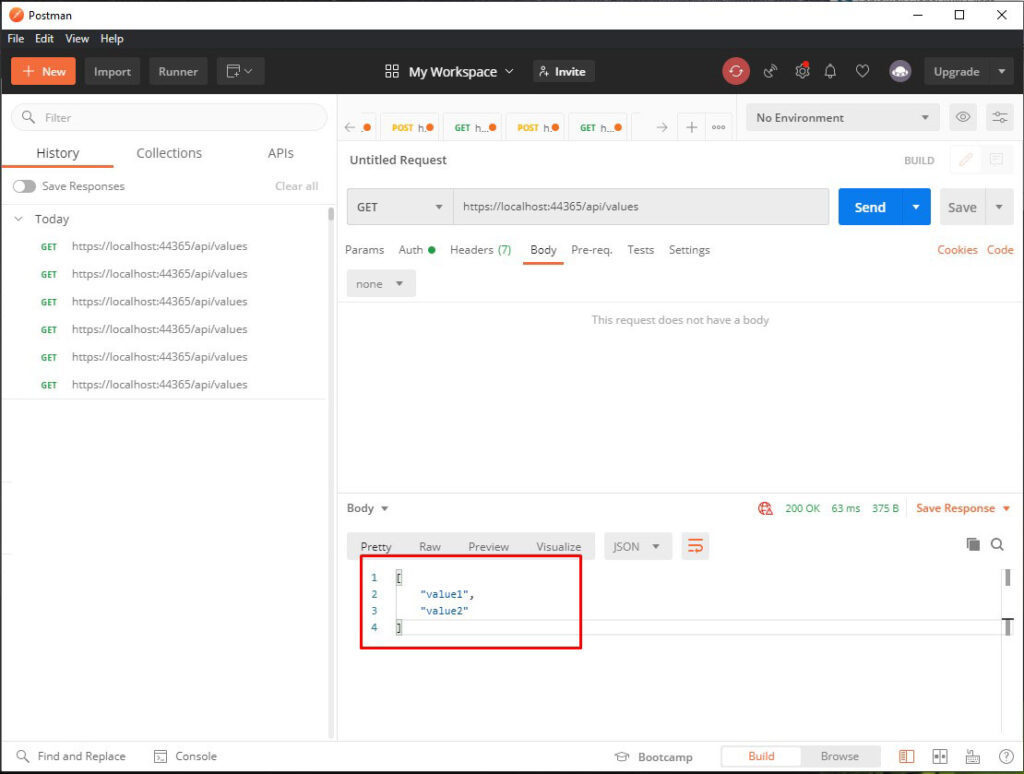
When you run this project you can access the default GET “api/values” to return this values “{ “value1”, “value2” }“. See the image below.
Via Browser
Via Postman
II. Create AuthorizationFilterAttribute
Now, let’s create our basic authentication using the Authorization filter. The implementation of the filter is pretty straightforward and handled in a few steps:
- Parsing credentials from the request header
- If the request header authorization is empty, return 401 unauthorized access
- Validate user credential
- Set the ThreadPrinicipal (or HttpContext.User) if credentials are valid
Below is the format of the credential pass on this authentication.
username:passwordWhich is then encoded into base64 format:
dXNlcm5hbWU6cGFzc3dvcmQ=A request header authorization from a client that will send the username and password will look like the code snippet below.
Authorization: Basic dXNlcm5hbWU6cGFzc3dvcmQ=To start, let’s create a class that extends into an AuthorizationFilterAttribute.
- Create a folder, name it as AuthAttribute. Then create a class file AuthIdentity. This class extends the standard GenericIdentity and adds a Password. This will handle the identity username and password later on the AuthorizationFilterAttribute.
 using System;
 using System.Collections.Generic;
 using System.Linq;
 using System.Security.Principal;
 using System.Web;

 namespace BasicAuthDemo.AuthAttribute
 {
     public class AuthIdentity : GenericIdentity
     {
         public string Password { get; set; }
         public AuthIdentity(string name, string password) : base(name, "Basic")
         {
             this.Password = password;
         }
     }
 }
2. Now, on the same folder AuthAttribute. Create a new class BasicAuthenticationAttribute. This class will extend into an AuthorizationFilterAttribute. This class will contain the following method.
- OnAuthorization » Override Web API filter method to handle Basic Auth check.
- OnAuthorizeUser » Customize Authentication and store user data as needed in a Thread Principle.
- DecodeAuthHeader » Decode authorization header and set credentials using AuthIdentity class.
  using Newtonsoft.Json;
 using System;
 using System.Collections.Generic;
 using System.Linq;
 using System.Net;
 using System.Net.Http;
 using System.Security.Principal;
 using System.Text;
 using System.Threading;
 using System.Web;
 using System.Web.Http.Controllers;
 using System.Web.Http.Filters;

 namespace BasicAuthDemo.AuthAttribute
 {
     public class BasicAuthenticationAttribute : AuthorizationFilterAttribute
     {
         public override void OnAuthorization(HttpActionContext actionContext)
         {

             var identity = DecodeAuthHeader(actionContext);

             if (identity == null)
             {
                 actionContext.Response = actionContext.Request.CreateResponse(HttpStatusCode.Unauthorized, "Unauthorized request");
             }
             else
             {

                 if (OnAuthorizeUser(identity.Name,identity.Password,actionContext))
                 {
                     var principal = new GenericPrincipal(identity, null);
                     Thread.CurrentPrincipal = principal;
                 }
                 else
                 {
                     actionContext.Response = actionContext.Request.CreateResponse(HttpStatusCode.Unauthorized, "Unauthorized request");
                 }
             }
         }

         protected virtual bool OnAuthorizeUser(string username, string password, HttpActionContext actionContext)
         {
             if (username == "freecode" && password == "freecodespot")
                 return true;

             return false;
         }

         protected virtual AuthIdentity DecodeAuthHeader(HttpActionContext actionContext)
         {
             string authHeader = null;
             var auth = actionContext.Request.Headers.Authorization;
             if (auth != null && auth.Scheme == "Basic")
                 authHeader = auth.Parameter;

             if (string.IsNullOrEmpty(authHeader))
                 return null;

             authHeader = Encoding.Default.GetString(Convert.FromBase64String(authHeader));

             var tokens = authHeader.Split(':');
             if (tokens.Length < 2)
                 return null;

             return new AuthIdentity(tokens[0], tokens[1]);
         }
     }
 }
III. AuthorizationFilterAttribute Application
There are three ways to apply this filter attribute you can add it to a controller, method, or add it globally in the WEB API configuration.
1. Adding filter attribute to a controller in our default API ValuesController. This will apply the attribute for all the methods inside this controller.
[BasicAuthentication]
public class ValuesController : ApiController
{
        // GET api/values
         public IEnumerable<string> Get()
         {
             return new string[] { "value1", "value2" };
         }
}
2. Adding attributes to a specific action method. This isolates the attribute to a specific method of your choice.
[BasicAuthentication]
public IEnumerable<string> Get()
{
             return new string[] { "value1", "value2" };
}
3. Adding a filter globally in the Web API configuration. This will apply the attribute to all available controllers in your project.
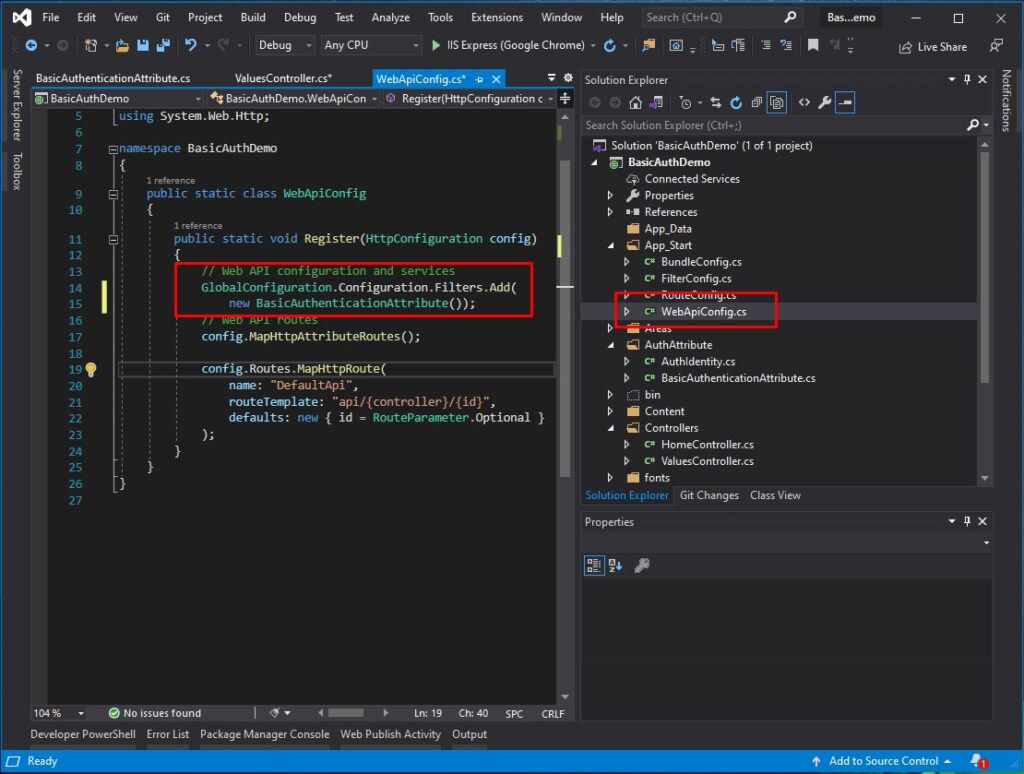
Below is the code snippet:
GlobalConfiguration.Configuration.Filters.Add(new BasicAuthenticationAttribute());IV. Test the WEB API
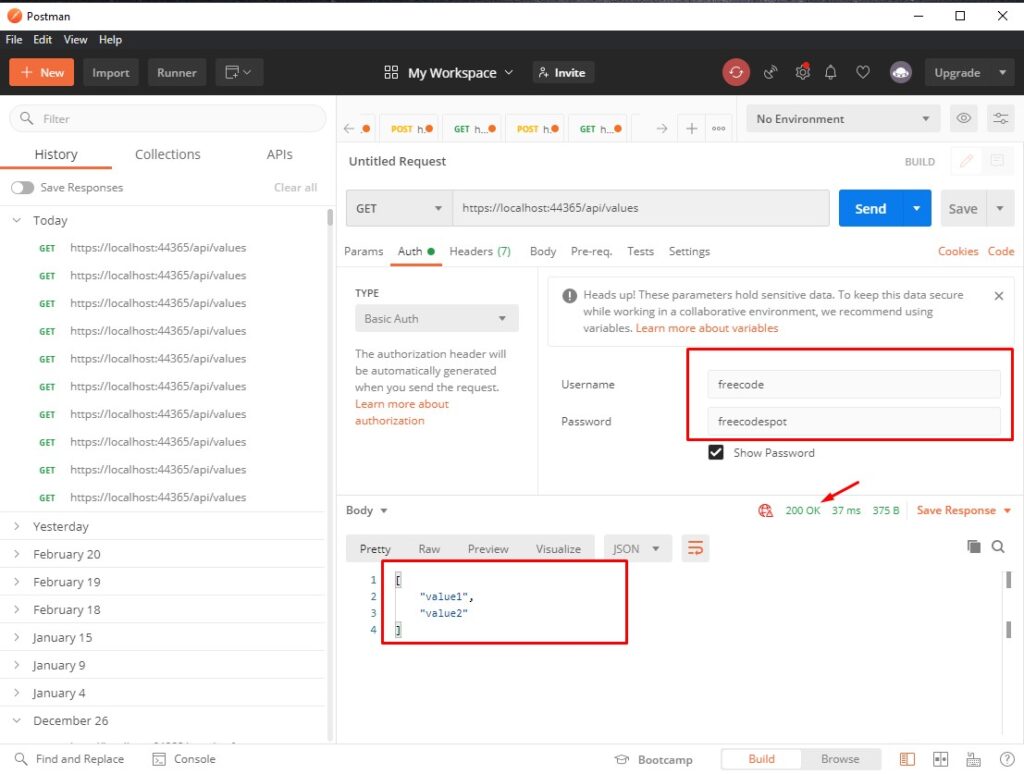
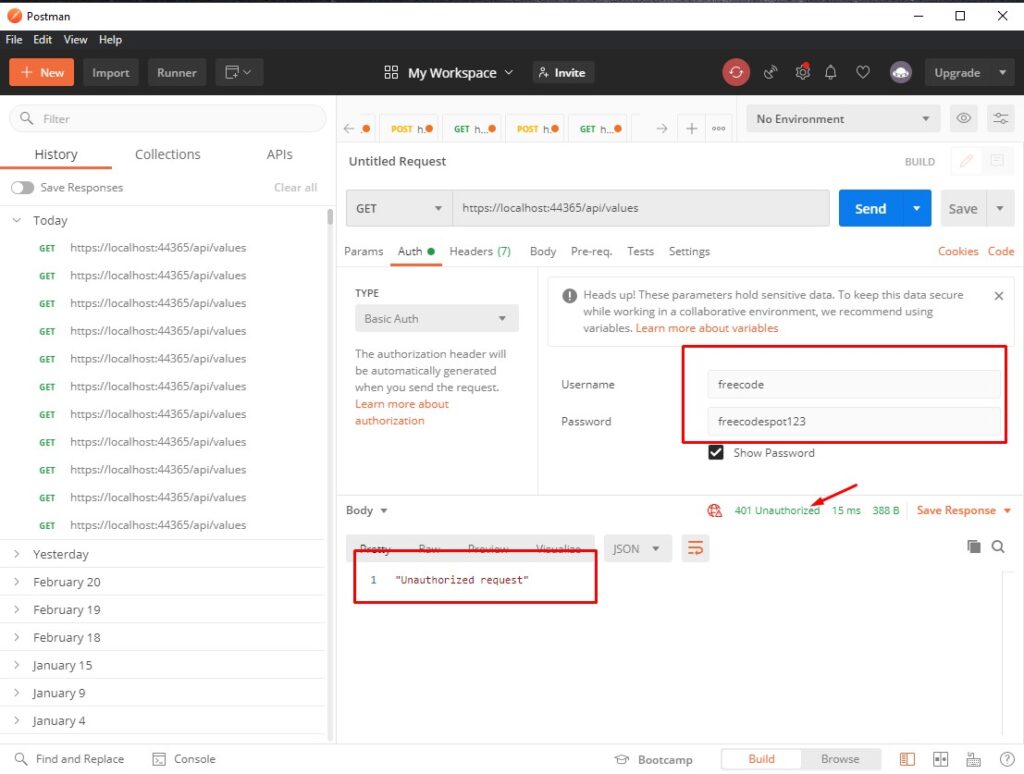
Now, let’s try the API with the Basic Authentication enabled since I hardcoded the username and password for authorization. We will use “freecode” for the username and “freecodespot” for the password.

Run your Web API by pressing F5 on your keyboard. Open the Postman Windows application. Below is the screenshot of my Postman request.
Request with a correct username and password
Request with an incorrect password
V. Consume using HTTPCLient
  public async Task<string> get_value()
         {
             string response = "";
             try
             {
                 using (HttpClient client = new HttpClient())
                 {
                     var byteArray = Encoding.ASCII.GetBytes("freecode:freecodespot");
                     client.DefaultRequestHeaders.Authorization
                          = new AuthenticationHeaderValue("Basic", Convert.ToBase64String(byteArray));

                     client.DefaultRequestHeaders.Authorization = new System.Net.Http.Headers.AuthenticationHeaderValue("Basic", Convert.ToBase64String(byteArray));

                     HttpResponseMessage web_response = await client.GetAsync("https://localhost:44365/api/values");
                     HttpContent content = web_response.Content;
                     response = await content.ReadAsStringAsync();
                 }
             }
             catch (WebException ex)
             {
                 using (var reader = new StreamReader(ex.Response.GetResponseStream()))
                 {
                     response = reader.ReadToEnd().ToString();
                 }
             }

             return response;
         }
You can also download the source code from my GitHub Account @coderbugzz.
Summary
In this tutorial, we created a simple implementation of how you can secure Web API using Basic Authentication in ASP.NET MVC. Using filter attribute, we can handle authorization and create a custom authentication for our WEB API application. Hopefully, this tutorial will help you with your future project.
KEEP CODING!
You may also read this article JWT Authentication for another way to secure your Web API.
