In this tutorial, we’re going to build a secure chat app from scratch using some cool modern technologies. Whether you’re new to this or have some experience, I’ll guide you through every step to make sure you end up with a fully functional chat system you can be proud of.
Here’s what we’re using to make this happen:
- ASP.NET Core Web API with SignalR for real-time messaging.
- SQL Server for storing users and chat messages.
- Flutter as the front-end client for user interaction.
- JWT for secure authentication.
The article will provide step-by-step guidance to help even beginners create a complete working system.
A real-time chat app enables instant messaging between users. We’ll build a secure chat application that:
- Authenticates users using JWT.
- Sends and receives messages in real-time with SignalR.
- Persists messages and users in a SQL Server database.
Ensure you have the following:
- Backend: Visual Studio 2022, .NET 8 SDK, SQL Server.
- Frontend: Flutter SDK installed, basic Dart knowledge.
- A text editor like Visual Studio Code or Android Studio.
Setting Up the ASP.NET Core Web API
Step 1: Create the Project
- Open Visual Studio.
- Create a new ASP.NET Core Web API project.
- Name it
SecureChatApp.
Step 2: Install NuGet Packages
Run the following commands in the Package Manager Console:
dotnet add package Microsoft.EntityFrameworkCore.SqlServer
dotnet add package Microsoft.EntityFrameworkCore.Tools
dotnet add package Microsoft.AspNetCore.SignalR
dotnet add package Microsoft.AspNetCore.Authentication.JwtBearer
dotnet add package BCrypt.Net-Next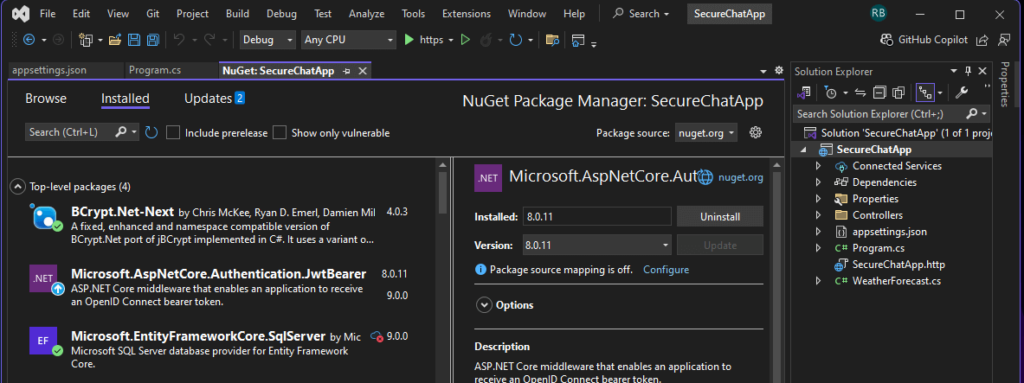
Step 3: Configure SignalR and JWT in Program.cs
First, Add a connection string in appsettings.json to connect to your SQL Server instance.
"ConnectionStrings": {
    "DefaultConnection": "Server=YOUR_SERVER;Database=YOUR_DATABASE;Trusted_Connection=True;"
}
Open Program.cs and update it. You may encounter error on this code, but leave it be as it will be fix later on this tutorial.
using Microsoft.AspNetCore.Authentication.JwtBearer;
using Microsoft.EntityFrameworkCore;
using Microsoft.IdentityModel.Tokens;
using SecureChatApp.Data;
using System.Text;

var builder = WebApplication.CreateBuilder(args);

// Add services to the container.

builder.Services.AddControllers();
// Learn more about configuring Swagger/OpenAPI at https://aka.ms/aspnetcore/swashbuckle
builder.Services.AddEndpointsApiExplorer();
builder.Services.AddSwaggerGen();
builder.Services.AddDbContext<ChatDbContext>(options =>
    options.UseSqlServer(builder.Configuration.GetConnectionString("DefaultConnection")));
builder.Services.AddSignalR();
builder.Services.AddAuthentication(JwtBearerDefaults.AuthenticationScheme)
    .AddJwtBearer(options =>
    {
        options.TokenValidationParameters = new TokenValidationParameters
        {
            ValidateIssuer = true,
            ValidateAudience = true,
            ValidateIssuerSigningKey = true,
            ValidIssuer = "yourissuer",
            ValidAudience = "youraudience",
            IssuerSigningKey = new SymmetricSecurityKey(Encoding.UTF8.GetBytes("v9yR6TpZ8NfXq3aKs2mBx4D7gE5PwQjV"))
        };

        // Allow JWT in SignalR connections
        options.Events = new JwtBearerEvents
        {
            OnMessageReceived = context =>
            {
                var accessToken = context.Request.Query["access_token"];
                var path = context.HttpContext.Request.Path;
                if (!string.IsNullOrEmpty(accessToken) && path.StartsWithSegments("/chatHub"))
                {
                    context.Token = accessToken;
                }
                return Task.CompletedTask;
            }
        };
    });
var app = builder.Build();

// Configure the HTTP request pipeline.
if (app.Environment.IsDevelopment())
{
    app.UseSwagger();
    app.UseSwaggerUI();
}

app.UseHttpsRedirection();

app.UseAuthorization();

app.MapControllers();
app.MapHub<ChatHub>("/chatHub");

app.Run();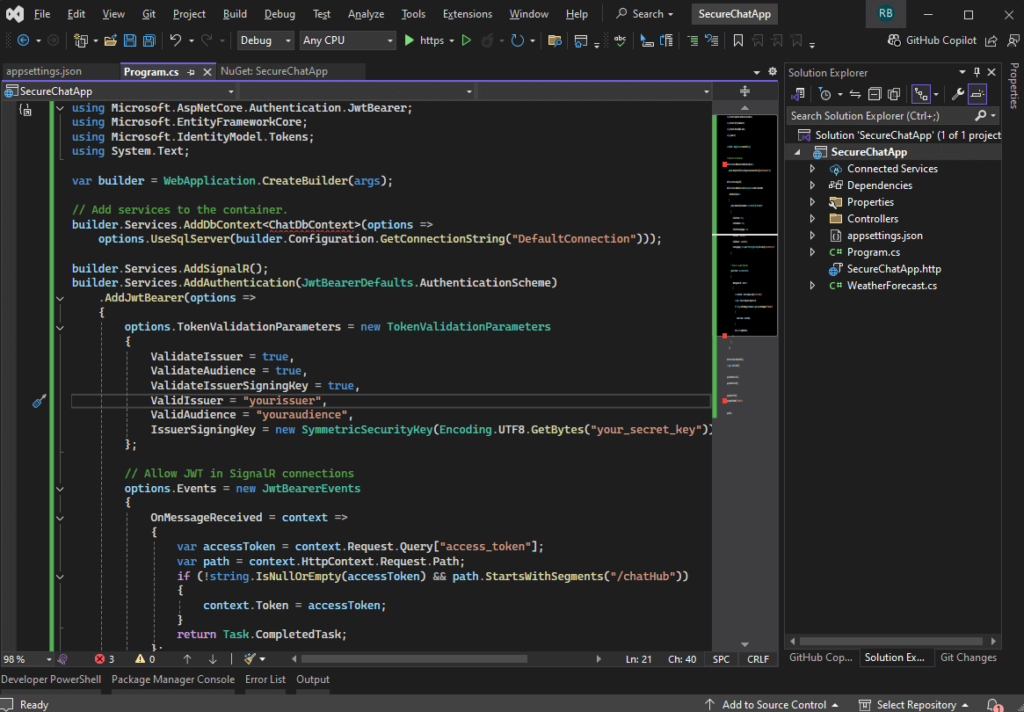
Creating the SQL Server Database
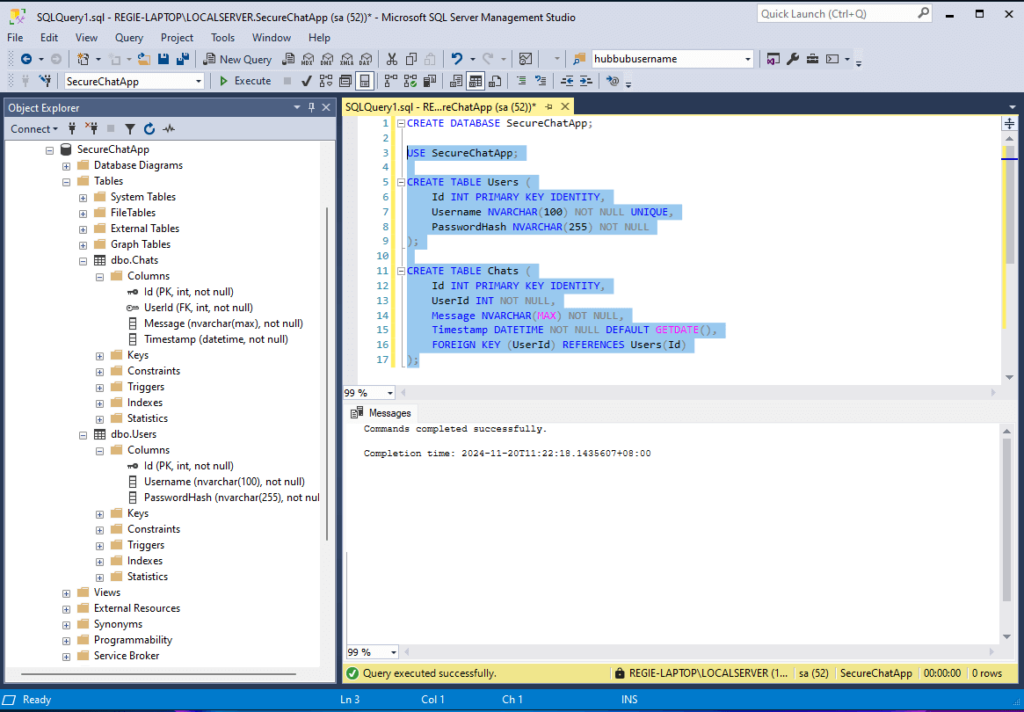
Step 1: Create Database and Tables
Run the following SQL script in SQL Server Management Studio:
CREATE DATABASE SecureChatApp;

USE SecureChatApp;

CREATE TABLE Users (
    Id INT PRIMARY KEY IDENTITY,
    Username NVARCHAR(100) NOT NULL UNIQUE,
    PasswordHash NVARCHAR(255) NOT NULL
);

CREATE TABLE Chats (
    Id INT PRIMARY KEY IDENTITY,
    UserId INT NOT NULL,
    Message NVARCHAR(MAX) NOT NULL,
    Timestamp DATETIME NOT NULL DEFAULT GETDATE(),
    FOREIGN KEY (UserId) REFERENCES Users(Id)
);
Step 2: Configure EF Core
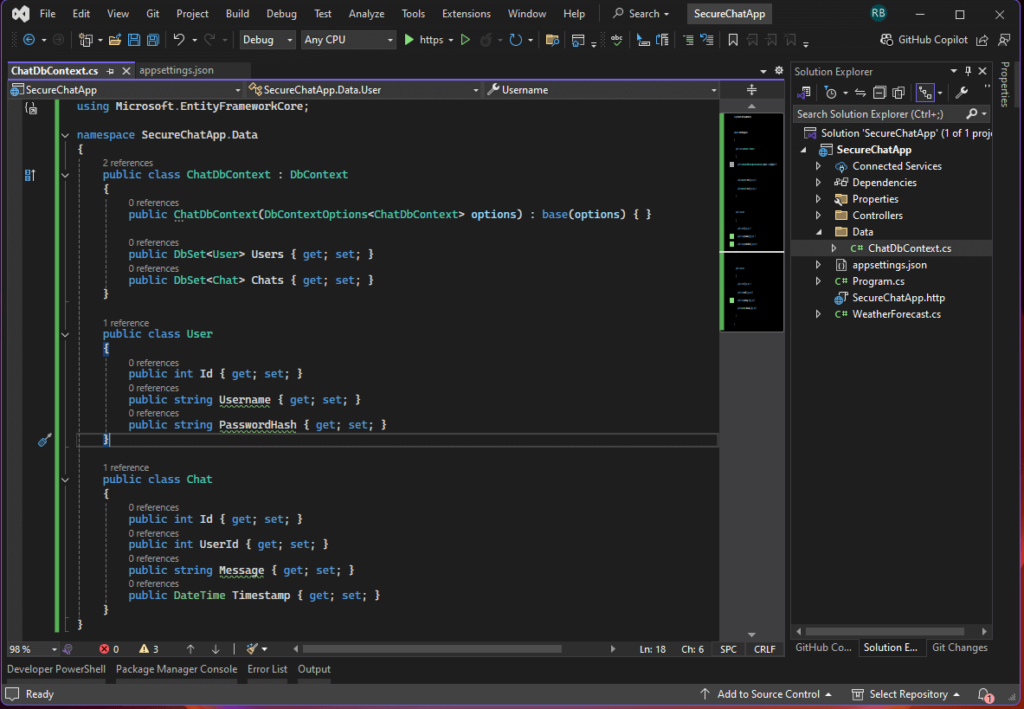
Create a new folder named Data in the project root and add a file ChatDbContext.cs:
using Microsoft.EntityFrameworkCore;

namespace SecureChatApp.Data
{
    public class ChatDbContext : DbContext
    {
        public ChatDbContext(DbContextOptions<ChatDbContext> options) : base(options) { }

        public DbSet<User> Users { get; set; }
        public DbSet<Chat> Chats { get; set; }
    }

    public class User
    {
        public int Id { get; set; }
        public string Username { get; set; }
        public string PasswordHash { get; set; }
    }

    public class Chat
    {
        public int Id { get; set; }
        public int UserId { get; set; }
        public string Message { get; set; }
        public DateTime Timestamp { get; set; }
    }
}
Run EF Core migrations:
This step is optional if you already created the table manually, but if not execute this command to generate the necessary tables needed for this tutorial.
dotnet ef migrations add InitialCreate
dotnet ef database update
Here are the equivalent commands for the Package Manager Console in Visual Studio:
- Add a Migration:
Add-Migration InitialCreate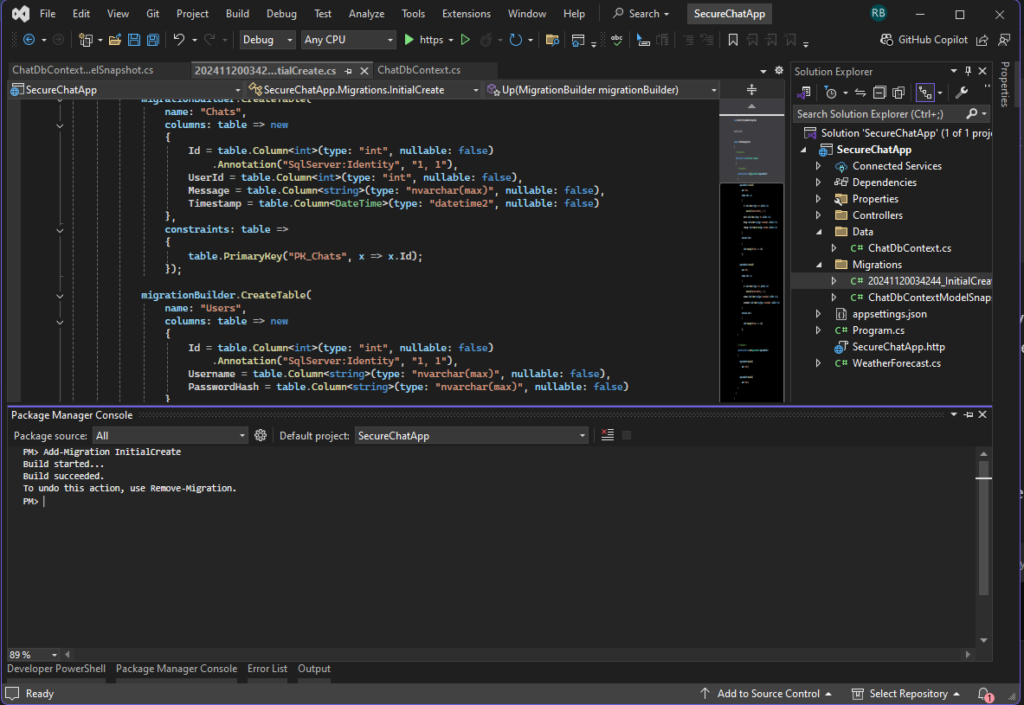
- Update the Database:
Update-DatabaseThese commands achieve the same functionality as the dotnet ef commands but are tailored for use within the Visual Studio environment. Make sure the Default Project in the Package Manager Console is set to the project containing your DbContext.
Building the SignalR Hub
Create a folder named Hubs and add a file ChatHub.cs:
using Microsoft.AspNetCore.SignalR;
using SecureChatApp.Data;

public class ChatHub : Hub
{
    private readonly ChatDbContext _context;

    public ChatHub(ChatDbContext context)
    {
        _context = context;
    }

    public async Task SendMessage(string userId, string message)
    {
        var chat = new Chat { UserId = int.Parse(userId), Message = message };
        _context.Chats.Add(chat);
        await _context.SaveChangesAsync();

        await Clients.All.SendAsync("ReceiveMessage", userId, message);
    }
}
Creating the User Authentication API
Create a folder named Controllers and add UserController.cs:
[Route("api/[controller]")]
[ApiController]
public class UserController : ControllerBase
{
    private readonly ChatDbContext _context;

    public UserController(ChatDbContext context)
    {
        _context = context;
    }

    [HttpPost("register")]
    public async Task<IActionResult> Register([FromBody] User user)
    {
        user.PasswordHash = BCrypt.Net.BCrypt.HashPassword(user.PasswordHash);
        _context.Users.Add(user);
        await _context.SaveChangesAsync();
        return Ok();
    }

    [HttpPost("authenticate")]
    public IActionResult Authenticate([FromBody] LoginRequest login)
    {
        var user = _context.Users.SingleOrDefault(u => u.Username == login.Username);
        if (user == null || !BCrypt.Net.BCrypt.Verify(login.Password, user.PasswordHash))
            return Unauthorized();

        var token = GenerateJwtToken(user.Id);
        return Ok(new { token });
    }

    private string GenerateJwtToken(int userId)
    {
        var tokenHandler = new JwtSecurityTokenHandler();
        var key = Encoding.UTF8.GetBytes("your_secret_key");
        var tokenDescriptor = new SecurityTokenDescriptor
        {
            Subject = new ClaimsIdentity(new[] { new Claim("id", userId.ToString()) }),
            Expires = DateTime.UtcNow.AddDays(1),
            SigningCredentials = new SigningCredentials(new SymmetricSecurityKey(key), SecurityAlgorithms.HmacSha256Signature)
        };
        var token = tokenHandler.CreateToken(tokenDescriptor);
        return tokenHandler.WriteToken(token);
    }
}
Create a folder named Models and add LoginRequest.cs:
  public class LoginRequest
  {
      public string Username { get; set; }
      public string Password { get; set; }
  }
Understanding and Testing the Endpoints
The UserController contains two endpoints: /register and /authenticate. These endpoints are part of a user authentication flow and allow users to register and authenticate with the application. Below is a detailed explanation of each endpoint and how to test them using Postman.
1. Register Endpoint
Route:POST api/user/register
Purpose:
This endpoint is used to register a new user. It takes a User object in the request body, hashes the user’s password using BCrypt, and stores the user information in the database.
Request Format:
- URL:
http://<your_base_url>/api/user/register - Method:
POST - Request Body:
  {
    "username": "testuser",
    "passwordHash": "password123",
    "email": "testuser@example.com"
  }
Adjust the fields based on the
Usermodel structure.
Response:
- 200 OK: When the user is successfully registered.
- Error Response: This code doesn’t handle specific error responses, but database-related errors or missing fields would result in a 500 Internal Server Error.
Postman Testing Steps:
- Open Postman and create a new request.
- Select
POSTas the HTTP method. - Enter the endpoint URL:
http://<your_base_url>/api/user/register. - Go to the
Bodytab, selectraw, and chooseJSONas the format. - Enter the JSON payload for the user object.
- Click Send and observe the response.
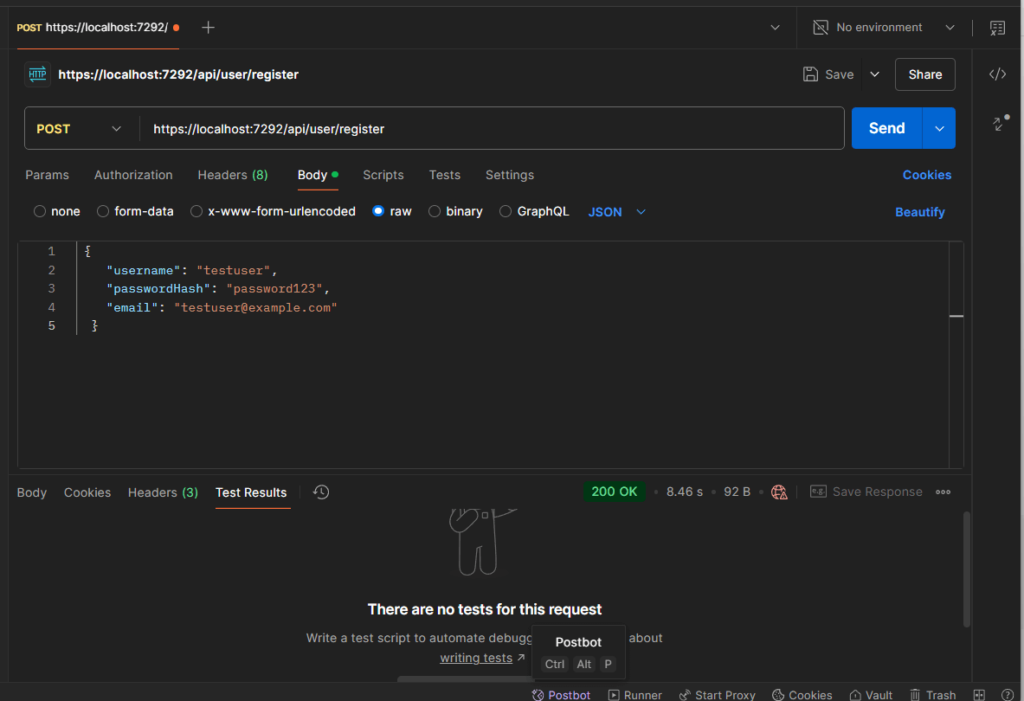
Open Users table to verify the new user inserted.
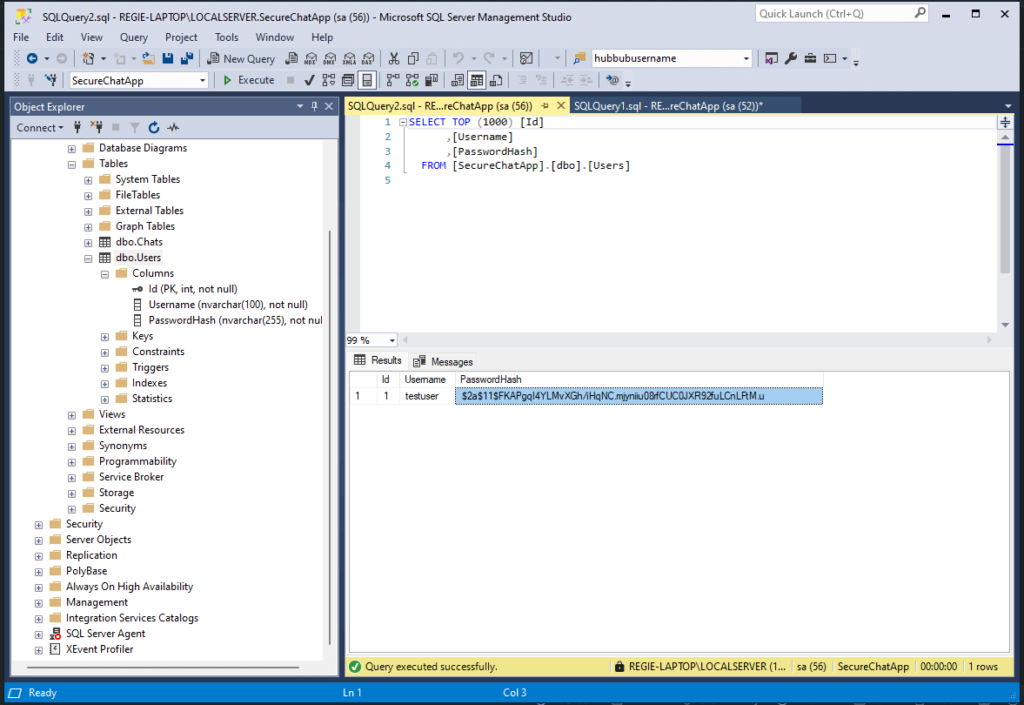
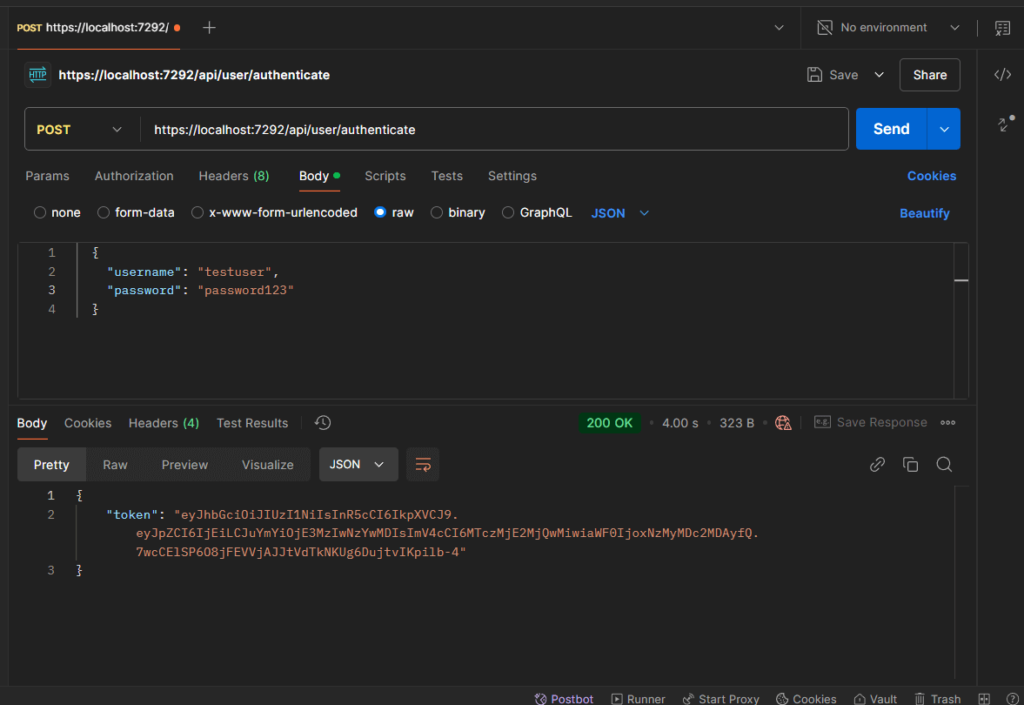
2. Authenticate Endpoint
Route:POST api/user/authenticate
Purpose:
This endpoint authenticates a user by verifying the username and password. If valid, it generates and returns a JSON Web Token (JWT) for secure subsequent requests.
Request Format:
- URL:
http://<your_base_url>/api/user/authenticate - Method:
POST - Request Body:
  {
    "username": "testuser",
    "password": "password123"
  }
Response:
- 200 OK: Returns a token when authentication is successful.
  {
    "token": "<JWT_token_here>"
}- 401 Unauthorized: If the username or password is invalid.
Postman Testing Steps:
- Open Postman and create a new request.
- Select
POSTas the HTTP method. - Enter the endpoint URL:
http://<your_base_url>/api/user/authenticate. - Go to the
Bodytab, selectraw, and chooseJSONas the format. - Enter the JSON payload for the login object.
- Click Send and observe the response:
- If successful, copy the token from the response for use in testing protected routes.
- If unsuccessful, verify the credentials and try again.
JWT Token for Secured Endpoints
The Authenticate endpoint generates a JWT, which can be used to access secure endpoints in the application. To include the token in subsequent requests:
- Copy the token returned by the
Authenticateendpoint. - In Postman, go to the
Headerstab of your new request. - Add the following key-value pair:
- Key:
Authorization - Value:
Bearer <your_token_here>
This token-based authentication ensures secure communication between the client and server.
Security Notes
- Replace
"your_secret_key"in theGenerateJwtTokenmethod with a secure, randomly generated key stored securely (e.g., in environment variables). - Validate the user input (e.g., ensure usernames and passwords meet complexity requirements).
- Add exception handling for robust error management in production.
With these steps, you can test the endpoints effectively and understand their roles in the authentication process.
Download Source Code
To download the free source code from this tutorial, click the button below.
Important Notes:
- Ensure you have 7-Zip installed to extract the file. You can download 7-Zip here if you don’t already have it.
- Use the password freecodespot when prompted during extraction.
This source code is designed to work seamlessly with the steps outlined in this tutorial. If you encounter any issues or have questions, feel free to reach out in the comments section below.
What’s Next?
Congratulations on completing the backend setup! At this point, you have a fully functional backend with secure user registration, authentication using JWT, and real-time messaging powered by SignalR. You’ve also set up a database with SQL Server to store user credentials and chat messages.
What’s Next?
In the next part of this series, we’ll focus on building the Flutter front-end. Here’s what we’ll cover:
- Creating the Flutter project.
- Setting up user registration and login screens.
- Storing JWT tokens securely on the client side.
- Connecting the app to the SignalR server for real-time messaging.
- Building a clean, functional chat UI.
Stay tuned for Part 2: Setting Up Flutter and Building the Chat Front-End, where we’ll tie everything together and bring the chat application to life!
