Authentication is a critical aspect of securing APIs. While ASP.NET Core offers robust identity frameworks like ASP.NET Core Identity or third-party options such as IdentityServer, there are scenarios where a lightweight, custom solution is more practical. In this article, we will implement a custom authentication middleware to enable token-based authentication for your APIs.
This middleware will:
- Parse tokens from headers or query parameters.
- Validate tokens and attach claims to
HttpContext.User. - Reject requests with invalid or missing tokens.
By the end of this guide, you’ll have a working example of lightweight authentication that you can integrate into your API projects.
Advantages of Custom Authentication Middleware
- Lightweight: Ideal for applications with simple authentication requirements.
- Customizable: Tailor the authentication logic to your specific needs.
- No External Dependencies: Avoid the overhead of integrating full-fledged frameworks.
Before starting, ensure you have the following:
- ASP.NET Core SDK: Version 8.0 or higher.
- Development Environment: Visual Studio 2022.
Setting Up the Project
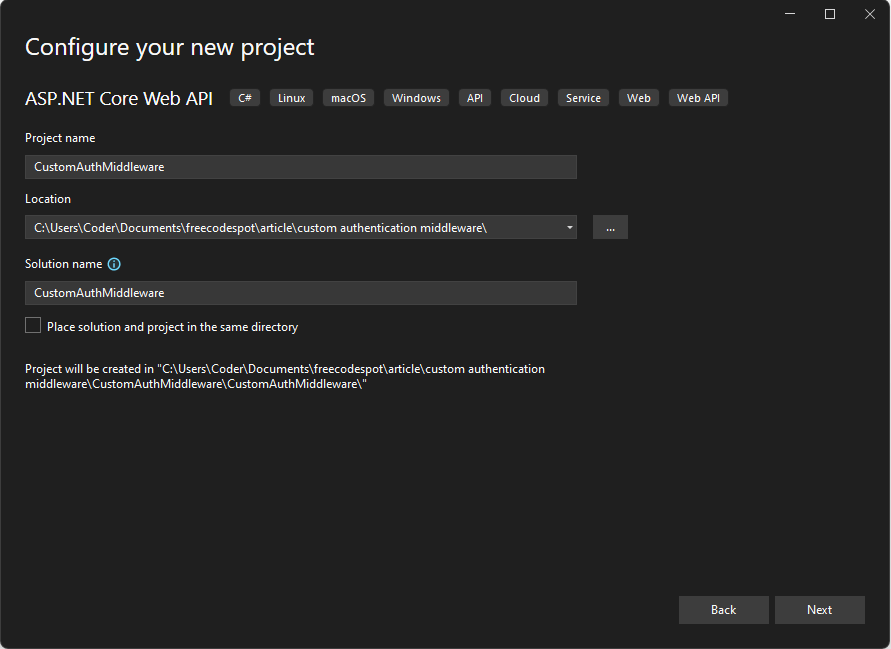
- Create a New ASP.NET Core Web API Project: Open Visual Studio 2022 and create a new project:
- Select ASP.NET Core Web API template.
- Name the project
CustomAuthMiddleware. - Choose .NET 8 as the target framework.
- Install Required Packages: Open the Package Manager Console and run:
Install-Package System.IdentityModel.Tokens.Jwt -Version 8.3.0
In this demo, we’ll be implementing JWT authentication, so we need to install the package mention above.
Generate JWT Token
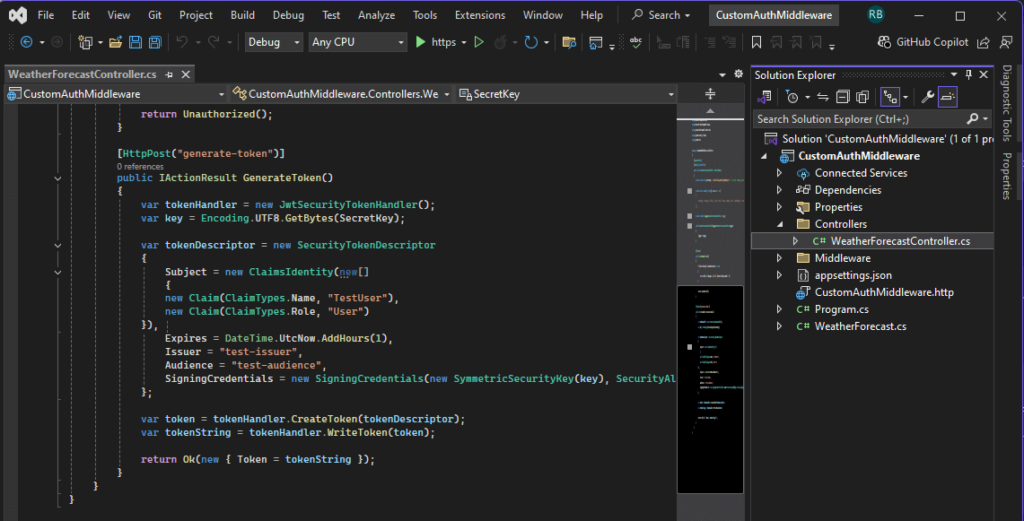
Now, let’s create a method to generate tokens for testing. When we create a new project, Visual Studio automatically scaffolds a default controller named WeatherForecastController. Open this controller and add the following method.
 [HttpPost("generate-token")]
 public IActionResult GenerateToken()
 {
     var tokenHandler = new JwtSecurityTokenHandler();
     var key = Encoding.UTF8.GetBytes(SecretKey);

     var tokenDescriptor = new SecurityTokenDescriptor
     {
         Subject = new ClaimsIdentity(new[]
         {
         new Claim(ClaimTypes.Name, "TestUser"),
         new Claim(ClaimTypes.Role, "User")
     }),
         Expires = DateTime.UtcNow.AddHours(1),
         Issuer = "test-issuer",
         Audience = "test-audience",
         SigningCredentials = new SigningCredentials(new SymmetricSecurityKey(key), SecurityAlgorithms.HmacSha256Signature)
     };

     var token = tokenHandler.CreateToken(tokenDescriptor);
     var tokenString = tokenHandler.WriteToken(token);

     return Ok(new { Token = tokenString });
 }
Creating the Middleware
1. Define the Middleware Class
Create a new folder named Middleware and add a new class called CustomAuthenticationMiddleware:
using Microsoft.IdentityModel.Tokens;
using System.IdentityModel.Tokens.Jwt;
using System.Security.Claims;

namespace CustomAuthMiddleware.Middleware
{
    public class CustomAuthenticationMiddleware
    {
        private readonly RequestDelegate _next;
        private readonly ILogger<CustomAuthenticationMiddleware> _logger;
        private readonly TokenValidationParameters _tokenValidationParameters;

        public CustomAuthenticationMiddleware(RequestDelegate next, ILogger<CustomAuthenticationMiddleware> logger, TokenValidationParameters tokenValidationParameters)
        {
            _next = next;
            _logger = logger;
            _tokenValidationParameters = tokenValidationParameters;
        }

        public async Task InvokeAsync(HttpContext context)
        {
            var path = context.Request.Path.Value;
            if (path != null && path.Equals("/WeatherForecast/generate-token", StringComparison.OrdinalIgnoreCase))
            {
                await _next(context);
                return;
            }
            var token = GetToken(context);

            if (string.IsNullOrEmpty(token))
            {
                _logger.LogWarning("No token provided in the request.");
                context.Response.StatusCode = StatusCodes.Status401Unauthorized;
                await context.Response.WriteAsync("Unauthorized: Token is missing.");
                return;
            }

            if (!ValidateToken(token, out ClaimsPrincipal? user))
            {
                _logger.LogWarning("Invalid token provided.");
                context.Response.StatusCode = StatusCodes.Status401Unauthorized;
                await context.Response.WriteAsync("Unauthorized: Token is invalid.");
                return;
            }

            // Attach the authenticated user to the context
            context.User = user;

            await _next(context);
        }

        private string? GetToken(HttpContext context)
        {
            // Check for token in Authorization header
            if (context.Request.Headers.TryGetValue("Authorization", out var authHeader) && authHeader.ToString().StartsWith("Bearer ", StringComparison.OrdinalIgnoreCase))
            {
                return authHeader.ToString()[7..];
            }

            // Check for token in query parameters (optional)
            return context.Request.Query["access_token"].FirstOrDefault();
        }

        private bool ValidateToken(string token, out ClaimsPrincipal? user)
        {
            user = null;

            try
            {
                var tokenHandler = new JwtSecurityTokenHandler();
                var principal = tokenHandler.ValidateToken(token, _tokenValidationParameters, out SecurityToken validatedToken);

                // Ensure the token is a JWT
                if (validatedToken is not JwtSecurityToken jwtToken ||
                    !jwtToken.Header.Alg.Equals(SecurityAlgorithms.HmacSha256, StringComparison.OrdinalIgnoreCase))
                {
                    _logger.LogWarning("Token validation failed due to invalid algorithm.");
                    return false;
                }

                user = principal;
                return true;
            }
            catch (Exception ex)
            {
                _logger.LogError(ex, "Token validation failed.");
                return false;
            }
        }
    }
}
If you observe in the method InvokeAsnc, we added this condition.
if (path != null && path.Equals("/WeatherForecast/generate-token", StringComparison.OrdinalIgnoreCase))
            {
                await _next(context);
                return;
            }
This will bypass the authentication for the generate-token method. This way we can generate token during our testing.
2. Register the Middleware
To register the middleware, open Program.cs and add it to the application’s request pipeline. This step ensures that every incoming request passes through the middleware for authentication.
Here is the updated Program.cs file:
var builder = WebApplication.CreateBuilder(args);
var app = builder.Build();

// Add custom authentication middleware
app.UseMiddleware<CustomAuthenticationMiddleware>();

app.MapControllers();
app.Run();
We also need to register a service for Token Validation Parameter for our custom middleware.
builder.Services.AddSingleton(new TokenValidationParameters
{
    ValidateIssuer = true,
    ValidateAudience = true,
    ValidateLifetime = true,
    ValidateIssuerSigningKey = true,
    ValidIssuer = "test-issuer",
    ValidAudience = "test-audience",
    IssuerSigningKey = new SymmetricSecurityKey(Encoding.UTF8.GetBytes("ZxU65F4l8E82yJHq3Rd!Fg9@TmV0LpNc")),
    ClockSkew = TimeSpan.Zero // Optional: Reduce allowable clock skew
});
Be sure to replace the secret key (ZxU65F4l8E82yJHq3Rd!Fg9@TmV0LpNc) used in this example with your own.
This is the final modified program.cs.
using CustomAuthMiddleware.Middleware;
using Microsoft.IdentityModel.Tokens;
using System.Text;

var builder = WebApplication.CreateBuilder(args);

// Add services to the container.

builder.Services.AddControllers();
// Learn more about configuring Swagger/OpenAPI at https://aka.ms/aspnetcore/swashbuckle
builder.Services.AddEndpointsApiExplorer();
builder.Services.AddSwaggerGen();
builder.Services.AddSingleton(new TokenValidationParameters
{
    ValidateIssuer = true,
    ValidateAudience = true,
    ValidateLifetime = true,
    ValidateIssuerSigningKey = true,
    ValidIssuer = "test-issuer",
    ValidAudience = "test-audience",
    IssuerSigningKey = new SymmetricSecurityKey(Encoding.UTF8.GetBytes("ZxU65F4l8E82yJHq3Rd!Fg9@TmV0LpNc")),
    ClockSkew = TimeSpan.Zero // Optional: Reduce allowable clock skew
});


var app = builder.Build();

// Configure the HTTP request pipeline.
if (app.Environment.IsDevelopment())
{
    app.UseSwagger();
    app.UseSwaggerUI();
}

app.UseHttpsRedirection();

app.UseAuthorization();

// Add custom authentication middleware
app.UseMiddleware<CustomAuthenticationMiddleware>();

app.MapControllers();

app.Run();
Behavior of Requests After Middleware Registration:
- Incoming Requests: Each request is intercepted by the
CustomAuthenticationMiddleware. - Token Validation: The middleware attempts to parse and validate the token from the request’s headers or query parameters.
- Unauthorized Access: If the token is missing or invalid, the middleware terminates the pipeline by returning a
401 Unauthorizedresponse. - Authorized Access: For valid tokens, the middleware attaches the user’s claims to
HttpContext.Userand passes control to the next middleware or endpoint.
This setup ensures that all protected endpoints automatically reject unauthorized requests and allow access only to authenticated users with valid tokens.
Testing the Implementation
1. Modify the API Endpoint
In this step, we will update the WeatherForecastController to ensure it requires authentication. The changes include adding logic to check if the User.Identity is authenticated and returning different responses based on the authentication status. This makes sure that only valid users can access the endpoint and receive a personalized response.
Here is the modified controller code:
[ApiController]
[Route("[controller]")]
public class WeatherForecastController : ControllerBase
{
    [HttpGet]
    public IActionResult Get()
    {
        if (User.Identity?.IsAuthenticated == true)
        {
            return Ok(new { Message = $"Hello, {User.Identity.Name}!" });
        }

        return Unauthorized();
    }
}
What Changed:
- The
Getaction method now checksUser.Identity?.IsAuthenticatedto determine if the request is authenticated. - If authenticated, it returns a personalized message using the authenticated user’s name.
- If not authenticated, it responds with a
401 Unauthorizedstatus.
This modification ensures the endpoint behaves appropriately based on the user’s authentication state.
2. Generate a Test Token
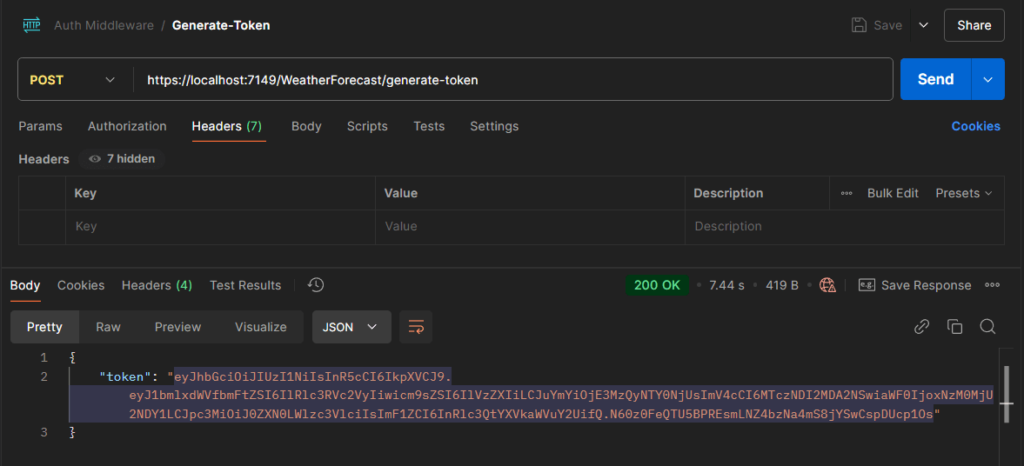
To test the API with a valid token, you need to generate a valid token. Start the application and use Postman or curl to generate the token:
curl --location --request POST 'https://localhost:7149/WeatherForecast/generate-token'You should receive a response like this:
{
    "token": "eyJhbGciOiJIUzI1NiIsInR5cCI6IkpXVCJ9.eyJ1bmlxdWVfbmFtZSI6IlRlc3RVc2VyIiwicm9sZSI6IlVzZXIiLCJuYmYiOjE3MzQyNTY0NjUsImV4cCI6MTczNDI2MDA2NSwiaWF0IjoxNzM0MjU2NDY1LCJpc3MiOiJ0ZXN0LWlzc3VlciIsImF1ZCI6InRlc3QtYXVkaWVuY2UifQ.N60z0FeQTU5BPREsmLNZ4bzNa4mS8jYSwCspDUcp1Os"
}
3. Run and Test
- Start the application using Visual Studio 2022.
- Test with a valid token using tools like Postman or curl:
curl -H "Authorization: Bearer valid-token" https://localhost:5001/weatherforecast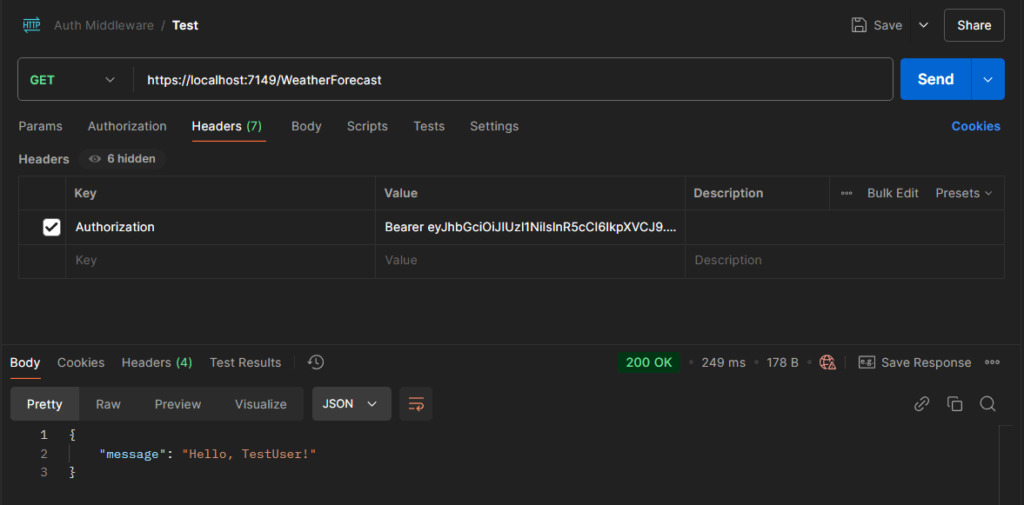
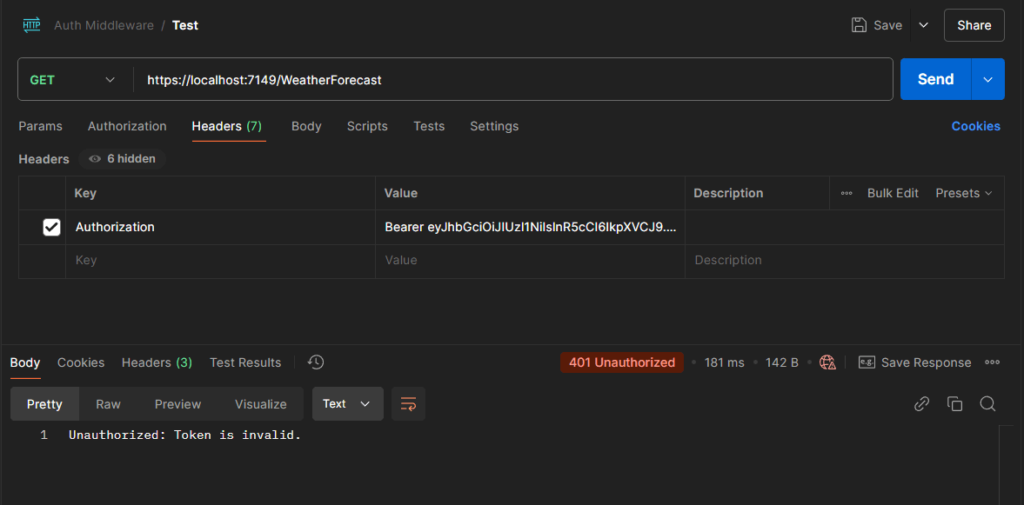
- Test with an invalid or missing token:
curl https://localhost:7149/weatherforecastYou should receive a 401 Unauthorized response.
If you want to use Swagger to test your endpoint instead of postman, you can follow this tutorial How to Use JWT Bearer Authorization in Swagger OpenAPI
Download Source Code
To download the free source code from this tutorial, click the button below.
Important Notes:
- Ensure you have 7-Zip installed to extract the file. You can download 7-Zip here if you don’t already have it.
- Use the password freecodespot when prompted during extraction.
This source code is designed to work seamlessly with the steps outlined in this tutorial. If you encounter any issues or have questions, feel free to reach out in the comments section below.
Summary
In this article, we demonstrated how to create a custom authentication middleware in ASP.NET Core using Visual Studio 2022 and .NET 8. This lightweight solution allows you to protect APIs without relying on complex identity frameworks. By customizing the token parsing and validation logic, you can adapt this middleware to fit the specific needs of your application.
You may also check this article on How to Implement JWT Authentication In ASP.NET Core Web API.
