It is a common need in many C# applications to import Excel data into a DataGridView control. Regardless of whether you’re creating a reporting system data analysis tool or just displaying Excel data in your application this post will provide guidance on how to import Excel files and populate a DataGridView with C# code.
- Setting up the Project
- Add Microsoft.Office.Interop.Excel
- Importing Excel Data
- Testing the Application
- Download Source Code
- Summary
- ASP.NET Core MVC Login and Registration using Identity
- Implement IP Whitelisting or Blacklisting Middleware in .NET Core
- How to Implementing Rate-Limiting Middleware in .NET Core 8
Before we begin, make sure you have the following prerequisites in place:
- Basic understanding of C# programming language.
- Visual Studio (any version) installed on your machine.
- Microsoft Office Excel installed (for testing purposes).
Setting up the Project
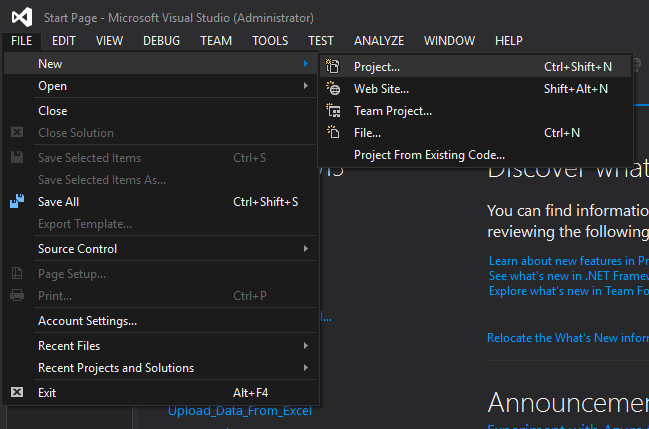
1. Launch Visual Studio and create a new Windows Forms Application project. To do that, navigate to File » New » Project.
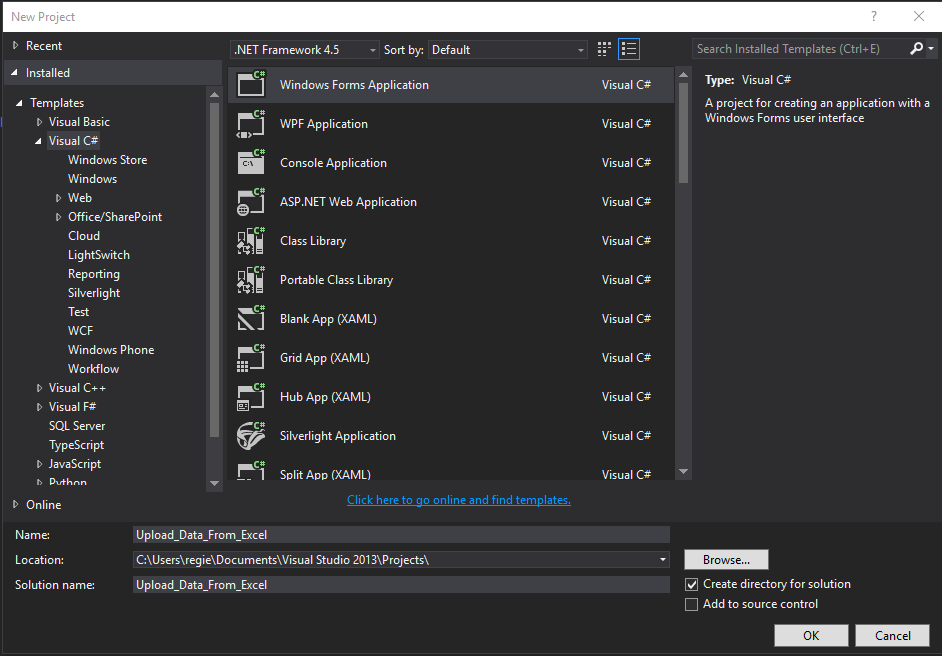
2. Search for Windows Forms Application, then assign name for your project and select a location where you want to save your project.
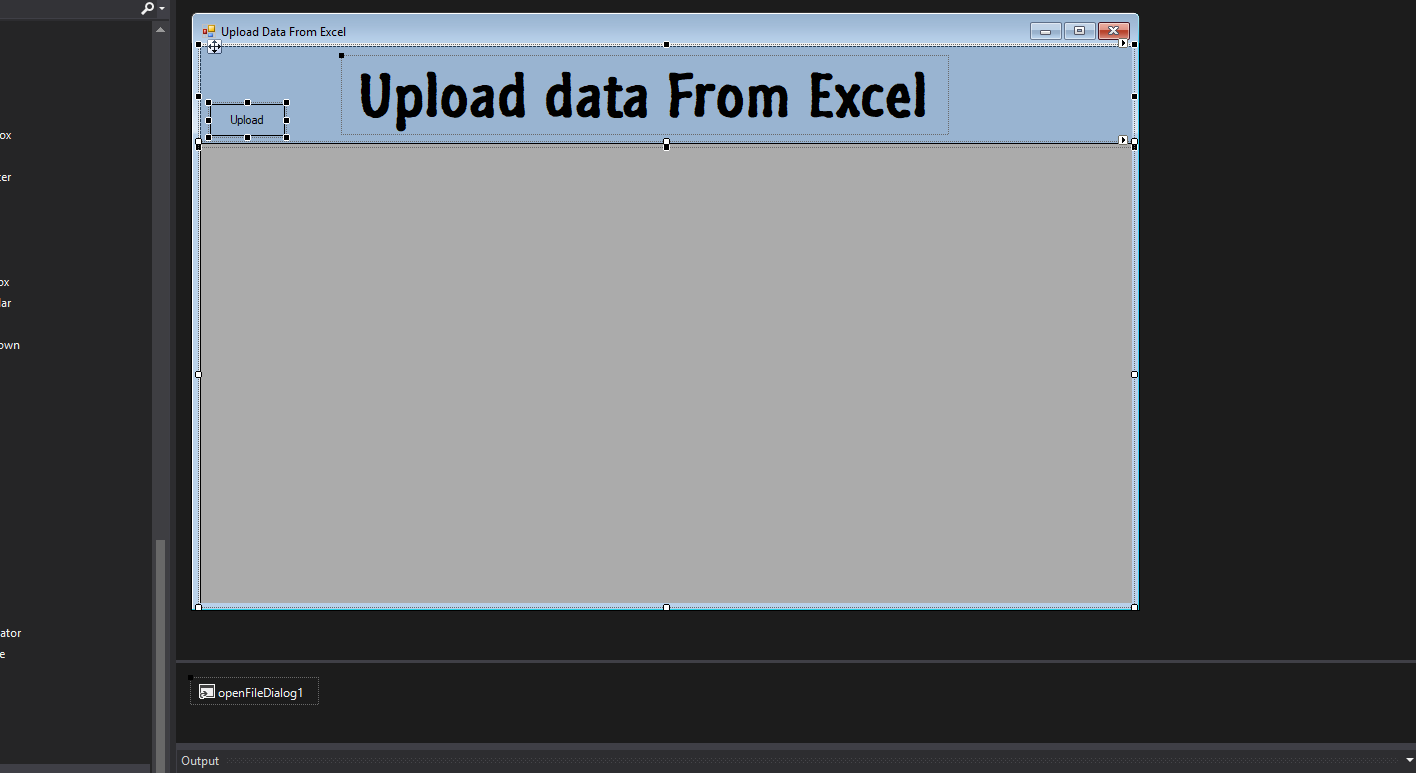
3. Drag and drop a DataGridView control from the Toolbox onto your form. Resize it as needed.
4. Add a button control to the form. This button will trigger the import process.
5. Now, add OpenFileDialog from the Toolbox. This will handle the browsing of excel file.
Add Microsoft.Office.Interop.Excel
In this tutorial, we are going to use a library to process the data from the excel file. Follow the step below.
1. Right-click on your project in the Solution Explorer and select “Manage NuGet Packages.”
2. In the NuGet Package Manager, search for “Microsoft.Office.Interop.Excel” and install it.
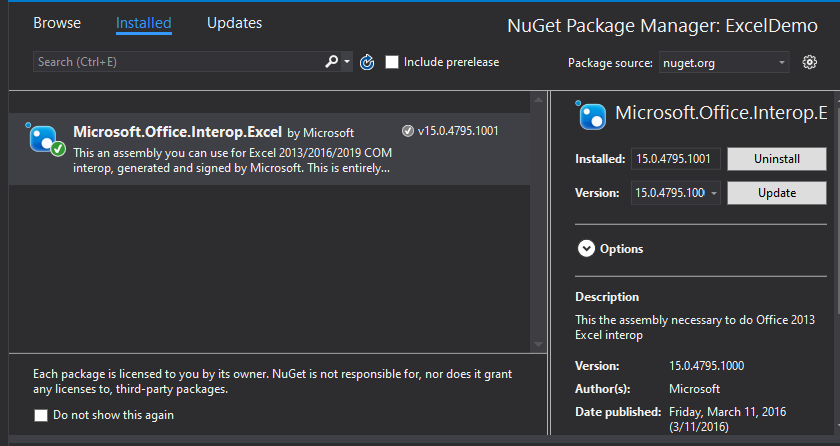
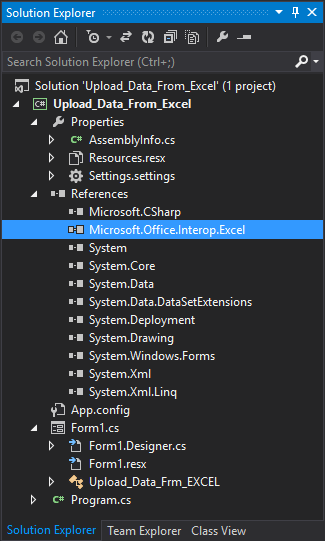
3. To make sure the reference is added, navigate to References on your solution explorer then expand and look for Microsoft.Office.Interop.Excel. See the image below.
Importing Excel Data
1. Create A Helper folder and create a static class ExcelFileReader. We will use this class to create a function that will read the excel file using Mictosoft.Office.Interop.excel. Open the class file then add the following using statement at the top of your code file.
using Microsoft.Office.Interop.Excel;2. Inside ExcelFileReader static class create a method read and the following code.
public static System.Data.DataTable read(Range excelRange)
        {
            DataRow row;
            System.Data.DataTable dt = new System.Data.DataTable();
            int rowCount = excelRange.Rows.Count; //get row count of excel data
            int colCount = excelRange.Columns.Count; // get column count of excel data
            //Get the first Column of excel file which is the Column Name
            for (int i = 1; i <= rowCount; i++)
            {
                for (int j = 1; j <= colCount; j++)
                {
                    dt.Columns.Add(excelRange.Cells[i, j].Value2.ToString());
                }
                break;
            }
            //Get Row Data of Excel
            int rowCounter; //This variable is used for row index number
            for (int i = 2; i <= rowCount; i++) //Loop for available row of excel data
            {
                row = dt.NewRow(); //assign new row to DataTable
                rowCounter = 0;
                for (int j = 1; j <= colCount; j++) //Loop for available column of excel data
                {
                    //check if cell is empty
                    if (excelRange.Cells[i, j] != null && excelRange.Cells[i, j].Value2 != null)
                    {
                        row[rowCounter] = excelRange.Cells[i, j].Value2.ToString();
                    }
                    else
                    {
                        row[i] = "";
                    }
                    rowCounter++;
                }
                dt.Rows.Add(row); //add row to DataTable
            }
            return dt;
        }
The code above will read the data from the excel file we uploaded and return the data using Datatable.
3. Moving back to the Form1 class. In the button click event handler code, Add the following code to open a file dialog and select an Excel file.
   private void btn_Upload_Click(object sender, EventArgs e)
        {
            string file = ""; //variable for the Excel File Location
            DialogResult result = openFileDialog1.ShowDialog(); // Show the dialog.
            if (result == DialogResult.OK) // Check if Result == "OK".
            {
                file = openFileDialog1.FileName; //get the filename with the location of the file
                try
                {
                    //Create Object for Microsoft.Office.Interop.Excel that will be use to read excel file
                    Microsoft.Office.Interop.Excel.Application excelApp =
                        new Microsoft.Office.Interop.Excel.Application();
                    Microsoft.Office.Interop.Excel.Workbook excelWorkbook = excelApp.Workbooks.Open(file);
                    Microsoft.Office.Interop.Excel._Worksheet excelWorksheet = excelWorkbook.Sheets[1];
                    Microsoft.Office.Interop.Excel.Range excelRange = excelWorksheet.UsedRange;

                    dataGridView1.DataSource = ExcelFileReader.read(excelRange);
                    //close and clean excel process
                    GC.Collect();
                    GC.WaitForPendingFinalizers();
                    Marshal.ReleaseComObject(excelRange);
                    Marshal.ReleaseComObject(excelWorksheet);
                    //quit apps
                    excelWorkbook.Close();
                    Marshal.ReleaseComObject(excelWorkbook);
                    excelApp.Quit();
                    Marshal.ReleaseComObject(excelApp);
                }
                catch (Exception ex)
                {
                    MessageBox.Show(ex.Message);
                }
            }
        }
Testing the Application
1. Build and run your application.
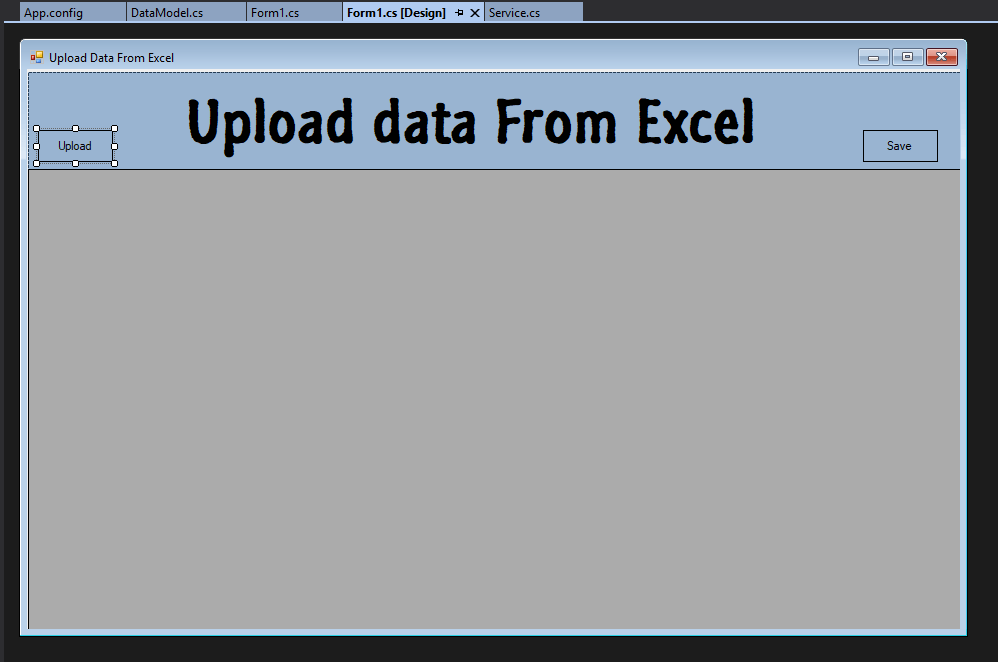
2. Click the Upload button to open the file dialog.
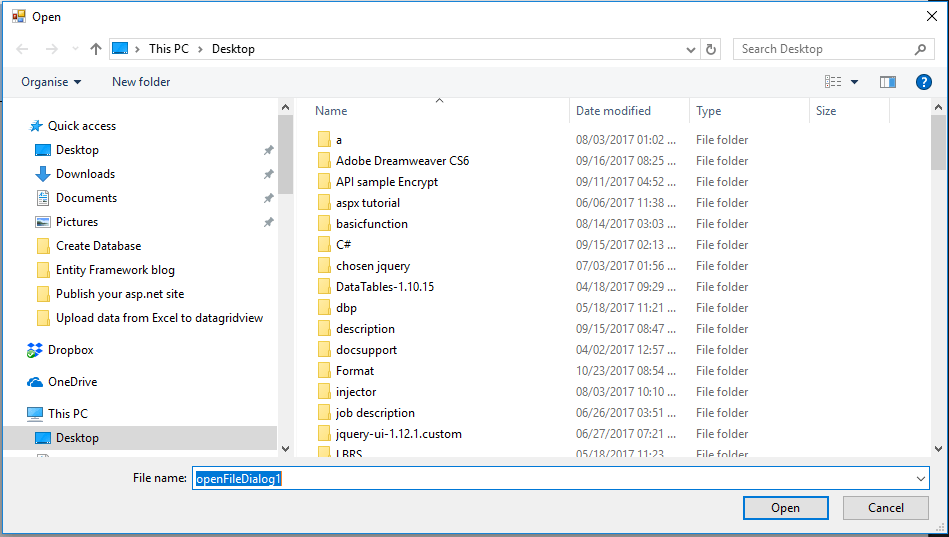
3. Select an excel file containing data.
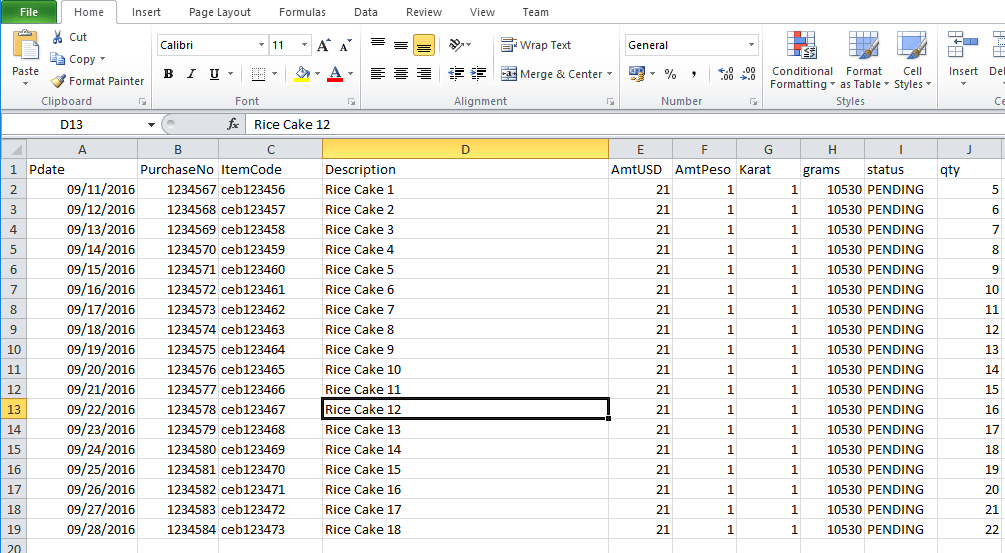
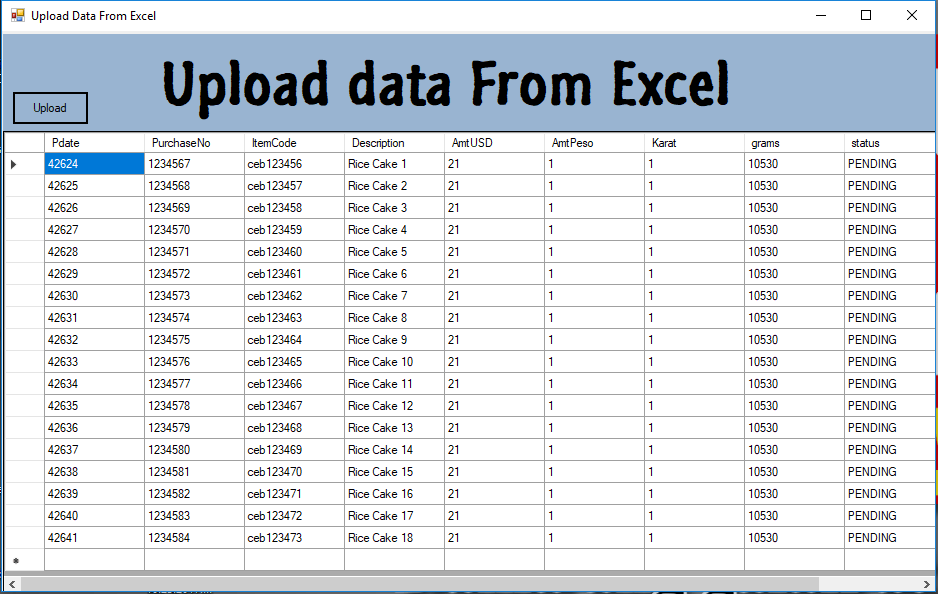
4. Verify that the Excel data is imported into the DataGridView.
Excel File:
Project Output:
Download Source Code
To download our free source code from this tutorial, you can use the button below.
Note: Extract the file using 7Zip and use password: freecodespot
Summary
In this article, we looked at using C# to import Excel data into a DataGridView control. We were able to read the Excel file, extract the data, and import the data into the DataGridView by utilizing the Microsoft.Office.Interop.excel. According to the needs of your application, you can integrate data validation, error handling, and more formatting choices to further improve this functionality. If this helps you, it would mean a lot to me if you can recommend this post to your friends. Thank you. Keep Coding!!
For more post like this please visit my blog and search for topic you want to learn.


