In this tutorial, you will learn how to build an e-commerce product catalog that updates in real-time using ASP.NET Core 8, SignalR, and Blazor WebAssembly. The project consists of two parts: a backend server for managing product data and a Blazor front-end for displaying real-time updates.
By the end of this tutorial, you’ll have a working product catalog where users see live updates when inventory changes.
Outcome
- Real-Time Updates: Stock changes instantly reflect across all connected clients.
- Blazor Front-End: A responsive, dynamic product catalog.
- Swagger for API Management: Easily add and update products.
- CORS Resolution: Ensure the front-end can connect to the API server.
Before starting, ensure you have the following:
- Visual Studio 2022 or later
- .NET 8 SDK installed
- Basic knowledge of ASP.NET Core and C#
- SQL Server installed locally or on the cloud
Solution Structure
The project contains two separate projects in a single solution:
- Backend: ASP.NET Core Web API with SignalR for real-time updates and Swagger for API testing.
- Front-End: A Blazor WebAssembly app that displays the product catalog and connects to the SignalR hub.
Step 1: Set Up the Backend Project
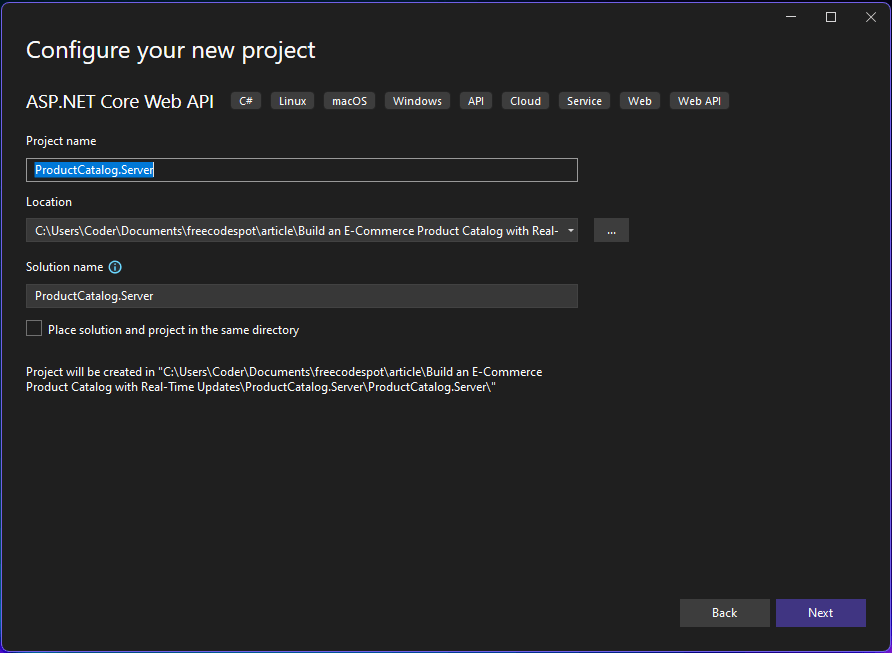
1.1 Create a New ASP.NET Core Web API Project
- Open Visual Studio and create a new ASP.NET Core Web API project.
- Name the project
ProductCatalog.Server.
1.2 Install Entity Framework Core
Install-Package Microsoft.EntityFrameworkCore.SqlServer
Install-Package Microsoft.EntityFrameworkCore.Tools
1.3 Set Up the Database
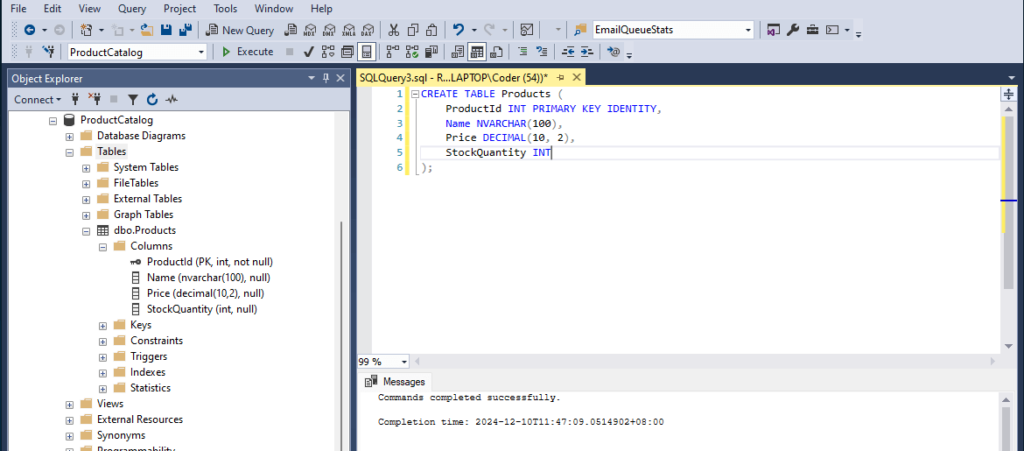
1. Create a SQL Server database named ProductCatalog and add a table for products:
CREATE TABLE Products (
    ProductId INT PRIMARY KEY IDENTITY,
    Name NVARCHAR(100),
    Price DECIMAL(10, 2),
    StockQuantity INT
);
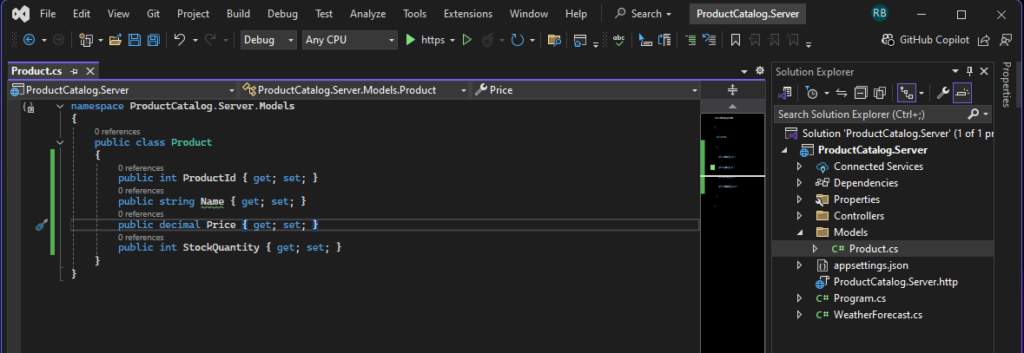
2. Create a Product model:
Define a class that represents the product structure with properties for ProductId, Name, Price, and StockQuantity, which will be used to manage product data throughout the application.
public class Product
{
    public int ProductId { get; set; }
    public string Name { get; set; }
    public decimal Price { get; set; }
    public int StockQuantity { get; set; }
}
3. Set up the database context:
Create a DbContext class to manage the connection between your application and the database. Define a DbSet<Product> property to represent the Products table for database operations.
 public class AppDbContext(DbContextOptions<AppDbContext> options) : DbContext(options)
 {
     public DbSet<Product> Products { get; set; }
 }
4. Configure the Connection String
Open appsettings.json in the Backend project and add your database connection string
"ConnectionStrings": {
  "DefaultConnection": "Server=YOUR_SERVER;Database=InventoryDB;Trusted_Connection=True;"
}
5. Register DbContext in program.cs
builder.Services.AddDbContext<AppDbContext>(options =>
    options.UseSqlServer(builder.Configuration.GetConnectionString("DefaultConnection")));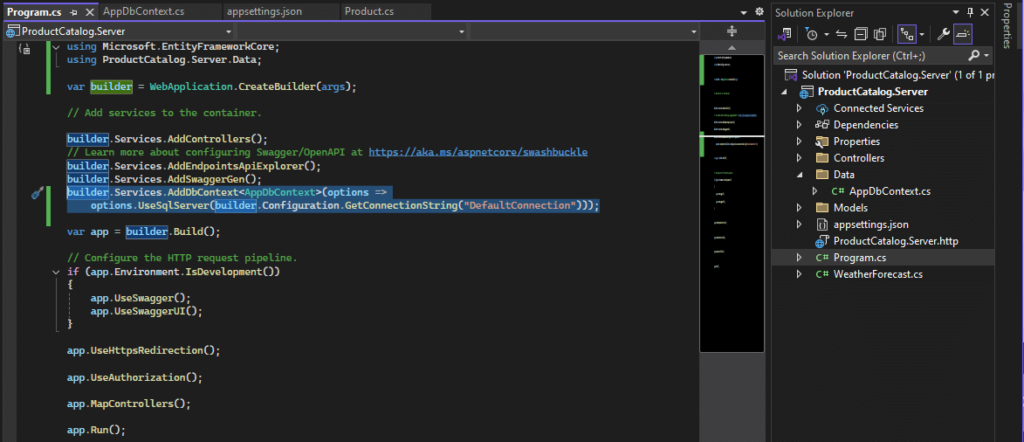
1.4 Add API Endpoints
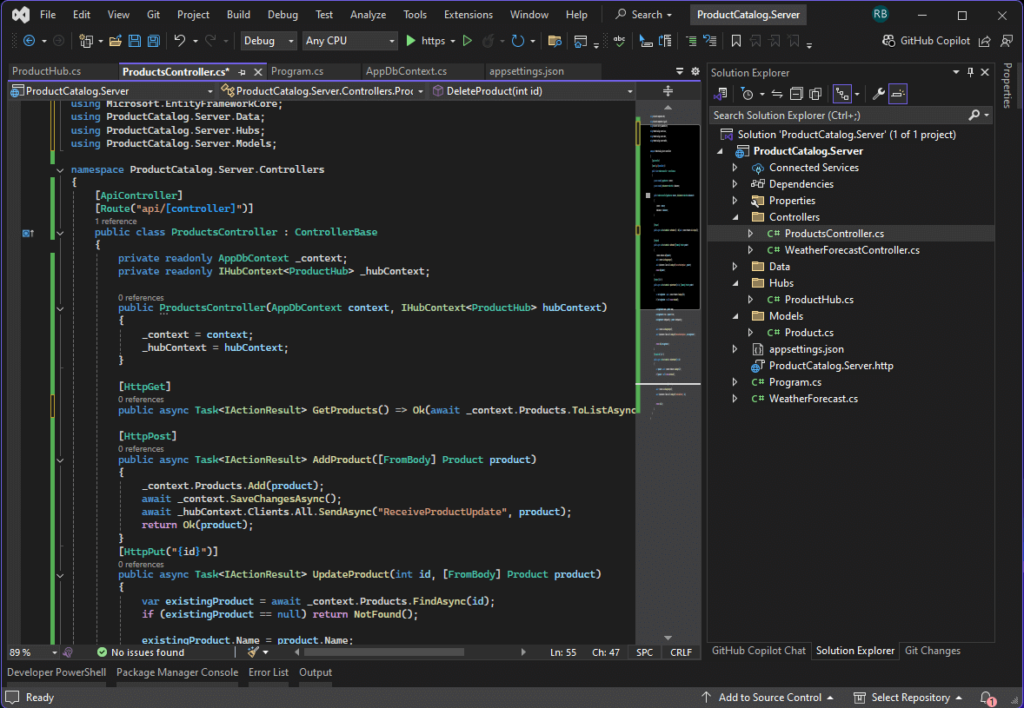
Create a controller to handle CRUD operations for the product catalog. Implement endpoints to fetch all products, add new products, and broadcast updates to clients using SignalR.
Create a ProductsController with the following CRUD operations:
using Microsoft.AspNetCore.Mvc;
using Microsoft.AspNetCore.SignalR;
using Microsoft.EntityFrameworkCore;
using ProductCatalog.Server.Data;
using ProductCatalog.Server.Hubs;
using ProductCatalog.Server.Models;

namespace ProductCatalog.Server.Controllers
{
    [ApiController]
    [Route("api/[controller]")]
    public class ProductsController : ControllerBase
    {
        private readonly AppDbContext _context;
        private readonly IHubContext<ProductHub> _hubContext;

        public ProductsController(AppDbContext context, IHubContext<ProductHub> hubContext)
        {
            _context = context;
            _hubContext = hubContext;
        }
    }
}
Create a Product
[HttpPost]
public async Task<IActionResult> AddProduct([FromBody] Product product)
{
    _context.Products.Add(product);
    await _context.SaveChangesAsync();
    await _hubContext.Clients.All.SendAsync("ReceiveProductUpdate", product);
    return Ok(product);
}
Read Product List
  [HttpGet]
  public async Task<IActionResult> GetProducts() => Ok(await _context.Products.ToListAsync());
Update Product
 [HttpPut("{id}")]
 public async Task<IActionResult> UpdateProduct(int id, [FromBody] Product product)
 {
     var existingProduct = await _context.Products.FindAsync(id);
     if (existingProduct == null) return NotFound();

     existingProduct.Name = product.Name;
     existingProduct.Price = product.Price;
     existingProduct.StockQuantity = product.StockQuantity;

     await _context.SaveChangesAsync();
     await _hubContext.Clients.All.SendAsync("ReceiveProductUpdate", existingProduct);

     return Ok(existingProduct);
 }
Delete Product
    [HttpDelete("{id}")]
    public async Task<IActionResult> DeleteProduct(int id)
    {
        var product = await _context.Products.FindAsync(id);
        if (product == null) return NotFound();

        _context.Products.Remove(product);
        await _context.SaveChangesAsync();
        await _hubContext.Clients.All.SendAsync("ProductDeleted", id);

        return Ok(id);
    }
1.5 Set Up SignalR
Create a SignalR hub to enable real-time communication between the server and connected clients. Configure the hub in the Program.cs file, map it to an endpoint (e.g., /productHub), and ensure SignalR is properly integrated into the middleware pipeline.
1. Create a folder named Hubs and inside it create a SignalR hub class:
using Microsoft.AspNetCore.SignalR;

namespace ProductCatalog.Server.Hubs
{
    public class ProductHub : Hub { }
}
2. Configure SignalR in Program.cs:
Add SignalR services to the backend, define the SignalR hub endpoint (e.g., /productHub), and ensure CORS policies allow front-end communication.
DBContext Service:
builder.Services.AddDbContext<AppDbContext>(options =>
    options.UseSqlServer(builder.Configuration.GetConnectionString("DefaultConnection")));
SignalR Service:
builder.Services.AddSignalR();CORS:
builder.Services.AddCors(options => options.AddPolicy("AllowAll", policy =>
    policy.AllowAnyOrigin().AllowAnyHeader().AllowAnyMethod()));
Apply service to your app:
var app = builder.Build();
app.UseCors("AllowAll");
app.MapHub<ProductHub>("/productHub");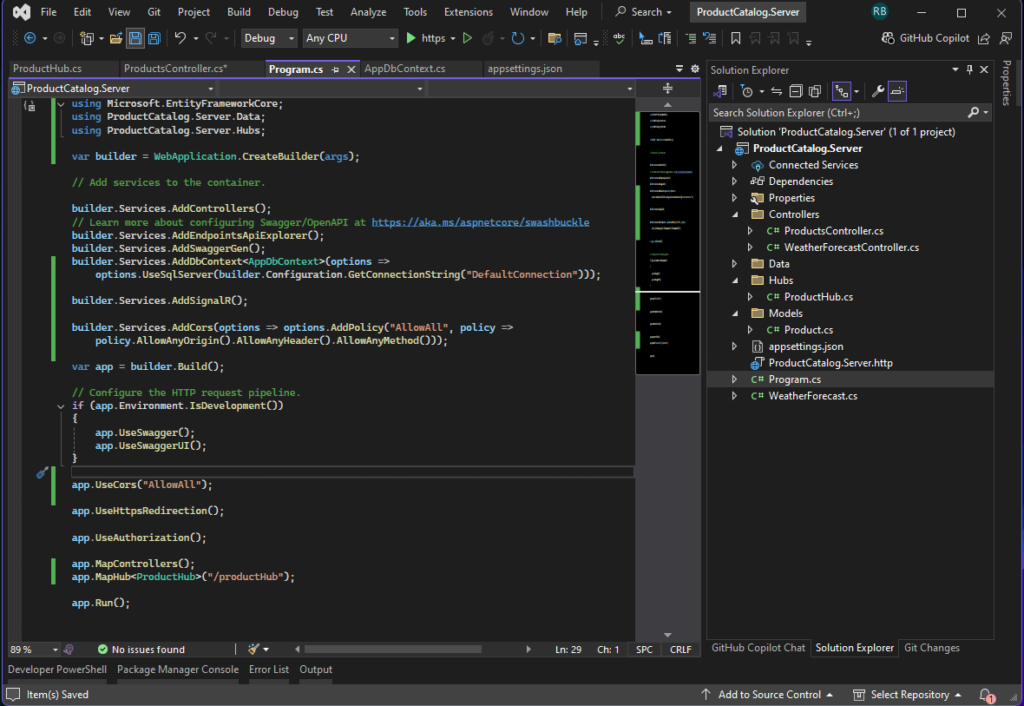
Step 2: Set Up the Front-End Project
Create a Blazor WebAssembly application to serve as the front-end for your e-commerce product catalog. This project will display the product list and use SignalR to receive real-time updates from the backend.
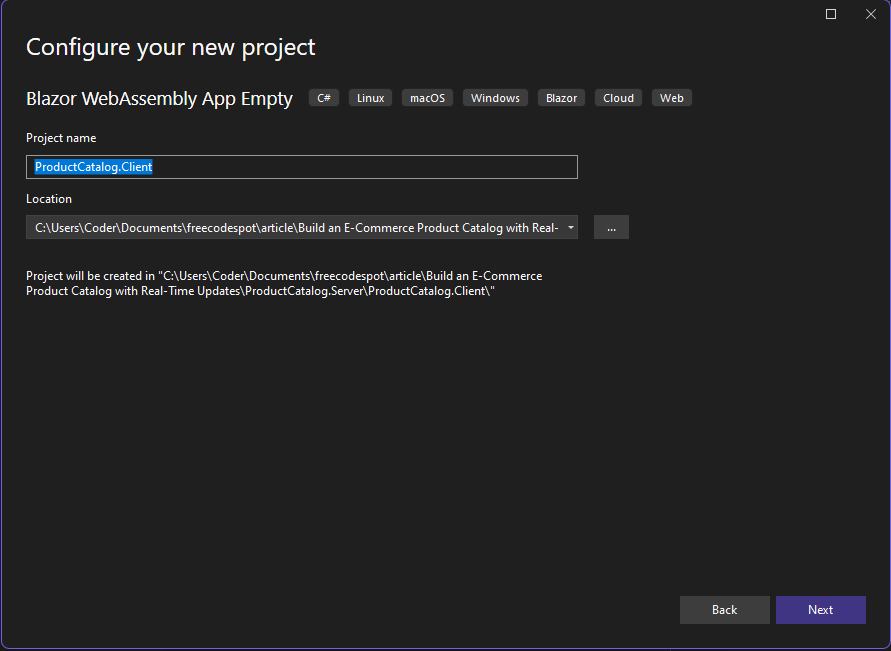
2.1 Create a New Blazor WebAssembly App
- Add a new project to the solution: Blazor WebAssembly App.
- Name it
ProductCatalog.Client.
2.2 Install SignalR Client
Add the SignalR client library to the Blazor WebAssembly project to enable real-time communication with the backend SignalR hub.
Install-Package Microsoft.AspNetCore.SignalR.Client
2.3 Create Product Catalog Page
Build a Blazor component to display the product list and integrate SignalR for real-time updates, ensuring dynamic UI updates when product data changes.
1. Add a Product model:
public class Product
{
    public int ProductId { get; set; }
    public string Name { get; set; }
    public decimal Price { get; set; }
    public int StockQuantity { get; set; }
}
2. Add bootstrap dependency. Open wwwroot/index.html and add the following script in the header section.
 <link href="https://cdn.jsdelivr.net/npm/bootstrap@5.3.1/dist/css/bootstrap.min.css" rel="stylesheet">
 <link href="https://cdn.jsdelivr.net/npm/bootstrap-icons/font/bootstrap-icons.css" rel="stylesheet">
 <script src="https://cdn.jsdelivr.net/npm/bootstrap@5.3.1/dist/js/bootstrap.bundle.min.js"></script>
3. Create a ProductCatalog.razor page:
Navigate to the Pages folder in your Blazor WebAssembly project and add a Razor component to display the product catalog and handle real-time updates from the SignalR hub.
@page "/"
@using Microsoft.AspNetCore.SignalR.Client
@using global::ProductCatalog.Client.Models
@inject HttpClient Http
@inject IJSRuntime JSRuntime


<div class="container py-4">
    <h1 class="mb-4 text-center">Product Catalog</h1>

    <!-- Product Table -->
    <div class="table-responsive">
        <table class="table table-bordered table-hover align-middle">
            <thead class="table-light">
                <tr>
                    <th>Name</th>
                    <th>Price</th>
                    <th>Stock Quantity</th>
                    <th>Actions</th>
                </tr>
            </thead>
            <tbody>
                @if (products?.Count > 0)
                {
                    @foreach (var product in products)
                    {
                        <tr>
                            <td>@product.Name</td>
                            <td>@product.Price.ToString("C")</td>
                            <td>@product.StockQuantity</td>
                            <td class="text-center">
                                <button @onclick="() => EditProduct(product)" class="btn btn-sm btn-warning me-2">
                                    <i class="bi bi-pencil-square"></i> Edit
                                </button>
                                <button @onclick="() => DeleteProduct(product.ProductId)" class="btn btn-sm btn-danger">
                                    <i class="bi bi-trash"></i> Delete
                                </button>
                            </td>
                        </tr>
                    }
                }
                else
                {
                    <tr>
                        <td colspan="4" class="text-center text-muted">No products available</td>
                    </tr>
                }
            </tbody>
        </table>
    </div>

    <!-- Add/Edit Product Form -->
    <div class="mt-5">
        <h2 class="text-center">@((editingProduct.ProductId == 0) ? "Add Product" : "Edit Product")</h2>
        <div class="card shadow-sm">
            <div class="card-body">
                <ProductForm EditingProduct="@editingProduct" OnSave="SaveProduct" OnCancel="CancelEdit" />
            </div>
        </div>
    </div>
</div>


@code {
    private List<Product> products = new();
    private Product editingProduct = new Product();
    private HubConnection? hubConnection;

    private async Task LogToBrowserConsole(string message)
    {
        await JSRuntime.InvokeVoidAsync("console.log", message);
    }

    protected override async Task OnInitializedAsync()
    {
        await LogToBrowserConsole("Initializing component...");

        // Load products from the API
        products = await Http.GetFromJsonAsync<List<Product>>("https://localhost:7228/api/products");
        await LogToBrowserConsole($"Loaded {products.Count} products.");

        // Setup SignalR connection
        hubConnection = new HubConnectionBuilder()
            .WithUrl("https://localhost:7228/productHub")
            .Build();
        await LogToBrowserConsole("SignalR connection established.");

        hubConnection.On<Product>("ReceiveProductUpdate", async product =>
        {
            await LogToBrowserConsole($"Received product update for: {product.Name}");
            HandleProductUpdate(product);
        });

        hubConnection.On<int>("ProductDeleted", async productId =>
        {
            await LogToBrowserConsole($"Product deleted with ID: {productId}");
            HandleProductDeletion(productId);
        });

        await hubConnection.StartAsync();
        await LogToBrowserConsole("SignalR connection started.");
    }


    public async ValueTask DisposeAsync()
    {
        if (hubConnection is not null)
        {
            await hubConnection.DisposeAsync();
        }
    }

    private void HandleProductUpdate(Product product)
    {
        var existing = products.FirstOrDefault(p => p.ProductId == product.ProductId);
        if (existing != null)
        {
            existing.Name = product.Name;
            existing.Price = product.Price;
            existing.StockQuantity = product.StockQuantity;
        }
        else
        {
            Console.WriteLine("Products before add:" );
            products.Add(product);
        }
        StateHasChanged();
    }

    private void HandleProductDeletion(int productId)
    {
        var product = products.FirstOrDefault(p => p.ProductId == productId);
        if (product != null)
        {
            products.Remove(product);
        }
        StateHasChanged();
    }

    private async Task SaveProduct()
    {
        if (editingProduct.ProductId == 0)
        {
            var response = await Http.PostAsJsonAsync("https://localhost:7228/api/products", editingProduct);
            var newProduct = await response.Content.ReadFromJsonAsync<Product>();
            if (newProduct != null)
            {
                Console.WriteLine("Products before save:");
               // products.Add(newProduct);
            }
        }
        else
        {
            await Http.PutAsJsonAsync($"https://localhost:7228/api/products/{editingProduct.ProductId}", editingProduct);
        }
        ResetForm();
    }

    private void EditProduct(Product product)
    {
        editingProduct = new Product
            {
                ProductId = product.ProductId,
                Name = product.Name,
                Price = product.Price,
                StockQuantity = product.StockQuantity
            };
    }

    private async Task DeleteProduct(int productId)
    {
        await Http.DeleteAsync($"https://localhost:7228/api/products/{productId}");
    }

    private void CancelEdit()
    {
        ResetForm();
    }

    private void ResetForm()
    {
        editingProduct = new Product();
    }
}
4. Create a New Razor Component. Name the component ProductForm.razor
@using Microsoft.AspNetCore.Components.Forms
@using global::ProductCatalog.Client.Models

<EditForm Model="@EditingProduct" OnValidSubmit="HandleSave" class="needs-validation" novalidate>
    <DataAnnotationsValidator />
    <ValidationSummary class="alert alert-danger" />

    <div class="mb-3">
        <label for="name" class="form-label">Product Name</label>
        <input id="name" type="text" @bind="EditingProduct.Name" class="form-control" placeholder="Enter product name" required />
        <div class="invalid-feedback">Product name is required.</div>
    </div>

    <div class="mb-3">
        <label for="price" class="form-label">Price</label>
        <input id="price" type="number" step="0.01" @bind="EditingProduct.Price" class="form-control" placeholder="Enter price" required />
        <div class="invalid-feedback">Price is required and must be valid.</div>
    </div>

    <div class="mb-3">
        <label for="stockQuantity" class="form-label">Stock Quantity</label>
        <input id="stockQuantity" type="number" @bind="EditingProduct.StockQuantity" class="form-control" placeholder="Enter stock quantity" required />
        <div class="invalid-feedback">Stock quantity is required.</div>
    </div>

    <div class="d-flex justify-content-end gap-2 mt-4">
        <button type="submit" class="btn btn-primary">
            <i class="bi bi-check-circle me-1"></i> Save
        </button>
        <button type="button" @onclick="HandleCancel" class="btn btn-secondary">
            <i class="bi bi-x-circle me-1"></i> Cancel
        </button>
    </div>
</EditForm>


@code {
    [Parameter] public Product EditingProduct { get; set; } = new Product();
    [Parameter] public EventCallback OnSave { get; set; }
    [Parameter] public EventCallback OnCancel { get; set; }

    private async Task HandleSave()
    {
        if (OnSave.HasDelegate)
        {
            await OnSave.InvokeAsync();
        }
    }

    private async Task HandleCancel()
    {
        if (OnCancel.HasDelegate)
        {
            await OnCancel.InvokeAsync();
        }
    }
}
Step 3: Verify App.razor for Routing
Ensure App.razor includes the following code to enable routing:
<Router AppAssembly="@typeof(App).Assembly">
    <Found Context="routeData">
        <RouteView RouteData="@routeData" DefaultLayout="@typeof(MainLayout)" />
        <FocusOnNavigate RouteData="@routeData" Selector="h1" />
    </Found>
    <NotFound>
        <PageTitle>Not found</PageTitle>
        <LayoutView Layout="@typeof(MainLayout)">
            <p role="alert">Sorry, there's nothing at this address.</p>
        </LayoutView>
    </NotFound>
</Router>
This configuration ensures the router processes routes using AppAssembly, applies a consistent layout to pages via DefaultLayout, and handles unmatched routes with a fallback “not found” message.
Step 4: Test the Application
Follow these steps to test the real-time functionality of your e-commerce product catalog:
3.1 Run Both Projects in Visual Studio 2022
- Set Up Multiple Startup Projects:
- In Solution Explorer, right-click on the solution name and select Properties.
- Under the Startup Project tab, select Multiple Startup Projects.
- Set both
ProductCatalog.ServerandProductCatalog.Clientto Start. - Click Apply and OK.
- Start the Projects:
- Press F5 or click Start to run both the backend and front-end projects simultaneously.
- Ensure the backend (API server) runs on
https://localhost:5001and the front-end (Blazor app) onhttps://localhost:5002.
3.2 Test the API Server
- Access Swagger:
- Open a browser and navigate to
https://localhost:5001/swaggerto access the Swagger UI.
- Open a browser and navigate to
- Test Endpoints:
- Use the Swagger interface to add products via the API.For example, test the POST /api/products endpoint by adding a new product:
{ "name": "Sample Product", "price": 10.99, "stockQuantity": 50 }- Use the PUT /api/products/{id} endpoint with the following payload to update an existing product:
{
    "name": "Updated Product Name",
    "price": 15.99,
    "stockQuantity": 30
}- Delete a Product: Use the DELETE /api/products/{id} endpoint to remove a product by its ID.
3.3 Test the Front-End
- Navigate to the Product Catalog:
- Open a browser and go to
https://localhost:5002/catalogto view the Blazor front-end.
- Open a browser and go to
- Verify Real-Time Updates:
- Add or update products using Swagger or the database.
- Observe the changes reflected instantly on the product catalog page in the Blazor app.
3.4 Test Real-Time Updates Across Multiple Clients
- Open Multiple Browser Tabs:
- Open the Blazor product catalog (
https://localhost:5002/catalog) in two or more browser tabs or devices.
- Open the Blazor product catalog (
- Simulate Updates:
- Use Swagger or a direct API call to modify product stock or add new products.
- Verify that all open tabs update in real-time without refreshing.
3.5 Debugging Tips
- Ensure the SignalR hub URL matches the backend configuration.
- Verify CORS settings allow front-end communication with the backend.
- Check the browser console for errors related to SignalR connections.
Expected Result
The product catalog displays a dynamic list of products. Any changes made via Swagger (or directly through the API) appear instantly in the front-end across all connected clients.
Download Source Code
To download the free source code from this tutorial, click the button below.
Important Notes:
- Ensure you have 7-Zip installed to extract the file. You can download 7-Zip here if you don’t already have it.
- Use the password freecodespot when prompted during extraction.
This source code is designed to work seamlessly with the steps outlined in this tutorial. If you encounter any issues or have questions, feel free to reach out in the comments section below.
Summary
You’ve built a real-time e-commerce product catalog using ASP.NET Core 8, SignalR, and Blazor WebAssembly. The system updates stock dynamically, providing a seamless experience for users. This solution demonstrates the power of SignalR and Blazor for modern web applications.
