When developing applications with a strong emphasis on database design, the Model-First Approach in ASP.NET Entity Framework shines as a valuable technique. In this article, we’ll explore Model-First in Entity Framework, discover its advantages, walk through the steps to implement it using ASP.NET, and pick up some best practices.
- What is the Model-First Approach in ASP.NET Entity Framework?
- These are the advantages of using the Model-First Approach in ASP.NET Entity Framework.
- Create ASP.NET MVC Project and Apply Model-First Approach
- I. Create an EDMX File
- II. Add Entities and Relationships
- III. Generate Database from Model
- IV. Keep Your Design Updated
- V. Navigating Best Practices
- Summary
To fully understand how this approach works. I have created a simple tutorial on executing the Model First Approach.
Before we start, Please make sure to have installed the following
- Visual Studio 2013 or the latest version
- SQL Server
Post you may also like:
How to Add Nuget Package in ASP.NET Project » Read More
What is the Model-First Approach in ASP.NET Entity Framework?
The Model-First approach flips the script by allowing developers to create an Entity Data Model (EDM) visually using the Entity Framework Designer in Visual Studio. This model becomes the property that represents the database schema and automatically generates the classes for us.
In contrast to the Code-First approach, where code and classes dictate the database structure, Model-First is ideal when you want to define your database visually before diving into the code.
These are the advantages of using the Model-First Approach in ASP.NET Entity Framework.
- Model-First lets you create a blueprint for your data structure before writing complex code.
- You don’t have to write lots of code. Model-First automatically generates the necessary code based on your blueprint.
- It’s like defining how different parts of your data are linked or connected.
- If you want to use a different type of database, it’s not a big deal. You can easily switch without breaking things.
- Begin by setting up your data design from scratch.
- As your app grows, you can easily update your data design to match any changes in your database.
- You can design your database without dealing with confusing technical terms.
- It’s like creating a map for your data, making it visually enjoyable and easy to understand.
- If you make a mistake, it’s easy to go back and adjust it in your blueprint.
- You’re not limited to just one type of database; you can use Model-First with different ones.
Create ASP.NET MVC Project and Apply Model-First Approach
I. Create an EDMX File
1. Open Visual Studio.
2. Create a new ASP.NET MVC Project
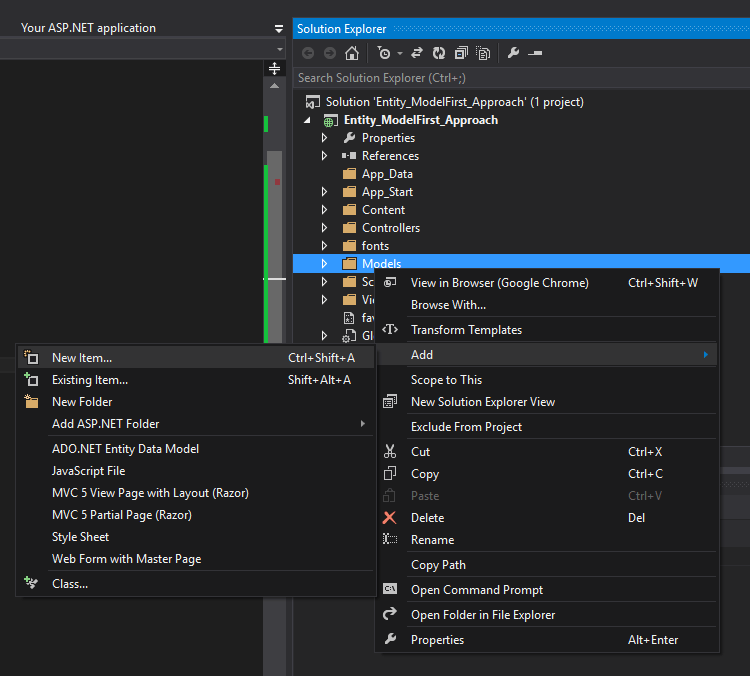
3. Then, add a new Item to your project. In my case, I place it inside my Models folder. To add, right-click on the Models folder, click Add, and choose New Item.
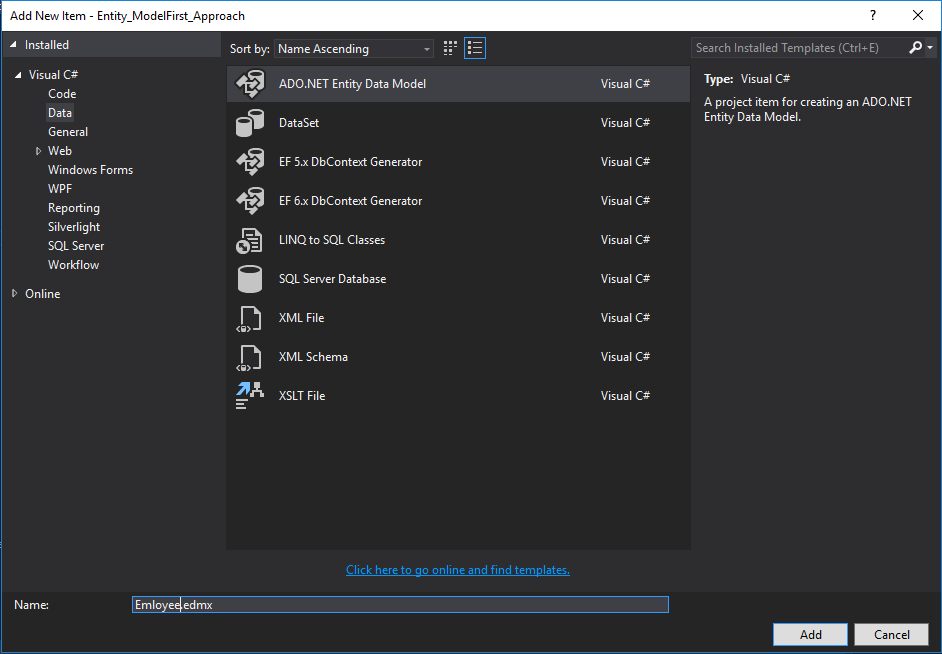
4. Add ADO.NET Entity Data Model. Expand the Visual C# tab, then select Data; choose ADO.NET Entity Data Model in the middle pane.
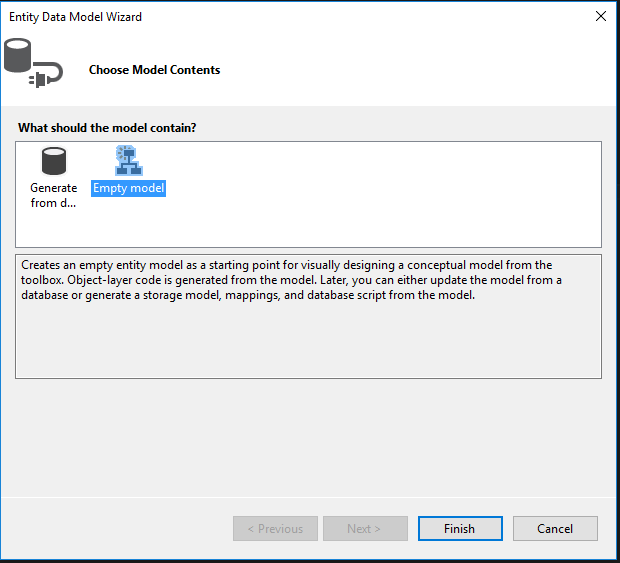
5. Choose Empty Model, then Click the “Finish” button to proceed.
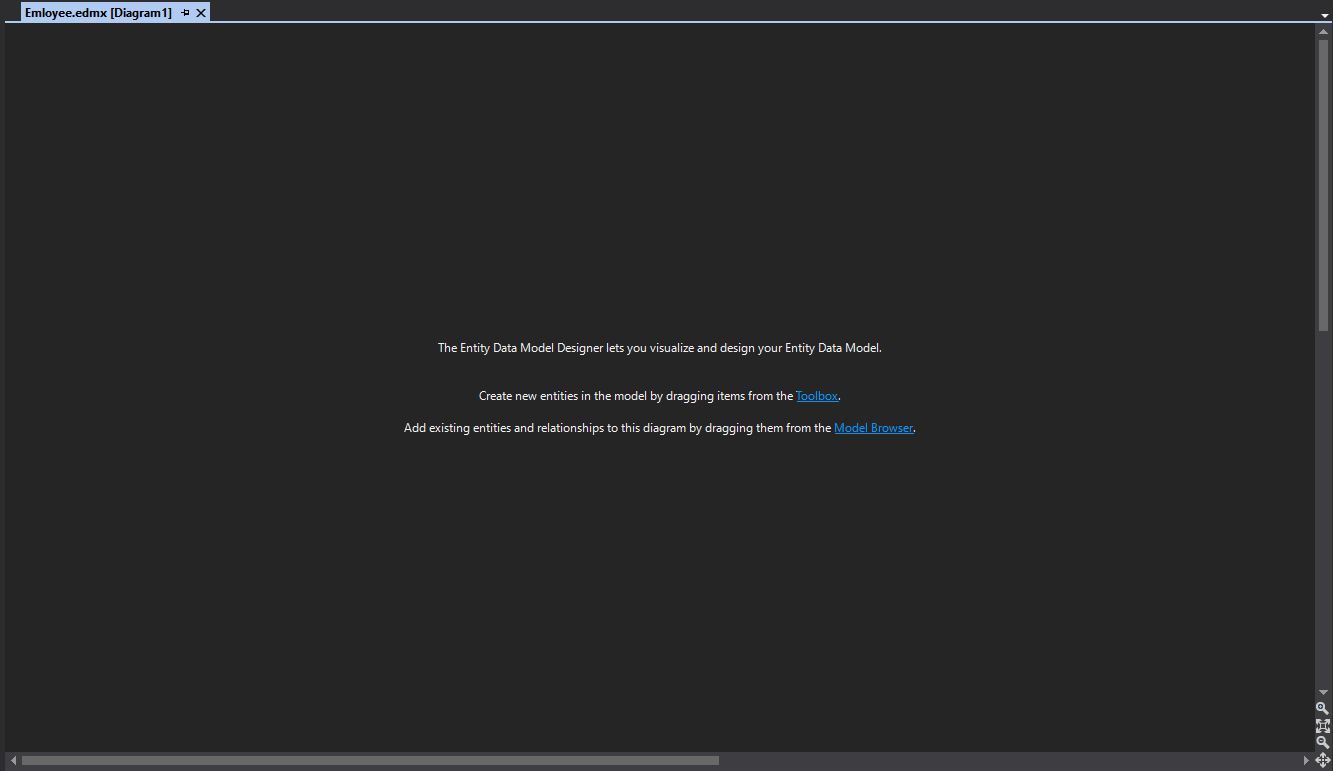
6. After adding the ADO.NET Entity Data Model, it will automatically create an EDMX(.edmx extension) file. Like the image shown below.
II. Add Entities and Relationships
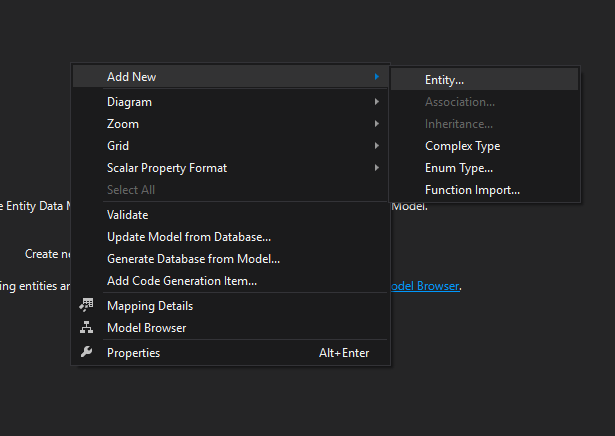
1. Add an entity for your model. Right-click anywhere inside EDMX designer and click Add New » Entity. Refer to the image below.
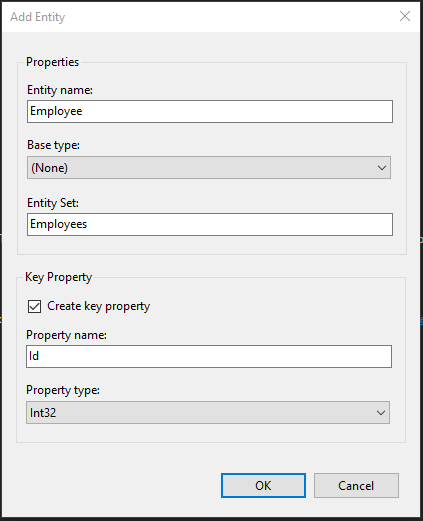
2. Name your entity. In my case, I name it Employee, and the framework automatically generates the entity Set as Employees.
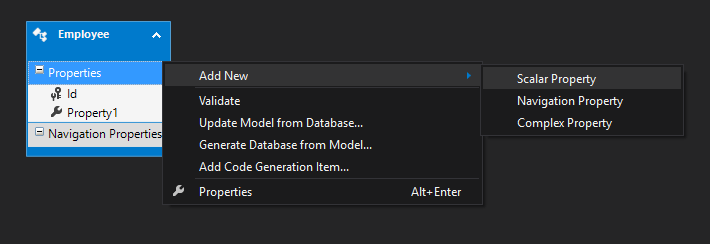
3. Add Scalar Property, which represents your table column. To add, right-click anywhere inside your Entity and Select Add New » Scalar Property.
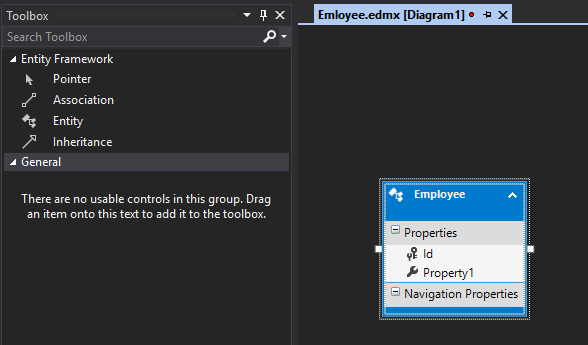
4. The image below is the designer’s overview with the toolbox that contains tools you can use to design your entity.
III. Generate Database from Model
1. Generate Database from Model. This model will generate a .sql file inside your EDMX file containing commands to create your Database. Right-click anywhere inside your designer and select Generate Database from Model.
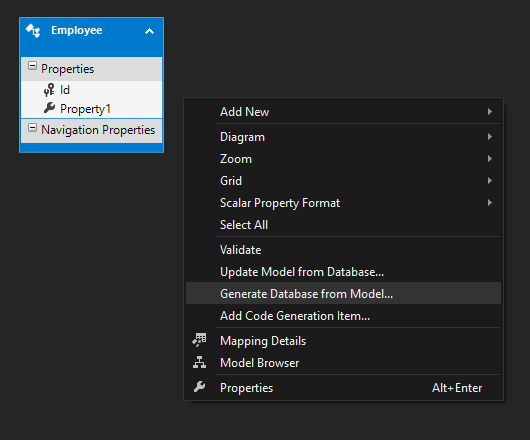
2. In the Generate Database Wizard window, click “Next” to proceed.
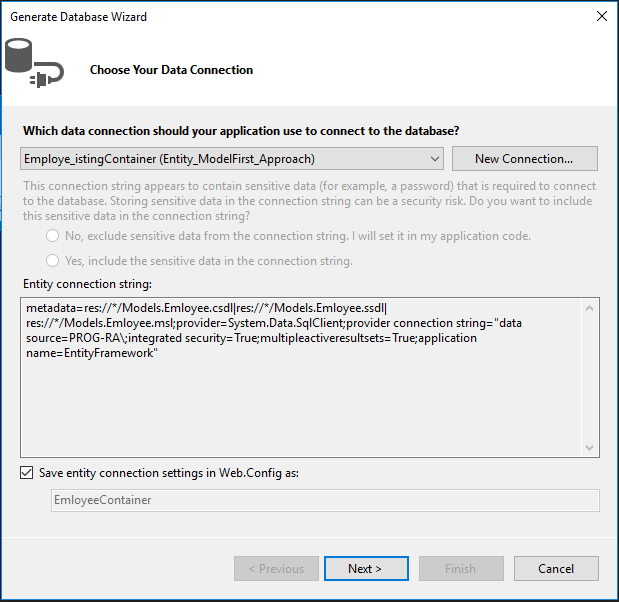
3. Entity Framework generates Data Definition Language(DDL) that contains the command for creating a database from your model design. Click “Finish.”
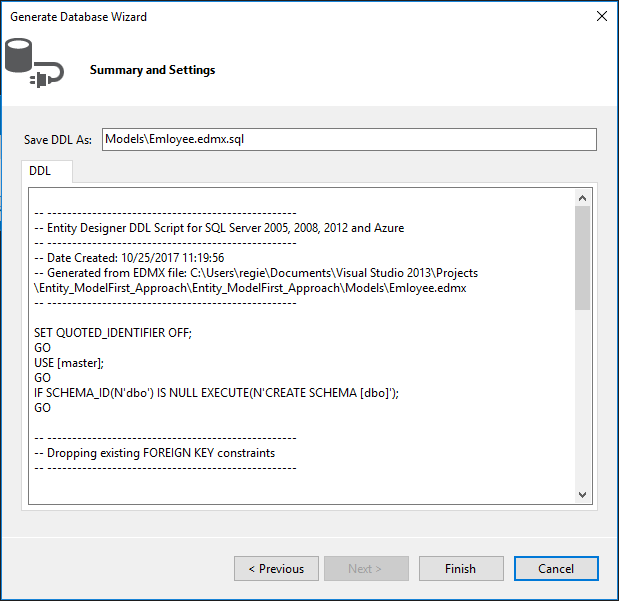
4. It will create a .sql file that contains the needed command to create your Database Schema.
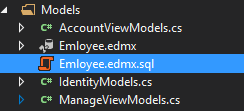
5. Below are the codes inside the Employee.edmx.sql file.
Replace [master] with the database name on your local where you want to create the table
Employee.edmx.sql Script:
-- --------------------------------------------------
 -- Entity Designer DDL Script for SQL Server 2005, 2008, 2012 and Azure
 -- --------------------------------------------------
 -- Date Created: 10/25/2017 11:19:56
 -- Generated from EDMX file: C:\Users\regie\Documents\Visual Studio 2013\Projects\Entity_ModelFirst_Approach\Entity_ModelFirst_Approach\Models\Emloyee.edmx
 -- --------------------------------------------------

SET QUOTED_IDENTIFIER OFF;
 GO
 USE [master];
 GO
 IF SCHEMA_ID(N'dbo') IS NULL EXECUTE(N'CREATE SCHEMA [dbo]');
 GO

-- --------------------------------------------------
 -- Dropping existing FOREIGN KEY constraints
 -- --------------------------------------------------

-- --------------------------------------------------
 -- Dropping existing tables
 -- --------------------------------------------------

-- --------------------------------------------------
 -- Creating all tables
 -- --------------------------------------------------

-- Creating table 'Employees'
 CREATE TABLE [dbo].[Employees] (
 [Id] int IDENTITY(1,1) NOT NULL,
 [Property1] nvarchar(max) NOT NULL
 );
 GO

-- --------------------------------------------------
 -- Creating all PRIMARY KEY constraints
 -- --------------------------------------------------

-- Creating primary key on [Id] in table 'Employees'
 ALTER TABLE [dbo].[Employees]
 ADD CONSTRAINT [PK_Employees]
 PRIMARY KEY CLUSTERED ([Id] ASC);
 GO

-- --------------------------------------------------
 -- Creating all FOREIGN KEY constraints
 -- --------------------------------------------------

-- --------------------------------------------------
 -- Script has ended
 -- --------------------------------------------------
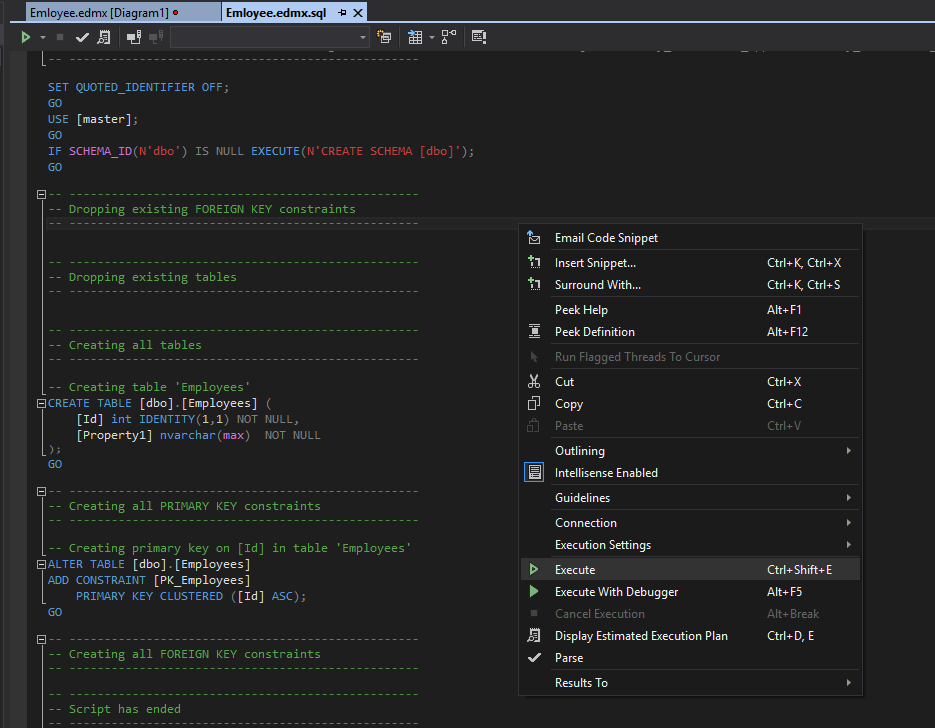
6. Open the Employee.edmx.sql file and execute the command to create a database. Right-click anywhere inside your Employee.edmx.sql editor and select Execute. See the image below.
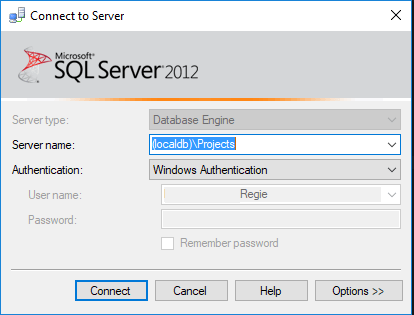
7. A dialog box will pop up asking for your server name where you want to create your table.
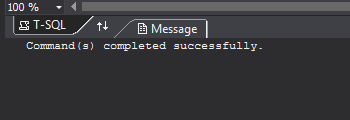
8. The console will display a message saying, “Command(s) completed successfully.”
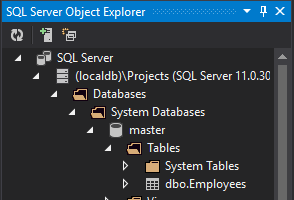
9. The image below is the table created by Entity Framework.
You have successfully created your table. By this time, you can now use the Entity Framework Model first approach in your ASP.Net MVC Web application.
IV. Keep Your Design Updated
As your web application evolves, you can keep your design in sync with any database changes. Follow the steps below.
1. Right-click on your design.
2. Choose “Update Model from Database.”
3. Pick the parts that need a refresh.
4. Click “Finish” to update your design with the latest changes.
V. Navigating Best Practices
- Keep your Entity Data Model up to date so it matches any changes in your database.
- Put your design file in version control. It’s like keeping a diary of how your data model grows and changes over time.
- Leave notes and explanations in the Entity Framework Designer. It’s like telling the story of why you made confident design choices.
Summary
In conclusion, Entity Framework’s Model-First approach simplifies database design by allowing the Entity Framework Designer to visually create an Entity Data Model (EDM). This method makes it easier to quickly prototype, generate code automatically, and quickly adapt to various database providers. Developing an EDMX file, creating entities and relationships, and producing the database schema are all part of the implementation process. Regular model changes, version control for the EDMX file, and Entity Framework Designer documentation are examples of best practices. All things considered, Model-First improves efficiency and flexibility by streamlining database architecture in ASP.NET applications.
Keep Coding!!
