In this continuation, we will build the Chat UI in Flutter, integrate it with the SignalR service for real-time messaging, and test the complete application.
This is Part 3 of this series. To follow along, you can download the source code from Part 2. Simply click the button below to visit the article and access the source code.

Click the button below to visit Part 2 of this series
6. Building the Chat UI
Step 1: Create the Chat Screen
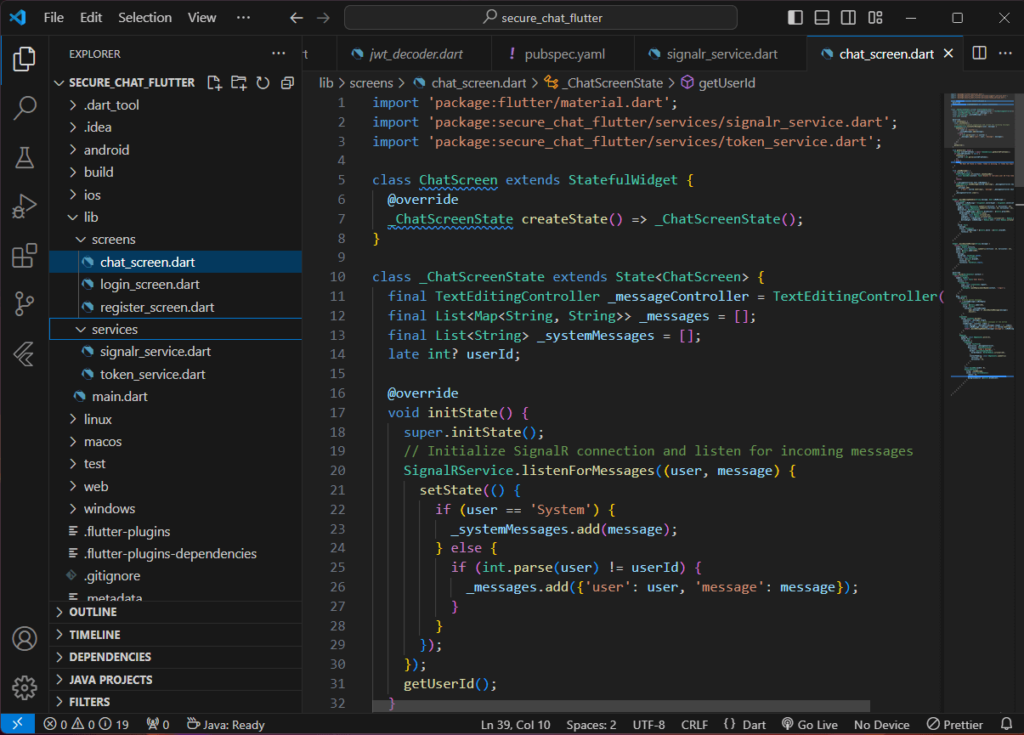
Create a new file lib/screens/chat_screen.dart:
import 'package:flutter/material.dart';
import 'package:secure_chat_flutter/services/signalr_service.dart';
import 'package:secure_chat_flutter/services/token_service.dart';

class ChatScreen extends StatefulWidget {
  @override
  _ChatScreenState createState() => _ChatScreenState();
}

class _ChatScreenState extends State<ChatScreen> {
  final TextEditingController _messageController = TextEditingController();
  final List<Map<String, String>> _messages = [];
  final List<String> _systemMessages = [];
  late int? userId;

  @override
  void initState() {
    super.initState();
    // Initialize SignalR connection and listen for incoming messages
    SignalRService.listenForMessages((user, message) {
      setState(() {
        if (user == 'System') {
          _systemMessages.add(message);
        } else {
          if (int.parse(user) != userId) {
            _messages.add({'user': user, 'message': message});
          }
        }
      });
    });
    getUserId();
  }

  void getUserId() async {
    String? userIdFromToken = await TokenService.getUserIdFromToken();
    if (userIdFromToken != null) {
      setState(() {
        userId = int.parse(userIdFromToken);
      });
    } else {
      print(
          "No User ID found in token, token is missing, or token has expired.");
    }
  }

  void _sendMessage() {
    if (userId == null) {
      ScaffoldMessenger.of(context).showSnackBar(
        const SnackBar(content: Text('Unable to retrieve user ID from token!')),
      );
      return;
    }
    if (_messageController.text.isNotEmpty) {
      SignalRService.sendMessage(userId.toString(), _messageController.text);
      setState(() {
        _messages.add(
            {'user': userId.toString(), 'message': _messageController.text});
      });
      _messageController.clear();
    }
  }

  Widget _buildMessageBubble(String message, bool isMyMessage) {
    return Align(
      alignment: isMyMessage ? Alignment.centerRight : Alignment.centerLeft,
      child: Container(
        margin: const EdgeInsets.symmetric(vertical: 5, horizontal: 10),
        padding: const EdgeInsets.symmetric(vertical: 10, horizontal: 15),
        decoration: BoxDecoration(
          color: isMyMessage ? Colors.blueAccent : Colors.grey[300],
          borderRadius: BorderRadius.only(
            topLeft: const Radius.circular(15),
            topRight: const Radius.circular(15),
            bottomLeft: isMyMessage ? const Radius.circular(15) : Radius.zero,
            bottomRight: isMyMessage ? Radius.zero : const Radius.circular(15),
          ),
        ),
        child: Text(
          message,
          style: TextStyle(
            color: isMyMessage ? Colors.white : Colors.black87,
            fontSize: 16,
          ),
        ),
      ),
    );
  }

  Widget _buildSystemMessage(String message) {
    return Container(
      width: double.infinity,
      padding: const EdgeInsets.symmetric(vertical: 10, horizontal: 15),
      color: Colors.amber[100],
      child: Text(
        message,
        textAlign: TextAlign.center,
        style: const TextStyle(
          color: Colors.black87,
          fontSize: 14,
          fontStyle: FontStyle.italic,
        ),
      ),
    );
  }

  @override
  Widget build(BuildContext context) {
    return Scaffold(
      appBar: AppBar(
        title: const Text('Chat Room'),
        actions: [
          IconButton(
            icon: const Icon(Icons.logout),
            onPressed: () {
              Navigator.pushReplacementNamed(context, '/login');
            },
          ),
        ],
      ),
      body: Column(
        children: [
          // Display system messages
          if (_systemMessages.isNotEmpty)
            Container(
              color: Colors.amber[50],
              child: Column(
                children: _systemMessages
                    .map((message) => _buildSystemMessage(message))
                    .toList(),
              ),
            ),
          Expanded(
            child: ListView.builder(
              itemCount: _messages.length,
              reverse: true, // Show newest messages at the bottom
              itemBuilder: (context, index) {
                final message = _messages[_messages.length - 1 - index];
                final isMyMessage = message['user'] == userId.toString();
                return _buildMessageBubble(message['message']!, isMyMessage);
              },
            ),
          ),
          Padding(
            padding: const EdgeInsets.all(8.0),
            child: Row(
              children: [
                Expanded(
                  child: TextField(
                    controller: _messageController,
                    decoration: InputDecoration(
                      hintText: 'Type a message...',
                      border: OutlineInputBorder(
                        borderRadius: BorderRadius.circular(20),
                      ),
                      contentPadding: const EdgeInsets.symmetric(
                        vertical: 10,
                        horizontal: 15,
                      ),
                    ),
                  ),
                ),
                const SizedBox(width: 8),
                GestureDetector(
                  onTap: _sendMessage,
                  child: const CircleAvatar(
                    radius: 25,
                    child: Icon(Icons.send, color: Colors.white),
                    backgroundColor: Colors.blueAccent,
                  ),
                ),
              ],
            ),
          ),
        ],
      ),
    );
  }
}

Step 2: Modify Token Service
First, open pubspec.yaml, and add jwt decoder.
jwt_decoder: ^2.0.1Then open lib/services/token_service.dart and add a method to retrieve the user id from the token generated in the login process:
 static Future<String?> getUserIdFromToken() async {
    final token = await getToken();
    if (token != null) {
      Map<String, dynamic> decodedToken = JwtDecoder.decode(token);
      return decodedToken['id']?.toString();
    }
    return null;
  }
You can use this method in the chat_screen like this:
String? userIdFromToken = await TokenService.getUserIdFromToken();Step 2: Update Routes in Main App
Open lib/main.dart and set up routes for navigation:
import 'package:flutter/material.dart';
import 'package:secure_chat_flutter/screens/chat_screen.dart';
import 'package:secure_chat_flutter/screens/login_screen.dart';
import 'package:secure_chat_flutter/screens/register_screen.dart';

void main() {
  runApp(const MyApp());
}

class MyApp extends StatelessWidget {
  const MyApp({super.key});

  @override
  Widget build(BuildContext context) {
    return MaterialApp(
      debugShowCheckedModeBanner: false,
      title: 'Flutter App',
      theme: ThemeData(
        primarySwatch: Colors.blue,
      ),
      routes: {
        '/login': (context) => LoginScreen(),
        '/register': (context) => const RegisterScreen(),
        '/chat': (context) => ChatScreen(),
      },
      initialRoute: '/login',
    );
  }
}
7. Connecting the Flutter UI to SignalR
Step 1: Integrate SignalR Initialization
The SignalR service is already initialized in main.dart during app startup. This ensures the app connects to the SignalR server as soon as it launches.
Step 2: Modify the Login Screen to Connect SignalR
Update the LoginScreen (lib/screens/login_screen.dart) to initialize the SignalR connection upon successful login:
import 'package:secure_chat_flutter/services/signalr_service.dart';
import 'package:secure_chat_flutter/services/token_service.dart';

void _login() async {
    if (_formKey.currentState!.validate()) {
      setState(() {
        _isLoading = true;
      });

      try {
        final response = await http.post(
          Uri.parse('http://10.0.2.2:5221/api/user/authenticate'),
          headers: {'Content-Type': 'application/json'},
          body: jsonEncode({
            'username': _usernameController.text,
            'password': _passwordController.text,
          }),
        );

        if (response.statusCode == 200) {
          final responseBody = jsonDecode(response.body);
          setState(() {
            _token = responseBody['token'];
          });
          await TokenService.storeToken(_token!);
          await SignalRService.initialize();
          ScaffoldMessenger.of(context).showSnackBar(
            const SnackBar(content: Text('Login successful!')),
          );
          Navigator.pushReplacementNamed(context, '/chat');
        } else {
          ScaffoldMessenger.of(context).showSnackBar(
            const SnackBar(content: Text('Invalid credentials!')),
          );
        }
      } catch (e) {
        ScaffoldMessenger.of(context).showSnackBar(
          const SnackBar(content: Text('An error occurred. Please try again.')),
        );
      } finally {
        setState(() {
          _isLoading = false;
        });
      }
    }
  }
Step 3: Update Chat Sending Logic
Update SignalRService.sendMessage in lib/services/signalr_service.dart:
static void sendMessage(String user, String message) {
  connection.invoke("SendMessage", args: [user, message]);
}
8. Improve SignalR Server
Open SecureChatApp then navigate to ChatHub.cs. SecureChatApp is the .NET Core Web API project that we create on the first part of this series.

Download SignalR server backend from this article.
Modify OnConnectedAsync method:
    public override async Task OnConnectedAsync()
    {
        var userIdClaim = Context.User?.FindFirst("id");
        if (userIdClaim == null)
        {
            throw new UnauthorizedAccessException("User ID claim is missing in the token.");
        }

        var userId = int.Parse(userIdClaim.Value);

        var username = await _context.Users
            .Where(u => u.Id == userId)
            .Select(u => u.Username)
            .FirstOrDefaultAsync();

        username ??= "Guest";

        // Send a welcome message to the connected client
        await Clients.Caller.SendAsync("ReceiveMessage", "System", $"Welcome {username}, you are successfully connected to the chat!");

        await base.OnConnectedAsync();
    }
This function provides a welcoming message to users upon successfully establishing a connection to the SignalR server.
9. Testing the Full Application
Step 1: Run the ASP.NET Core Backend
- Open the backend project in Visual Studio.
- Run the application. Ensure the API is accessible at
http://localhost:5221. If you are using emulator you can access it at http://10.0.2.2:5221.
Step 2: Run the Flutter Application
- Open two emulators to simulate chat messages.
- Start the Flutter application by running the following command. This will build and run the apk on both opened devices.
flutter run -d all- Navigate through the following steps in the app:
- Register: Create a new account using the Registration screen.
- Login: Log in with your registered credentials.
- Chat: Access the chat room and send/receive messages.
Step 3: Validate Real-Time Messaging
- Open the Flutter app on two devices (real devices or simulators).
- Log in with different accounts on each device.
- Send messages from one device and observe them appearing in real-time on the other device.
Download Source Code
Download Source Code
To download the free source code from this tutorial, click the button below.
Important Notes:
- Ensure you have 7-Zip installed to extract the file. You can download 7-Zip here if you don’t already have it.
- Use the password freecodespot when prompted during extraction.
This source code is designed to work seamlessly with the steps outlined in this tutorial. If you encounter any issues or have questions, feel free to reach out in the comments section below.
Summary
Congratulations! You’ve built a fully functional, secure chat application that includes:
- User registration and authentication via JWT.
- Real-time messaging using SignalR.
- Persistent storage of chat messages in SQL Server.
- A Flutter front-end with login, registration, and chat screens.
This app demonstrates:
- Secure communication using JWT.
- Real-time interaction with SignalR.
- Integration of SQL Server with ASP.NET Core.
