
In this article, we will explore how to implement Firebase Authentication with React. We’ll walk you through the process, making it simple to integrate Firebase authentication services into your React apps. Whether you want to improve user login security or streamline authentication methods, this guide will give you with the necessary insights and direction.
- I. Creating a React App with react-router-dom Routing
- II. Installing and Setting Up Bootstrap
- III. Setting Up Firebase
- IV. Setting Up Firebase in React
- V. Create FireabaseAuth Class
- VI. Creating API Context in React
- VII. Creating Header Component with Navigation Menu
- VIII. Creating and Implementing Login Authentication in React
- IX. Creating and Implementing Register Function
- X. Create a Dummy HomePage
- XI. Create a Private Route
- XII. Configure App.js
- XIII. Running the Project
- XIV. Summary
Before we begin make sure you have the following installed on your local environment.
- Node.js and npm installed
- Visual Studio Code or any text editor you prefer.
You can refer to this article on how to get started with React on Windows.

A Comprehensive Beginner’s Guide for Building Dynamic Web Applications
I. Creating a React App with react-router-dom Routing
1. Create a new React app using create-react-app.
npx create-react-app react-login-demo2. Navigate into the created app directory.
cd react-login-demo3. Install react-router-dom package.
npm install react-router-domII. Installing and Setting Up Bootstrap
Now, let’s setup bootswatch theme. To do that, follow the steps below.
1. Install Bootstrap package.
npm install bootstrap2. Install bootswath theme cerulean
npm install bootswatch@5.1.3 cerulean3. Import Bootswatch the styles in your index.js file.
import 'bootswatch/dist/cerulean/bootstrap.min.css';Now, our bootswatch theme is ready, but before we proceed on creating the actual Login and Register UI, let’s setup first our firebase app.
III. Setting Up Firebase
To use the Firebase authentication on React we need to have an account and enable the corresponding authentication we want to Implement on our App. Which for this tutorial is Email and Password Authentication. To setup Firebase, follow the steps below.
Register/Login Firebase Console
1: Go to the Firebase Console (https://console.firebase.google.com/).
2: If you don’t have an account yet, Create an account by filling in your email and other necessary details needed during signup.
3. If you already have an account log in with your credential.
Create Firebase Project
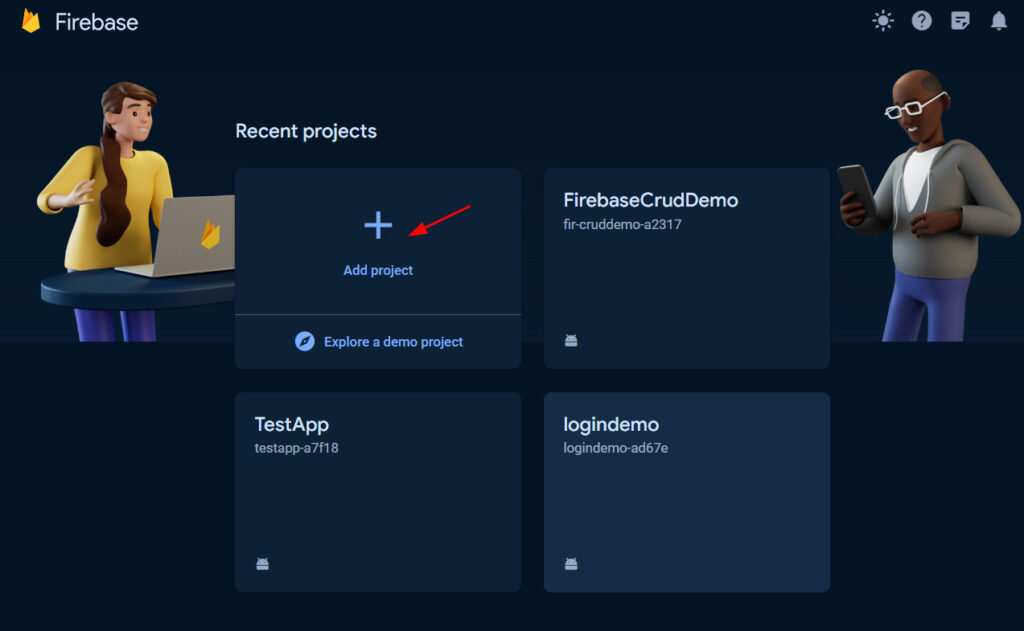
If you already have a Firebase account. Follow the steps below to create a Firebase project.
1. Add a Firebase project by clicking on the Add Project option.
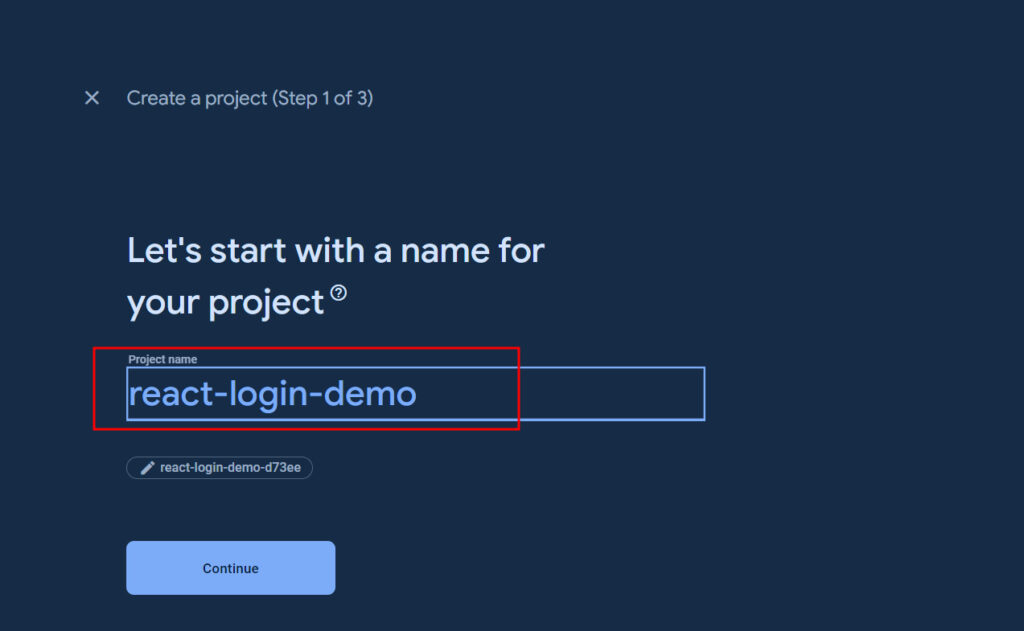
2. Name your project as react-login-demo or any name you prefer and then click continue to proceed.
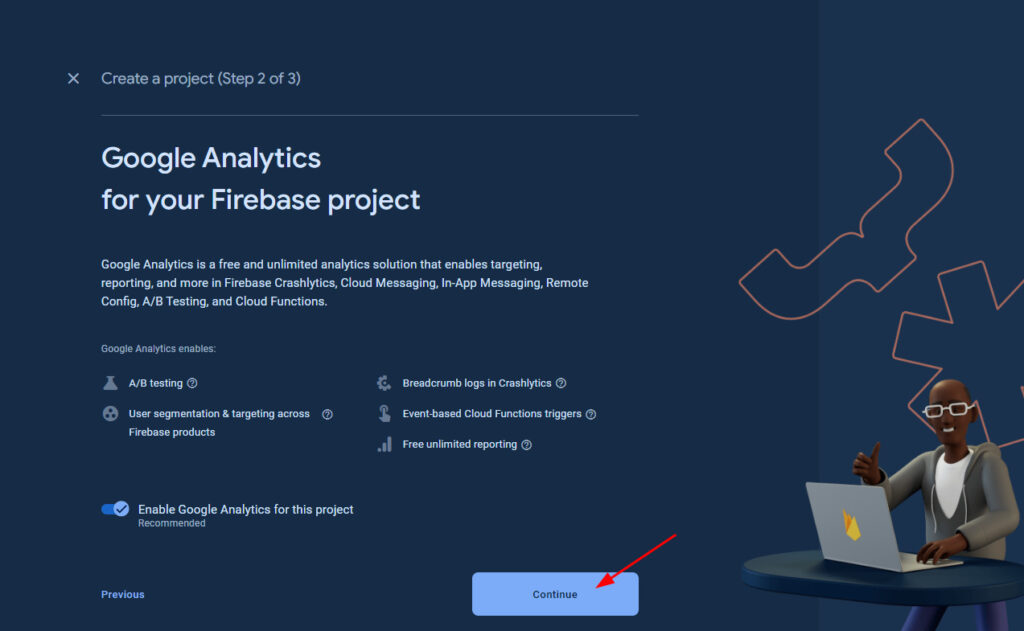
3. You will be asked to add Google Analytics to your project. We don’t need it for this demo project so you can disable it and click continue.
4. Once the project is completed, You will be prompted with this UI.

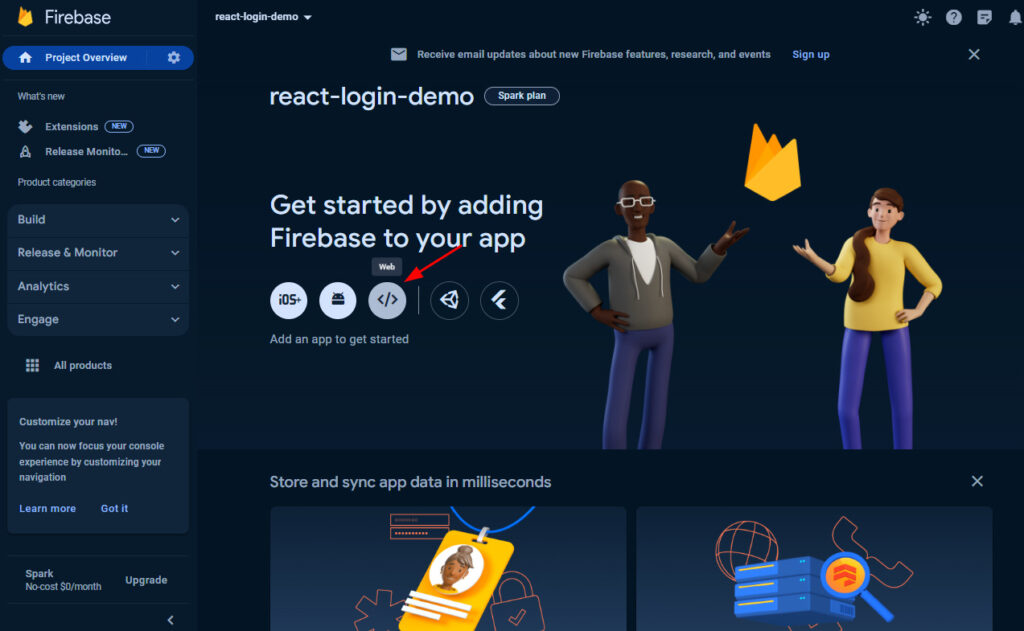
Create Firebase App
We are not quite done yet, we need to create a Firebase App. To do that, follow the steps below.
1. Open Firebase project react-login-demo.
2. Create a web app, by selecting the web app icon. See the image below for your reference
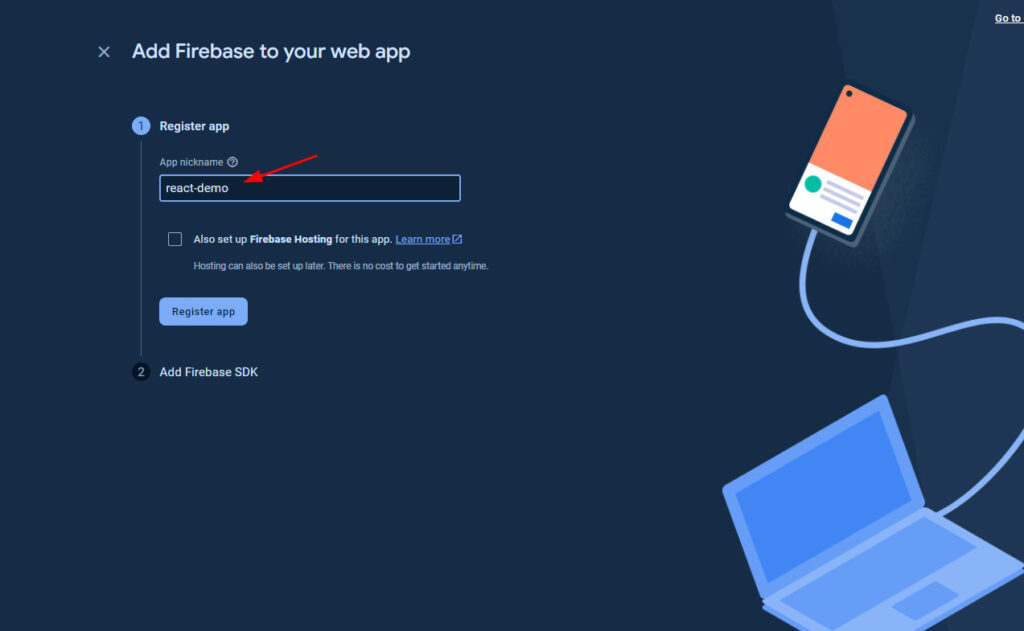
2. Named your app “react-demo” and click Register app.
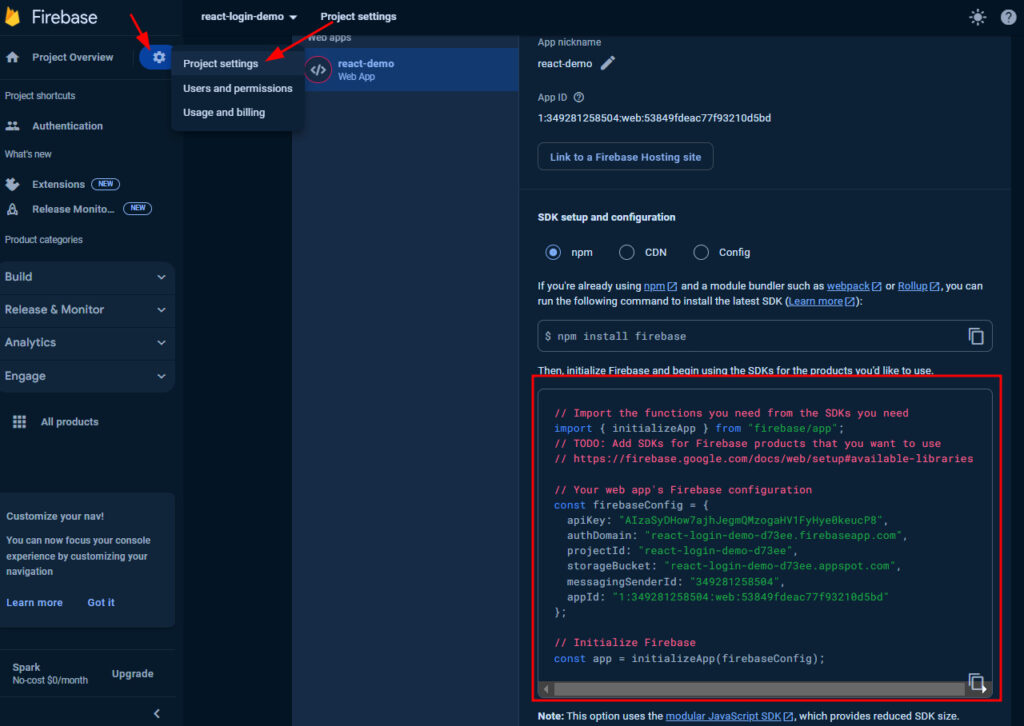
3. You will be prompted with the following instructions on how to install Firebase using npm command.
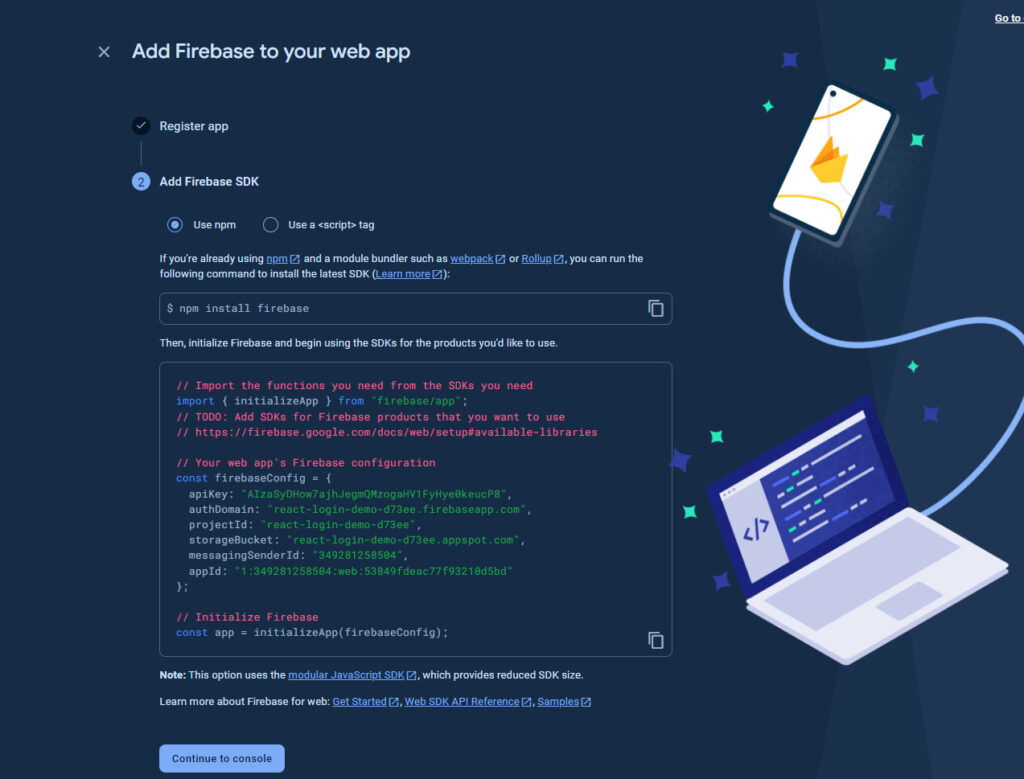
Take note of the code snippet given from the instruction, we need it later when we setup firebase on our react app.
Enable Firebase Authentication
Now, Firebase offers multiple authentication that we can use on our app. To enable it follow the steps below.
1. Inside your Firebase project(react-login-demo) open the Authentication page from the sidebar menu under Project shortcuts or you can expand the build menu and choose Authentication.

2. Choose the sign-in method and select Email/Password.
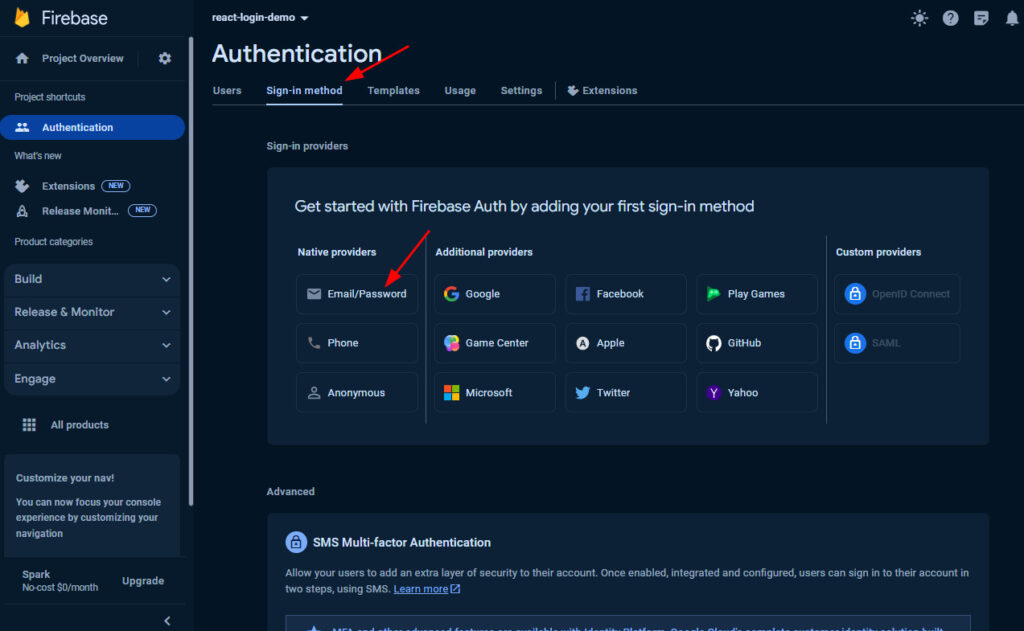
3. Toggle the slider to enable Email/Password authentication

Our Firebase app is ready, and we can now start setting up our react demo application.
IV. Setting Up Firebase in React
Let’s start configuring our react-login-demo app. Open your project with your favorite code editor, which for me I’ll use Visual Studio Code.
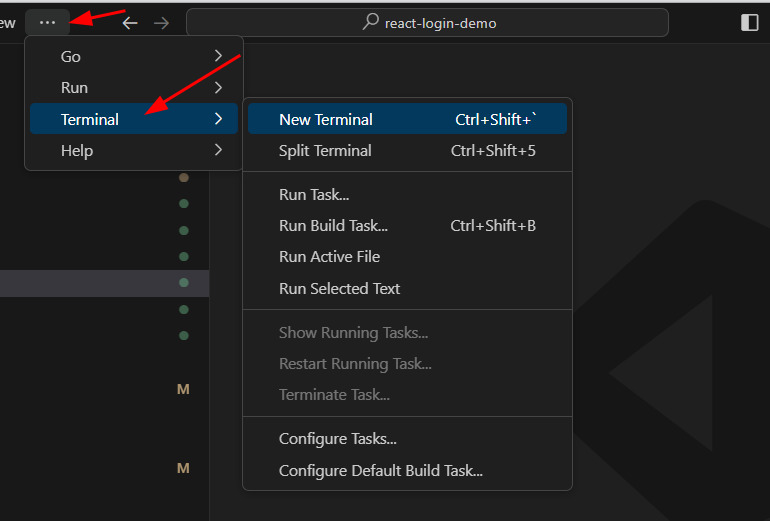
1. Once, your project is open in VSCode, Open a new Terminal by going to the menu bar and selecting New Terminal.
2. Install Firebase SDK using the following command.
npm install firebase
3. Create a firebase folder inside the src directory then create a new file firebase.js
4. Open the firebase.js file and initialize the firebase app. If you remember this code snippet was given when we created our Firebase app.
// Import the functions you need from the SDKs you need
import { initializeApp } from "firebase/app";
import {getAuth} from "firebase/auth"
// TODO: Add SDKs for Firebase products that you want to use
// https://firebase.google.com/docs/web/setup#available-libraries


// Your web app's Firebase configuration
const firebaseConfig = {
  apiKey: "AIzaSyDHow7ajhJegmQMzogaHV1FyHye0keucP8",
  authDomain: "react-login-demo-d73ee.firebaseapp.com",
  projectId: "react-login-demo-d73ee",
  storageBucket: "react-login-demo-d73ee.appspot.com",
  messagingSenderId: "349281258504",
  appId: "1:349281258504:web:53849fdeac77f93210d5bd"
};


// Initialize Firebase
const app = initializeApp(firebaseConfig);
const auth = getAuth(app);


export { app,auth };
You can manually find the code snippet for your app credential by going to project settings » General » react-demo.
V. Create FireabaseAuth Class
Now, we need to the Firebase method that we need for this demo app, which is the following.
- createUserWithEmailAndPassword » Responsible for new user registration
- signInWithEmailAndPassword » Signing In registered users
- signOut
To implement this method navigate back to src » firebase and create a new file firebaseAuth.js.
First, open the firebaseAuth.js file and add the following import.
import { createUserWithEmailAndPassword,signInWithEmailAndPassword } from "firebase/auth";
import {auth} from "./firebase";
This import allows us to use the createUserWithEmailAndPassword and signInWithEmailAndPassword from the Firebase auth and use the Firebase credential that we initialized inside the firebase.js file.
export const registerUserWithEmailAndPassword = async (email, password) => {
   return createUserWithEmailAndPassword(auth,email, password);
};


export const loginUserWithEmailAndPassword = async (email, password) =>{
   return signInWithEmailAndPassword(auth,email,password);
};


export const signOutUser = () => {
    return auth.signOut();
};
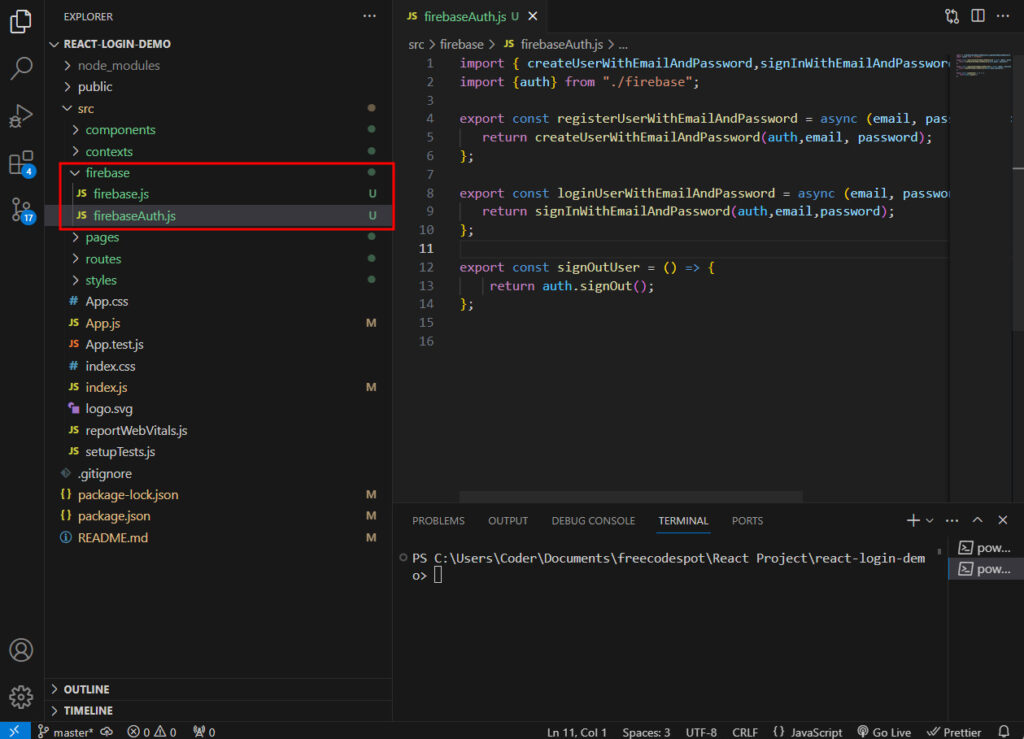
For your reference here’s the folder structure after I added the firebase configuration.
VI. Creating API Context in React
In React, using API context is like having a central hub for your application’s data and functions. It’s super handy because it allows different parts of your app to access this shared information without having to pass it down through every component manually.
To implement it on our demo app, follow the following steps.
1. Inside the src folder create a new folder name contexts, then create a file authContext.js
2. Open the authContext.js file and copy the following code snippet.
import React,{ useContext, useState,useEffect } from "react";
import { auth } from "../firebase/firebase";
import { onAuthStateChanged } from "firebase/auth";

const AuthContext = React.createContext();

export function useAuth(){
  return useContext(AuthContext);
}

export function AuthProvider({children}){
  const [currentUser, setCurrentUser] = useState(null);
  const [userLoggedIn, setUserLoggedIn] = useState(false);
  const [loading, setLoading] = useState(true);


useEffect(()=>{
     const unsubscribe = onAuthStateChanged(auth,initializeUser);
     return unsubscribe;
},[])

async function initializeUser(user){
  setLoading(true);
   if(user){
    setCurrentUser({...user});
    setUserLoggedIn(true);
   }else{
    setCurrentUser(null);
    setUserLoggedIn(false);
   }
   setLoading(false);
}


const value = {
  currentUser,
  userLoggedIn,
  loading
}


  return (
        <AuthContext.Provider value={value}>
          {children}
        </AuthContext.Provider>

    )
}
The code above sets up an authentication system for a React application using Firebase Authentication. It creates an AuthProvider component that manages the authentication state and provides it to other components using a context. The useAuth hook allows components to access the authentication state. The AuthProvider component initializes the authentication state, listens for changes in the authentication status using Firebase’s onAuthStateChanged, and updates the state accordingly. Overall, it simplifies the process of managing user authentication within a React application.
VII. Creating Header Component with Navigation Menu
Now, it is time to create the UI. Let’s start with the header. Start by following the steps below.
1. Create a folder named components inside the src folder.
2. Inside the components folder create another folder named Header.
3. Then create PublicHeader.js file inside the Header folder.
4. Open the PublicHeader.js file and copy the following snippet. This component will hold the navigation item for public users.
import React from 'react';
import { Nav } from 'react-bootstrap';
import '../../styles/styles.css';


const PublicHeader = () => {


  return (
    <Nav className="navbar navbar-expand-lg bg-primary" activeKey="/home">
          <Nav.Item>
            <Nav.Link href="/home">React Login Demo</Nav.Link>
          </Nav.Item>
          <Nav.Item>
            <Nav.Link href="/register">Register</Nav.Link>
          </Nav.Item>
          <Nav.Item>
            <Nav.Link href="/login">Login</Nav.Link>
          </Nav.Item>
    </Nav>
  );
};

export default PublicHeader;
5. Inside the Header folder create another file AuthorizedHeader.js. This component will hold the nav item for authorized users.
import React from 'react';
import { Nav } from 'react-bootstrap';
import '../../styles/styles.css';

const AuthorizedHeader = ({handleSignOut}) => {

  return (
    <Nav className="navbar navbar-expand-lg bg-primary" activeKey="/home">
          <Nav.Item>
            <Nav.Link href="/home">React Login Demo</Nav.Link>
          </Nav.Item>
          <Nav.Item>
            <Nav.Link onClick={handleSignOut}>LogOut</Nav.Link>
          </Nav.Item>
    </Nav>
  );
};

export default AuthorizedHeader;
6. Lastly, create a page folder inside src, then create a file named HeaderPage.js. This file will return the component header that was created in the previous step. Copy the following code snippet on your HeaderPage.js.
import React from 'react';
import PublicHeader from '../components/Header/PublicHeader';
import AuthorizedHeader from '../components/Header/AuthorizedHeader';
import { useNavigate } from 'react-router-dom';
import { signOutUser } from '../firebase/firebaseAuth';
import { useAuth } from '../contexts/authContext';


const HeaderPage = () => {
  const { loading,userLoggedIn } = useAuth();
  const navigate = useNavigate();
  const handleSignOut = async () => {
    console.log("test");
    try {
      await signOutUser();
      navigate('/login');
    } catch (error) {
      console.error('Error signing out:', error);
    }
  };


  return (

    <div>
       {userLoggedIn ? (
        <>
          {!loading &&  <AuthorizedHeader handleSignOut={handleSignOut} />}
        </>
      ) : (
        <>
         {!loading &&  <PublicHeader />}
        </>
      )}

    </div>

  );
};

export default HeaderPage;
Now, our header is set but we are not quite done yet, we still need to set the App to render this header page. Before that let’s create all the necessary UI needed for this demo.
VIII. Creating and Implementing Login Authentication in React
Let’s add the login UI. Simply follow the following steps.
1. Inside src » components create a new folder Login then create LoginForm.js file.
2. Open the newly created file and copy the code snippet below. This will return html template for our login form.
import React from 'react';

const LoginForm = ({ formData, errors, handleChange, handleSubmit }) => {
  return (
    <div className="card-body">
      <form onSubmit={handleSubmit}>
        <div className="mb-3">
          <label htmlFor="email" className="form-label">Email</label>
          <input type="email" className={`form-control ${errors.email && 'is-invalid'}`} id="email" name="email" value={formData.email} onChange={handleChange} />
          {errors.email && <div className="invalid-feedback">{errors.email}</div>}
        </div>
        <div className="mb-3">
          <label htmlFor="password" className="form-label">Password</label>
          <input type="password" className={`form-control ${errors.password && 'is-invalid'}`} id="password" name="password" value={formData.password} onChange={handleChange} />
          {errors.password && <div className="invalid-feedback">{errors.password}</div>}
        </div>
        <button type="submit" className="btn btn-primary">Submit</button>
      </form>
    </div>
  );
};

export default LoginForm;
3. Create a new folder named auth inside the pages folder then create a file LoginPage.js.
4. Open LoginPage.js and copy the code snippet below.
import React, { useState, useEffect } from 'react';
import LoginForm from '../../components/Login/LoginForm';
import { loginUserWithEmailAndPassword } from "../../firebase/firebaseAuth";
import { useNavigate } from 'react-router-dom';
import {useAuth} from '../../contexts/authContext'
const LoginPage = () => {
const {userLoggedIn} = useAuth();
const navigate = useNavigate();
const [formData, setFormData] = useState({
email: '',
password: ''
});
const [errors, setErrors] = useState({
email: '',
password: ''
});
useEffect(() => {
if (userLoggedIn) {
navigate('/home'); // Redirect to the home page
}
}, [userLoggedIn, navigate]);
const handleChange = (e) => {
const { name, value } = e.target;
setFormData({
...formData,
[name]: value
});
setErrors({
...errors,
[name]: ''
});
};
const handleSubmit = async (e) => {
e.preventDefault();
let formValid = true;
const newErrors = { ...errors };
if (!formData.email) {
newErrors.email = 'Email is required';
formValid = false;
}
if (!formData.password) {
newErrors.password = 'Password is required';
formValid = false;
}
if (formValid) {
try {
await loginUserWithEmailAndPassword(formData.email, formData.password);
navigate('/home');
} catch (error) {
console.error('Error:', error.message);
setErrors({ email: 'Invalid credentials', password: 'Invalid credentials' });
}
} else {
setErrors(newErrors);
}
};
return (
<div className="container mt-5">
<div className="row justify-content-center">
<div className="col-md-6">
<div className="card">
<LoginForm formData={formData} errors={errors} handleChange={handleChange} handleSubmit={handleSubmit} />
</div>
</div>
</div>
</div>
);
};
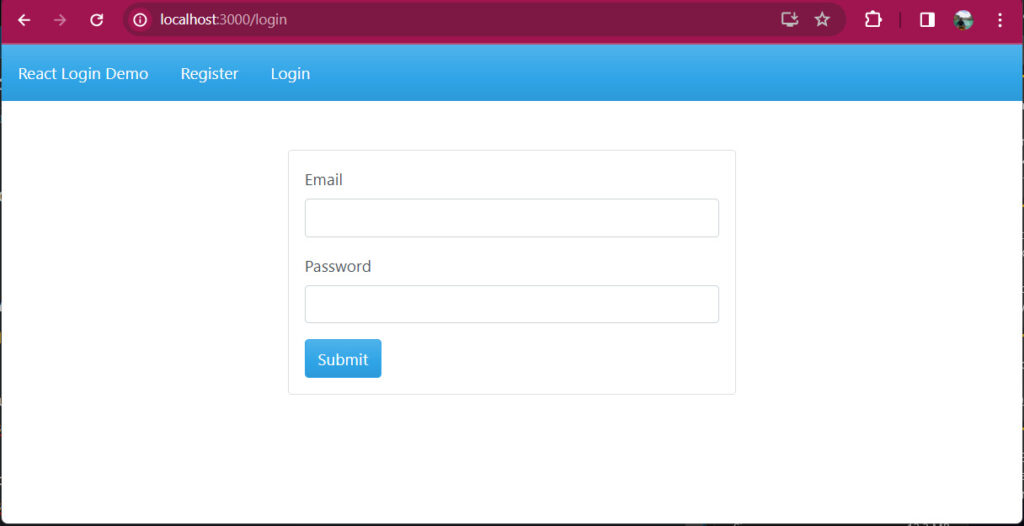
export default LoginPage;Here’s the final output of this login page using the bootswatch theme.
IX. Creating and Implementing Register Function
Now, let’s create the Registration form.
1. Create another folder named Register inside the components folder
2. Inside the Register folder create a file RegisterForm.js. This file will return the HTML registration form.
3. Open the file and use the code below.
import React from 'react';

const RegisterForm = ({ formData, errors, handleChange, handleSubmit }) => {
  return (
            <div className="card-body">
              <form onSubmit={handleSubmit}>
                <div className="mb-3">
                  <label htmlFor="email" className="form-label">Email</label>
                  <input type="email" className={`form-control ${errors.email && 'is-invalid'}`} id="email" name="email" value={formData.email} onChange={handleChange} />
                  {errors.email && <div className="invalid-feedback">{errors.email}</div>}
                </div>
                <div className="mb-3">
                  <label htmlFor="password" className="form-label">Password</label>
                  <input type="password" className={`form-control ${errors.password && 'is-invalid'}`} id="password" name="password" value={formData.password} onChange={handleChange} />
                  {errors.password && <div className="invalid-feedback">{errors.password}</div>}
                </div>
                <div className="mb-3">
                  <label htmlFor="confirm_password" className="form-label">Confirm Password</label>
                  <input type="password" className={`form-control ${errors.confirm_password && 'is-invalid'}`} id="confirm_password" name="confirm_password" value={formData.confirm_password} onChange={handleChange} />
                  {errors.confirm_password && <div className="invalid-feedback">{errors.confirm_password}</div>}
                </div>
                <button type="submit" className="btn btn-primary">Submit</button>
              </form>
            </div>
  );
};

export default RegisterForm;
4. Now, create the RegisterPage.js inside src » pages » auth and use the code snippet below.
import React, { useState, useEffect } from 'react';
import { registerUserWithEmailAndPassword} from "../../firebase/firebaseAuth";
import { useAuth } from '../../contexts/authContext';
import RegisterForm from '../../components/Register/RegisterForm';
import { useNavigate } from 'react-router-dom';
const RegisterPage = () => {
const { userLoggedIn } = useAuth();
const navigate = useNavigate();
const [formData, setFormData] = useState({
email: '',
password: '',
confirm_password: ''
});
const [errors, setErrors] = useState({
email: '',
password: '',
confirm_password: ''
});
useEffect(() => {
if (userLoggedIn) {
navigate('/home'); // Redirect to the home page
}
}, [userLoggedIn, navigate]);
const handleChange = (e) => {
const { name, value } = e.target;
setFormData({
...formData,
[name]: value
});
// Reset error message when user starts typing again
setErrors({
...errors,
[name]: ''
});
};
const handleSubmit = async (e) => {
e.preventDefault();
// Simple validation example, you can add more complex validation here
let formValid = true;
const newErrors = { ...errors };
if (!formData.email) {
newErrors.email = 'Email is required';
formValid = false;
}
if (!formData.password) {
newErrors.password = 'Password is required';
formValid = false;
}
if (!formData.confirm_password) {
newErrors.confirm_password = 'Confirm Password is required';
formValid = false;
}
if (formValid) {
// Handle form submission
await registerUserWithEmailAndPassword(formData.email, formData.password);
console.log('Form submitted:', formData);
} else {
// Update state with validation errors
setErrors(newErrors);
}
};
return (
<div className="container mt-5">
<div className="row justify-content-center">
<div className="col-md-6">
<div className="card">
<RegisterForm formData={formData} errors={errors} handleChange={handleChange} handleSubmit={handleSubmit} />
</div>
</div>
</div>
</div>
);
};
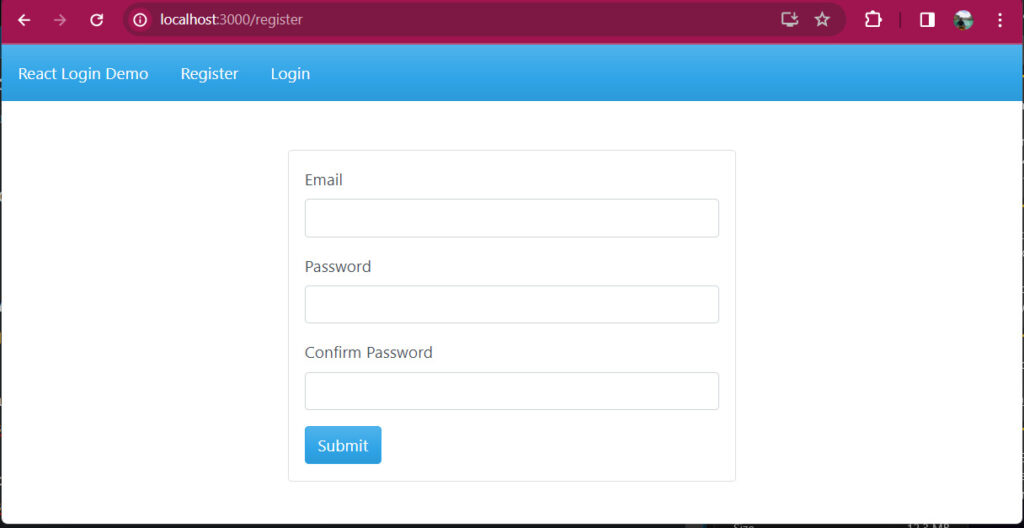
export default RegisterPage;Here’s the final output of this registration page using bootswatch theme.
X. Create a Dummy HomePage
We also need a dummy page to display after a user successfully login, so create a Home.js file inside the pages folder.
import React from 'react';
import { useAuth } from '../contexts/authContext';
const HomePage = () => {
const { currentUser } = useAuth();
console.log(currentUser);
return (
<div className="container mt-5">
<div className="row justify-content-center">
<div className="col-md-6">
<div className="card">
<h2>Welcome {currentUser.email}</h2>
</div>
</div>
</div>
</div>
);
};
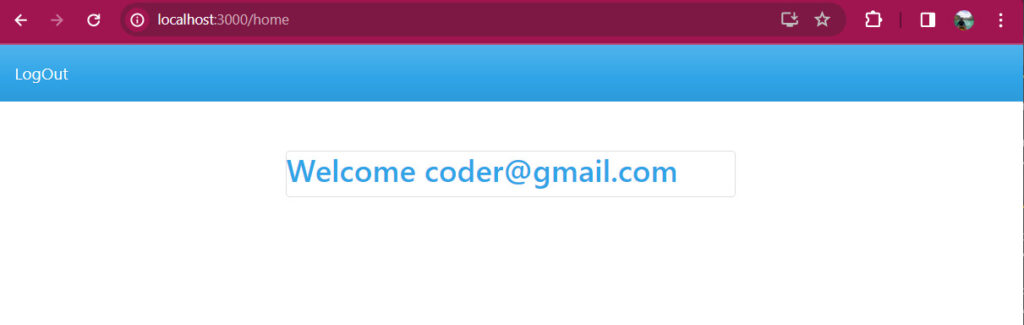
export default HomePage;This is what it looks like:
XI. Create a Private Route
To limit access to our dummy Home page we need to create a custom class. We will only allow authenticated users to access this route. To do that, create a routes folder inside src and create a file PrivateRoute.js.
Open the file and copy the code below.
import React from 'react';
import { Navigate, Outlet } from 'react-router-dom';
import { useAuth } from '../contexts/authContext';
import '../styles/styles.css'

const PrivateRoute = () => {
  const { userLoggedIn,loading } = useAuth();

  if (loading) {
    return <div class="loader"></div>;
  }

  return userLoggedIn ? <Outlet /> : <Navigate to="/login" />;
};

export default PrivateRoute;
XII. Configure App.js
Now, that we have made all our UI and finished setting the Firebase configuration, let’s configure our app to use all the pages and Authentication we created in the previous step. Open App.js inside the src folder.
1. Let’s start by importing the classes that we need.
import React from 'react';
import { BrowserRouter as Router, Route, Routes } from 'react-router-dom';
import HeaderPage from './pages/HeaderPage';
import LoginPage from './pages/auth/LoginPage';
import RegisterPage from './pages/auth/RegisterPage';
import { AuthProvider } from './contexts/authContext';
import HomePage from './pages/Home';
import PrivateRoute from './routes/PrivateRoute';
2. Then we can use the authContext by wrapping the entire application within the AuthProvider component. This will allow us to access the auth context from within our pages and any other child component inside.
<AuthProvider>
        <div className="App">
          <div className="container">

          </div>
        </div>
</AuthProvider>
3. Then we can add the Header using the code below.
<AuthProvider>
        <div className="App">
          <HeaderPage />
          <div className="container">

          </div>
        </div>
    </AuthProvider>
4. Now, let’s add all the other routes using the React router.
<AuthProvider>
      <Router>
        <div className="App">
          <HeaderPage />
          <div className="container">
          <Routes>
          <Route path="/login" element={<LoginPage />} />
          <Route path="/" element={<LoginPage />} />
          <Route path="/register" element={<RegisterPage />} />
          <Route path="/home" element={<PrivateRoute />}>
          <Route path="" element={<HomePage />} />
          </Route>
        </Routes>
          </div>
        </div>
      </Router>
    </AuthProvider>
As you observe above we also applied the PrivateRoute for the /home path.
This is the final code inside app.js.
import React from 'react';
import { BrowserRouter as Router, Route, Routes } from 'react-router-dom';
import HeaderPage from './pages/HeaderPage';
import LoginPage from './pages/auth/LoginPage';
import RegisterPage from './pages/auth/RegisterPage';
import { AuthProvider } from './contexts/authContext';
import HomePage from './pages/Home';
import PrivateRoute from './routes/PrivateRoute';


function App() {
  return (
    <AuthProvider>
      <Router>
        <div className="App">
          <HeaderPage />
          <div className="container">
          <Routes>
          <Route path="/login" element={<LoginPage />} />
          <Route path="/" element={<LoginPage />} />
          <Route path="/register" element={<RegisterPage />} />
          <Route path="/home" element={<PrivateRoute />}>
          <Route path="" element={<HomePage />} />
          </Route>
        </Routes>
          </div>
        </div>
      </Router>
    </AuthProvider>
  );
}

export default App;
XIII. Running the Project
Now, we are all set. Run the application using the command below.
npm start
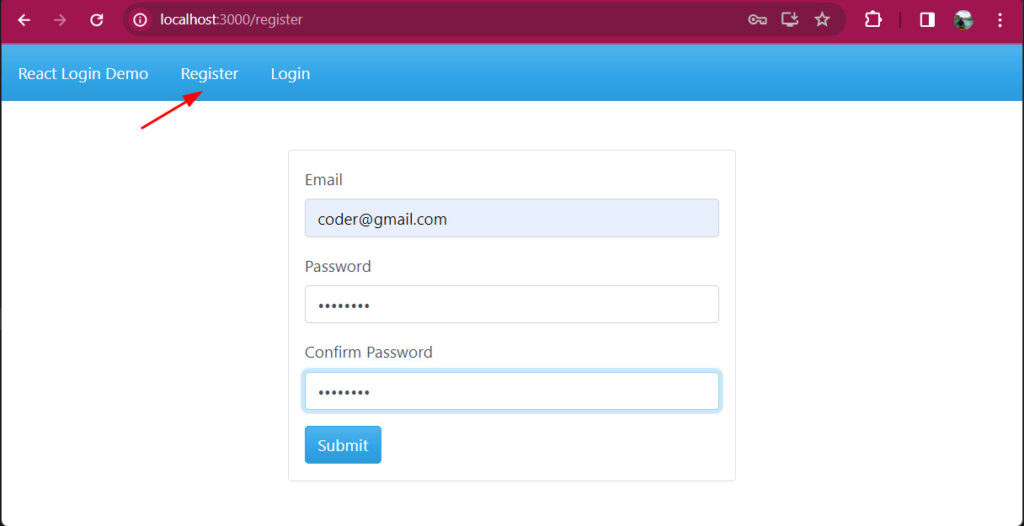
1. Click Register on the menu and try to register a new user.
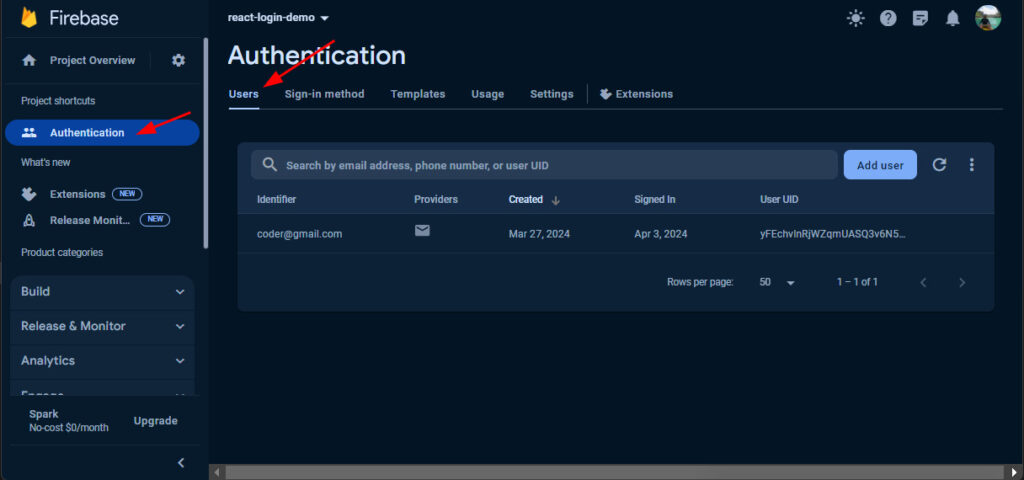
2. After you successfully register a new user, you can verify it by opening your Firebase dashboard navigating to the Authentication tab, and look the Users tab.
Now, you can try the login and signout functions.
XIV. Summary
This guide covers the basics of integrating Firebase Authentication with a React application. Each step outlines the process, from setting up the environment to implementing authentication features, allowing you to easily incorporate Firebase Authentication into your React projects.
This is pretty simple implementation and still have a lot improvement needed but hopefully you get the idea and will be able to help you on your React journey. Thank you for reading!
Keep Coding!
To download free source code from this tutorial, you can use the button below.
Note: Extract the file using 7Zip and use password: freecodespot