In this article, we will be building an Inventory Management App with Laravel Livewire. Laravel Livewire is a powerful full-stack framework for Laravel that allows you to build dynamic interfaces without leaving the comfort of Laravel. We will walk through the process of creating a CRUD (Create, Read, Update, Delete) application for managing an inventory using Laravel Livewire. This inventory app will allow you to keep track of products, their quantities, and other relevant details.
Before we start, make sure you have the following installed:
I. Setting Up the Project
1. Create a New Laravel Project
First, let’s create a new Laravel project. Open your terminal and run:
composer create-project --prefer-dist laravel/laravel inventory-appcd inventory-app2. Install Livewire
Next, we need to install Livewire. Run the following command in your project directory:
composer require livewire/livewire3. Set Up the Database
Configure your database by updating the .env file with your database details:
DB_CONNECTION=mysql
DB_HOST=127.0.0.1
DB_PORT=3306
DB_DATABASE=inventory_db
DB_USERNAME=root
DB_PASSWORD=
Then, create a database with the name inventory_db (or whatever name you choose).
4. Create a Product Model and Migration
Let’s create a Product model and its corresponding migration file:
php artisan make:model Product -mOpen the migration file in database/migrations and define the schema for the products table:
Schema::create('products', function (Blueprint $table) {
            $table->id();
            $table->foreignIdFor(\App\Models\User::class);
            $table->string('name');
            $table->text('description')->nullable();
            $table->integer('quantity');
            $table->timestamps();
        });
Run the migration to create the table:
php artisan migrateThis command will execute all the migration files and create the database for us. If the database you set in your .env config is new then you will be prompted with this message, asking if you will allow the process to create the database for you.

Type yes if you agree and you will be able to check the migration file that is executed at the end of the process. See the image below for reference.
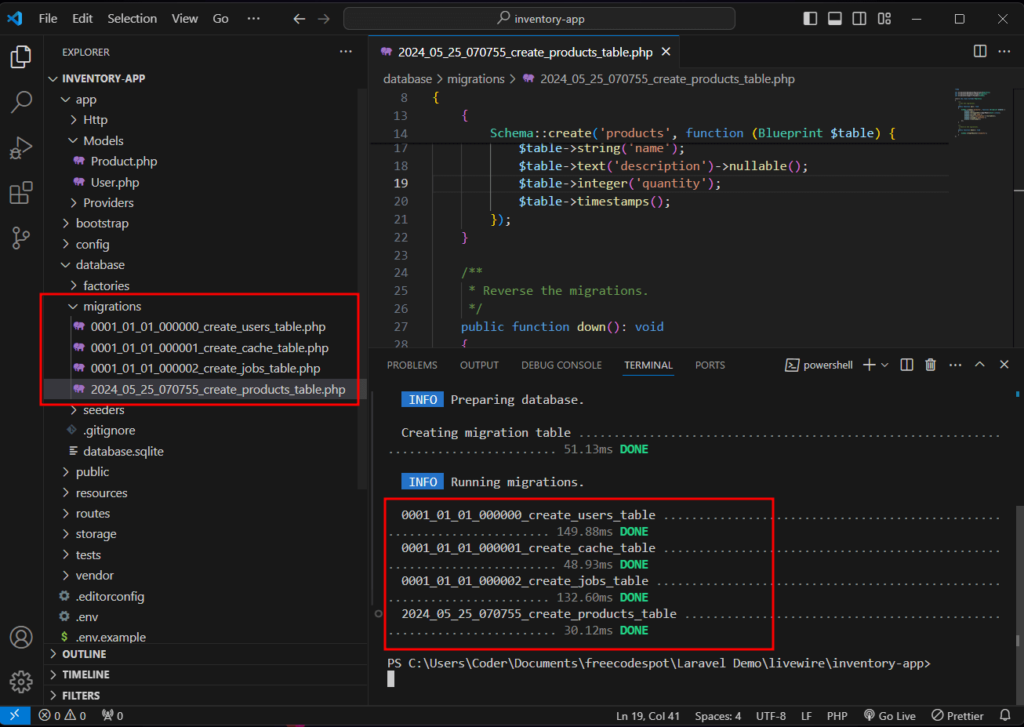
You can verify the database by opening your MySql server and look for your database name which in my case is inventory_db. Below are all the initial tables created including the products table we added in the previous steps.

5. Create Product Model fillable Columns
Now, we need to set a fillable column for the Product Model. Open app/Models/Product.php then add the following line.
protected $fillable = [
        'user_id',
        'name',
        'description',
        'quantity'
    ];
II. Create Login Authentication
To make this a more real-life scenario, let’s create a login authentication using Laravel breeze. Laravel Breeze is a simple implementation of all of Laravel’s authentication features, which include login, registration, password reset, email verification, and password confirmation.
1. Install Laravel Breeze
Run the following command to install Laravel Breeze using Composer.
composer require laravel/breeze --devThen we can implement it in our project using the following command.
php artisan breeze:installYou will be prompted with this option. Select Livewire by typing the option(livewire) and press enter on your keyboard

To proceed answer the succeeding option with your preference. For this demo, I’ll use dark mode support.

Then wait for the process to finish and afterward run the following command.
php artisan serveThis is how my App looks like at this time.
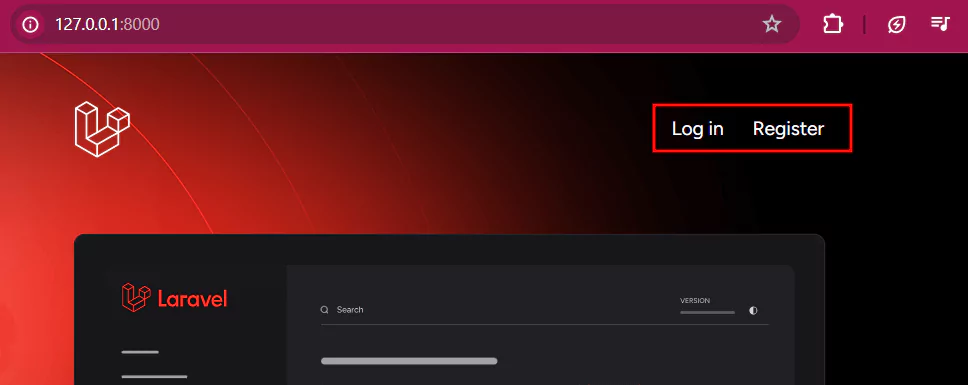
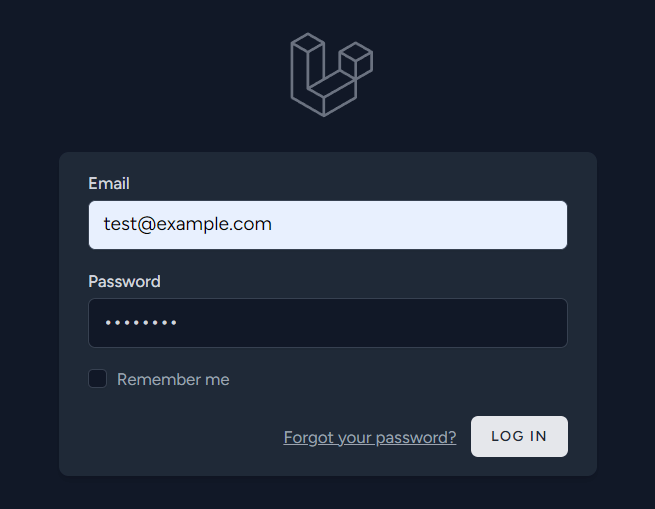
2. Create a Test Account
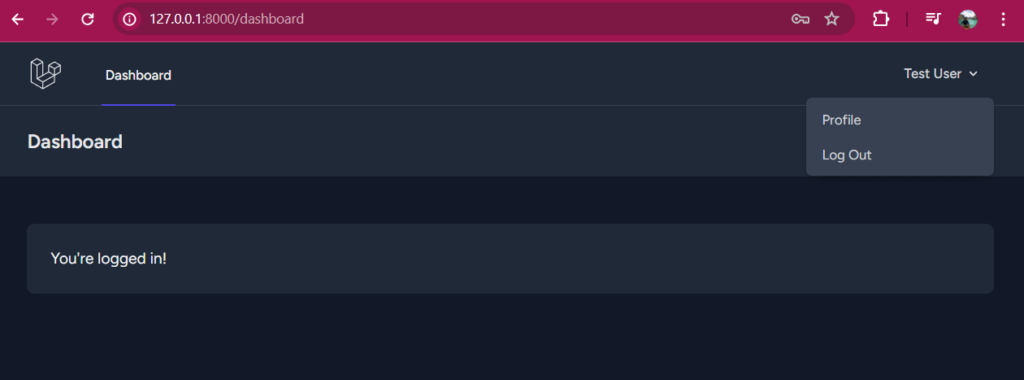
Now, you will be able to see the login and register menu. By default Laravel has a test user in place, to check you can navigate to database » seeders » DatabaseSeeder.php. Run the following command to activate this user and add it to your database.
php artisan db:seedThen you can use the following credentials to log in:
User: test@example.com
Password: password
After logging in, you will only see a Dashboard in the Menu at the moment.
III. Creating the Livewire Component
1. Create a Livewire Component
Generate a Livewire component for managing products:
php artisan make:livewire ProductComponentThis command creates two files: ProductComponent.php in app/Http/Livewire and product-component.blade.php in resources/views/livewire.
2. Implementing CRUD Operations
Open ProductComponent.php and add the necessary properties and methods:
<?php


namespace App\Livewire;


use Livewire\Component;
use App\Models\Product;
use Livewire\Attributes\Layout;
use Livewire\WithPagination;


#[Layout('layouts.app')]
class ProductComponent extends Component
{
    use WithPagination;
    public $name, $description, $quantity, $product_id;
    public $isOpen = 0;
    public $modalText = '';


    public function render()
    {
        $products = Product::where('user_id', auth()->user()->id)->paginate(5);
        return view('livewire.product-component',[
            'products' => $products
        ]);
    }


    public function create()
    {
        $this->resetInputFields();
        $this->openModal();
        $this->modalText = "Create";
    }


    public function openModal()
    {
        $this->isOpen = true;
        $this->dispatch('modal-open');
    }


    public function closeModal()
    {
        $this->isOpen = false;
        $this->dispatch('modal-close');
    }


    private function resetInputFields()
    {
        $this->name = '';
        $this->description = '';
        $this->quantity = '';
        $this->product_id = '';
    }


    public function store()
    {
        $this->validate([
            'name' => 'required',
            'quantity' => 'required|integer',
        ]);


        Product::updateOrCreate(['id' => $this->product_id], [
            'user_id' => auth()->id(),
            'name' => $this->name,
            'description' => $this->description,
            'quantity' => $this->quantity,
        ]);

        session()->flash(
            'message',
            $this->product_id ? 'Product Updated Successfully.' : 'Product Created Successfully.'
        );


        $this->closeModal();
        $this->resetInputFields();
    }


    public function edit($id)
    {
        $product = Product::findOrFail($id);
        $this->product_id = $id;
        $this->name = $product->name;
        $this->description = $product->description;
        $this->quantity = $product->quantity;
        $this->modalText = "Edit";
        $this->openModal();
    }


    public function delete($id)
    {
        Product::find($id)->delete();
        session()->flash('message', 'Product Deleted Successfully.');
    }
}
Here are the details on the code used above:
- Layout Attribute: The #[Layout(‘layouts.app’)] attribute specifies that this component will use the layouts.app layout.
- render(): This method is responsible for generating the view.
- It retrieves a paginated list of products belonging to the authenticated user.
- Returns the livewire.product-component view, passing the retrieved products to the view.
- create(): This method prepares the component for creating a new product.
- openModal() and closeModal(): These methods control the modal’s visibility and dispatch corresponding events (modal-open and modal-close).
- store(): This method handles storing (creating or updating) a product.
- edit(): This method prepares the component for editing an existing product.
- delete(): This method deletes a product by ID and sets a flash message indicating success.
3. Create Blade View for Livewire Component
Next, open product-component.blade.php and add the following code:
<div class="py-12">
    <div class="max-w-7xl mx-auto sm:px-6 lg:px-8">
        <div class="bg-white dark:bg-gray-800 overflow-hidden shadow-sm sm:rounded-lg p-5">
            @if (session()->has('message'))
                <div class="p-4 mb-4 text-sm text-green-800 rounded-lg bg-green-50 dark:bg-gray-800 dark:text-green-400"
                    role="alert">
                    <span class="font-medium"> {{ session('message') }}</span>
                </div>
            @endif
            <div class="float-right">
                <button wire:click="create()" class="bg-blue-500 hover:bg-blue-700 text-white font-bold py-2 px-4 rounded">Create Product</button>
            </div>
            @if ($isOpen)
                @include('livewire.create')
            @endif
            <table class="table-auto w-full text-white">
                <thead>
                    <tr>
                        <th class="px-4 py-2">
                            <div class="flex items-center">ID</div>
                        </th>
                        <th class="px-4 py-2">
                            <div class="flex items-center">Name</div>
                        </th>
                        <th class="px-4 py-2">
                            <div class="flex items-center"></div>
                        </th>
                        <th class="px-4 py-2">
                            <div class="flex items-center"></div>
                        </th>
                        <th class="px-4 py-2">
                            <div class="flex items-center">Actions</div>
                        </th>
                    </tr>
                </thead>
                <tbody>
                    @foreach ($products as $product)
                        <tr>
                            <td class="border px-4 py-2">{{ $product->id }}</td>
                            <td class="border px-4 py-2">{{ $product->name }}</td>
                            <td class="border px-4 py-2">{{ $product->description }}</td>
                            <td class="border px-4 py-2">{{ $product->quantity }}</td>
                            <td class="border px-4 py-2">
                                <button wire:click="edit({{ $product->id }})" class="bg-blue-500 hover:bg-blue-700 text-white text-sm font-bold py-1 px-2 rounded">Edit</button>
                                <button wire:click="delete({{ $product->id }})" class="bg-red-500 hover:bg-red-700 text-white text-sm font-bold py-1 px-2 rounded">Delete</button>
                            </td>
                        </tr>
                    @endforeach
                </tbody>
            </table>
        </div>
        <div class="mt-4">
           {{ $products->links() }}
        </div>
    </div>
</div>
4. Create new Blade Template
Create a new Blade view file create.blade.php in the resources/views/livewire directory:
<div class="fixed z-10 inset-0 overflow-y-auto @if(!$isOpen) hidden @endif">
<div class="flex items-end justify-center min-h-screen pt-4 px-4 pb-20 text-center sm:block sm:p-0">
<div class="fixed inset-0 transition-opacity" aria-hidden="true">
<div class="absolute inset-0 bg-gray-500 opacity-75"></div>
</div>
<span class="hidden sm:inline-block sm:align-middle sm:h-screen" aria-hidden="true"></span>
<div class="inline-block align-bottom bg-white rounded-lg px-4 pt-5 pb-4 text-left overflow-hidden shadow-xl transform transition-all sm:my-8 sm:align-middle sm:max-w-lg sm:w-full sm:p-6">
<div class="sm:flex sm:items-start">
<div class="w-full mt-3 text-center sm:mt-0 sm:text-left">
<h3 class="text-lg leading-6 font-medium text-gray-900" id="modal-title">
{{$modalText}} Product
</h3>
<div class="mt-2">
<form>
<div class="mb-4">
<label for="name" class="block text-gray-700 text-sm font-bold mb-2">Name</label>
<input type="text" id="name" wire:model="name" class="shadow appearance-none border rounded w-full py-2 px-3 text-gray-700 leading-tight focus:outline-none focus:shadow-outline">
@error('name') <span class="text-red-500 text-xs">{{ $message }}</span> @enderror
</div>
<div class="mb-4">
<label for="description" class="block text-gray-700 text-sm font-bold mb-2">Description</label>
<textarea id="description" wire:model="description" class="shadow appearance-none border rounded w-full py-2 px-3 text-gray-700 leading-tight focus:outline-none focus:shadow-outline"></textarea>
@error('description') <span class="text-red-500 text-xs">{{ $message }}</span> @enderror
</div>
<div class="mb-4">
<label for="quantity" class="block text-gray-700 text-sm font-bold mb-2">Quantity</label>
<input type="text" id="quantity" wire:model="quantity" class="shadow appearance-none border rounded w-full py-2 px-3 text-gray-700 leading-tight focus:outline-none focus:shadow-outline">
@error('quantity') <span class="text-red-500 text-xs">{{ $message }}</span> @enderror
</div>
<div class="flex items-center justify-between">
<button type="button" wire:click.prevent="store()" class="bg-blue-500 hover:bg-blue-700 text-white font-bold py-2 px-4 rounded focus:outline-none focus:shadow-outline">Save</button>
<button type="button" wire:click="closeModal" class="bg-gray-500 hover:bg-gray-700 text-white font-bold py-2 px-4 rounded focus:outline-none focus:shadow-outline">Cancel</button>
</div>
</form>
</div>
</div>
</div>
</div>
</div>
</div>IV. Integrating Livewire with Laravel
1: Setting Up Routes
Open routes/web.php and add the route for the product component:
use App\Livewire\ProductComponent;

Route::get('products', ProductComponent::class)
        ->middleware(['auth'])
        ->name('products');
This route will only be accessible to authenticated users.
2: Update Layout File
Include Livewire styles and scripts in your main layout file. (resources/views/layouts/app.blade.php):
To do that, add this line inside the <head> section.
@livewireStylesAnd add the livewire script before the end of </body> tag
@livewireScripts3: Add Product Menu
Now, add our product route into our App by opening the navigation layout inside resources » views » livewire » layout » navigation.blade.php.
Add the following line after the Dashboard navigation:
<div class="hidden space-x-8 sm:-my-px sm:ms-10 sm:flex">
                    <x-nav-link :href="route('products')" :active="request()->routeIs('products')" wire:navigate>
                        {{ __('Products') }}
                    </x-nav-link>
                </div>
V. Running the Application
Start the Laravel development server:
1. Open a new terminal in VSCode and run the following command.
php artisan serve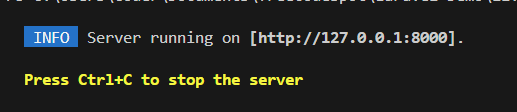
2. If you use Laravel version 11.x and above, the project uses Vite by default. This means you will need to run an additional command to compile your local development assets.
npm run dev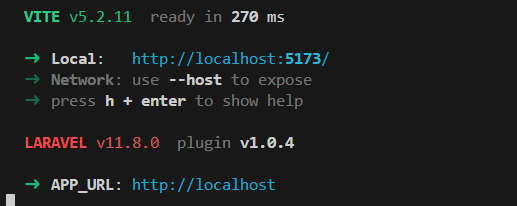
3. Navigate to http://localhost:8000 in your browser. You should be able to see the default welcome page which we did not modify but just added a login authentication using Laravel Breeze.
4. Login using the default test account:
- Username: test@example.com
- Password: password
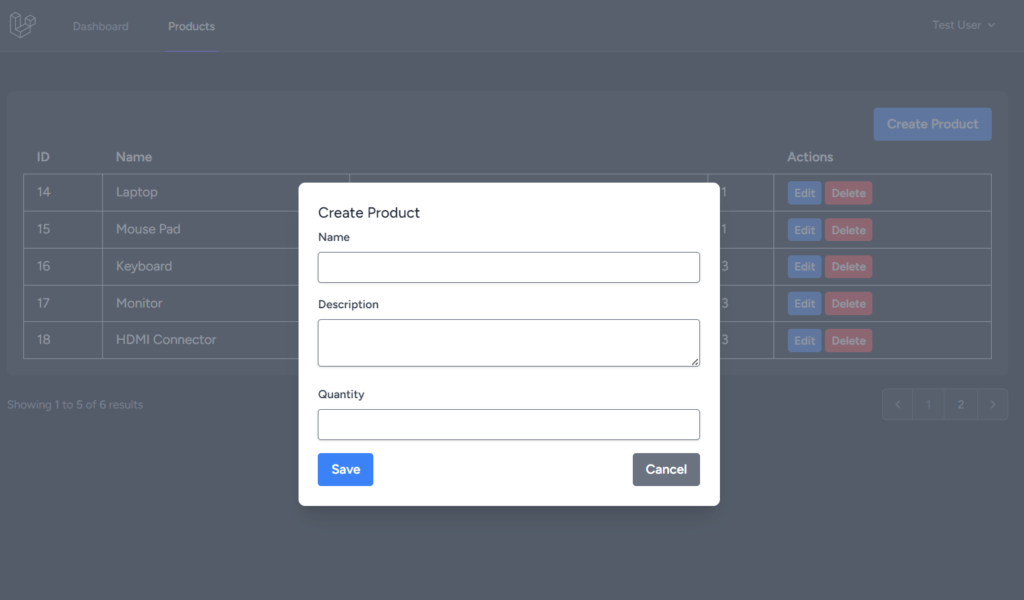
5. You should see the product management interface where you can create, view, update, and delete products.
Now to download our free source code from this tutorial, you can use the button below.
Note: Extract the file using 7Zip and use password: freecodespot
VI. Conclusion
In this article, we built a simple inventory management application using Laravel Livewire and added user authentication using Laravel Breeze. Livewire simplifies the process of building dynamic interfaces by handling the communication between the client and server seamlessly. With this foundation, you can extend the application to include more features such as product categories and more advanced validation. Keep coding!