An inventory management system is essential for businesses to keep track of stock and operations. This tutorial will guide you step-by-step to create a functional inventory management app using ASP.NET Core and Blazor WebAssembly. The app will let users work offline and sync data when they reconnect to the internet.
By the end of this tutorial, you’ll have a working inventory system you can use as-is or build upon. You’ll also learn how to handle offline data storage and syncing, which is a key feature for modern web applications.
Before we begin, make sure you have the following tools installed:
- Visual Studio 2022 (or later) with the following workloads:
- ASP.NET and web development
- .NET Core cross-platform development
- .NET 8 SDK (the latest as of today).
- SQL Server (Express or higher) installed locally or available as a service.
- Postman (optional) for testing API endpoints.
- Node.js (optional) for additional PWA configuration if needed.
Why Build an Offline Inventory System?
Ever tried using an app, and it stopped working because the internet went out? This happens a lot, but you can avoid it with offline support. By building an inventory app with offline capabilities, you ensure that:
- Users can keep working, even without a connection.
- Data automatically syncs when the internet is back.
- Operations stay smooth and uninterrupted.
This system uses:
- Blazor’s PWA features for offline support.
- ASP.NET Core Web API for a solid backend.
- localStorage, the browser’s simple key-value storage mechanism, is used to store data locally.
I. Set Up the Project
Step 1: Create the Solution
- Open Visual Studio.
- Go to File > New > Project.
- Search for ASP.NET Core Web Application, select it, and click Next.
- Name the solution
InventoryManagementSystem. - Choose ASP.NET Core Web API as the project template and ensure .NET 8 is selected.
- In the same solution, add another project:
- Search for Blazor WebAssembly App, select it, and click Next.
- Enable Progressive Web Application (PWA) in the project settings.
- Named it
InventoryApp
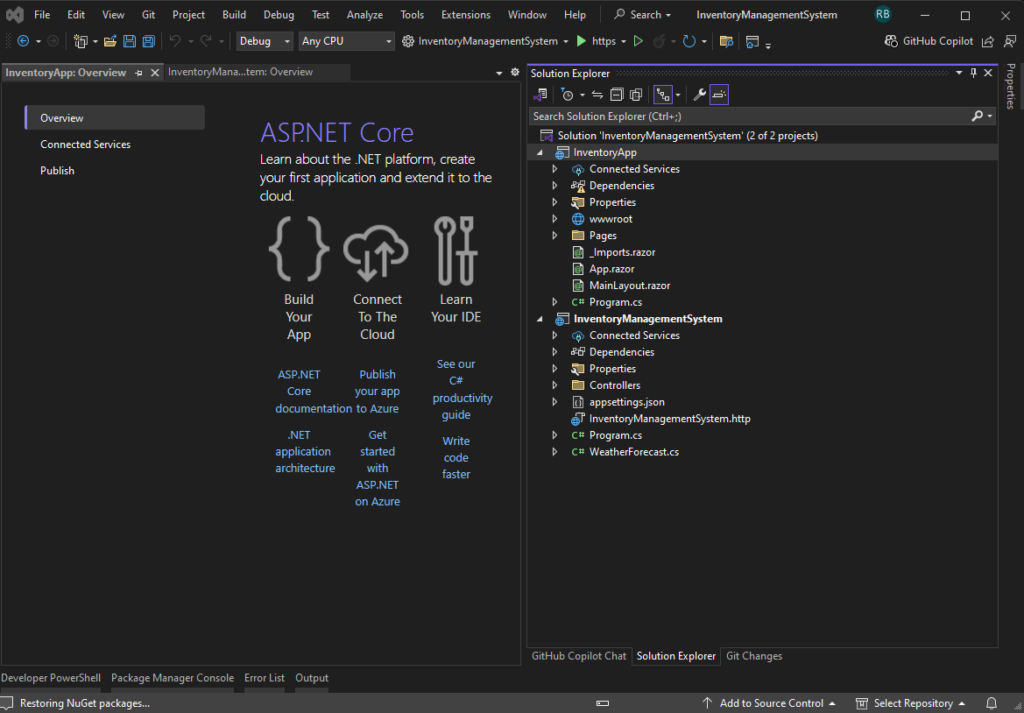
- You should now have two projects:
Backend(ASP.NET Core) andFrontend(Blazor WebAssembly).
Step 2: Install Required Packages
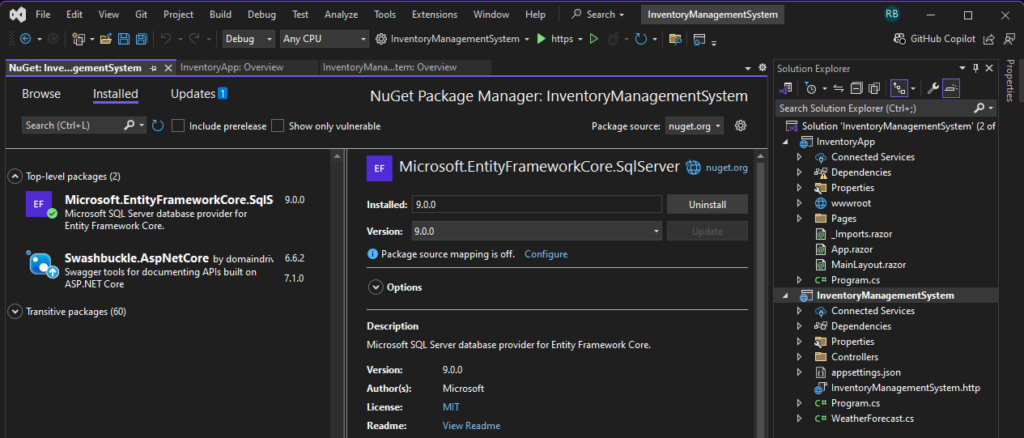
- In the Backend project, install:
Install-Package Microsoft.EntityFrameworkCore.SqlServer
Install-Package Microsoft.AspNetCore.Mvc.NewtonsoftJson
Install-Package Microsoft.EntityFrameworkCore.Tools
You can also use Nuget Package Manager to install the package. Right-click on the InventoryManagementSystem project solution and choose Manage Nuget Packages.
- In the Frontend project, install:
dotnet add package Blazored.LocalStorage
Install-Package Blazored.LocalStorage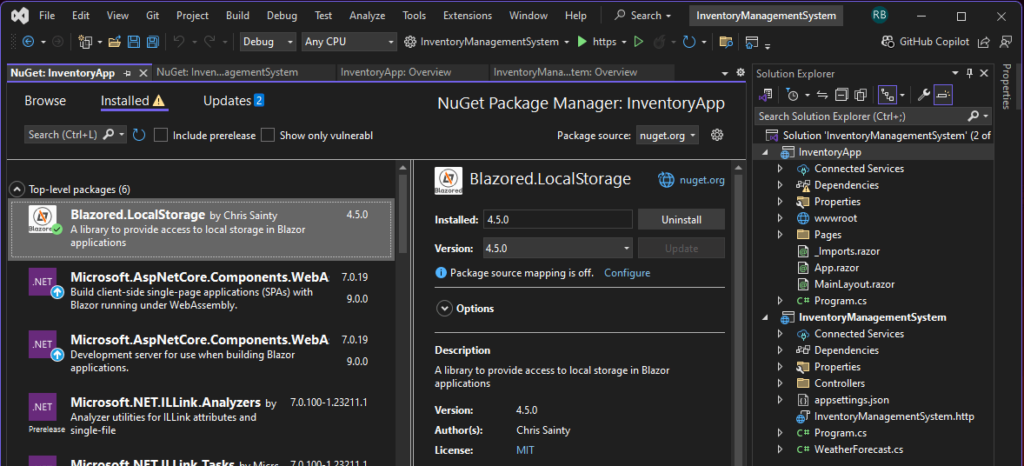
II. Build the Backend with ASP.NET Core
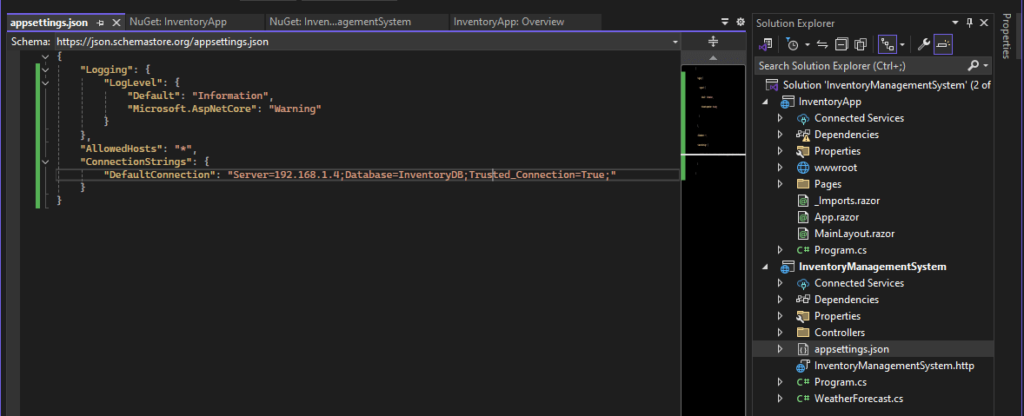
Step 1: Configure the Connection String
- Open
appsettings.jsonin the Backend project. - Add your database connection string:
"ConnectionStrings": {
  "DefaultConnection": "Server=YOUR_SERVER;Database=InventoryDB;Trusted_Connection=True;"
}
Tip: If you’re unsure how to get your SQL Server connection string, check out this detailed guide: How to get a connection string in SQL Server.
Step 2: Add Services in Program.cs
- Open
Program.csin the Backend project. - Configure the JSON support:
builder.Services.AddControllers().AddNewtonsoftJson();
builder.Services.AddEndpointsApiExplorer();
III. Create the Database and Models
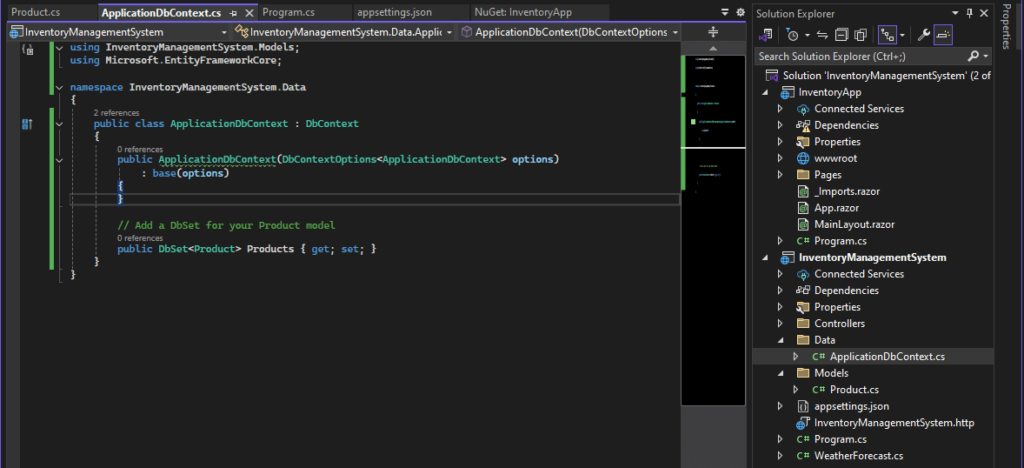
Step 1: Create the ApplicationDbContext
- In the Backend project, create a new folder called
Data. - Inside the
Datafolder, add a new class namedApplicationDbContext. - Define the class as follows:
using Microsoft.EntityFrameworkCore;

namespace InventoryManagementSystem.Data
{
    public class ApplicationDbContext : DbContext
    {
        public ApplicationDbContext(DbContextOptions<ApplicationDbContext> options)
            : base(options)
        {
        }

        // Add a DbSet for your Product model
        public DbSet<Product> Products { get; set; }
    }
}
4. This ApplicationDbContext class is responsible for managing database interactions. The DbSet<Product> property represents the Products table in the database.
Step 2: Add the Product Model
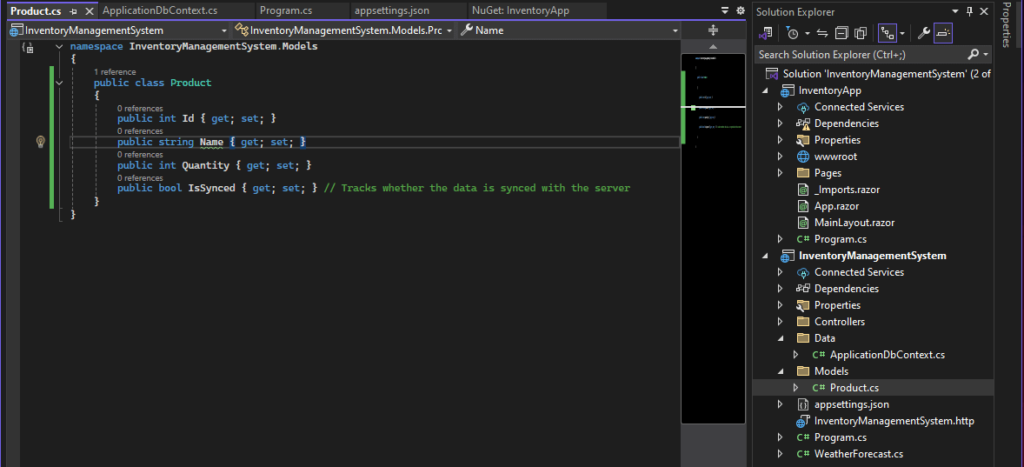
- Create a folder called
Modelsin the Backend project. - Inside the
Modelsfolder, add a new class namedProduct. - Define the
Productmodel as follows:
namespace InventoryManagementSystem.Models
{
    public class Product
    {
        public int Id { get; set; }
        public string Name { get; set; }
        public int Quantity { get; set; }
        public bool IsSynced { get; set; } // Tracks whether the data is synced with the server
    }
}
Step 3: Register the ApplicationDbContext in Program.cs
- Open
Program.csin the Backend project. - Register the
ApplicationDbContextwith the Dependency Injection (DI) container:
builder.Services.AddDbContext<ApplicationDbContext>(options =>
    options.UseSqlServer(builder.Configuration.GetConnectionString("DefaultConnection")));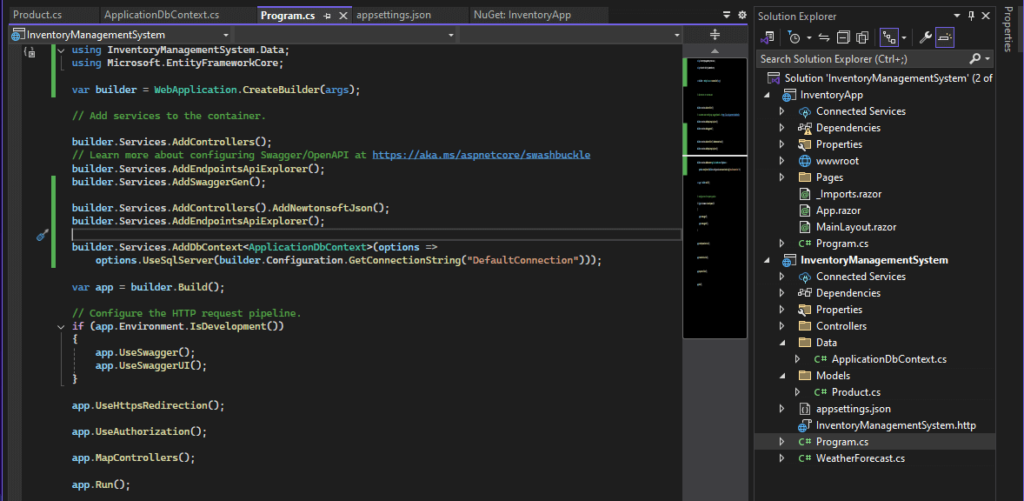
Step 4: Set Up the Database
- Run the following commands in the Backend project directory:
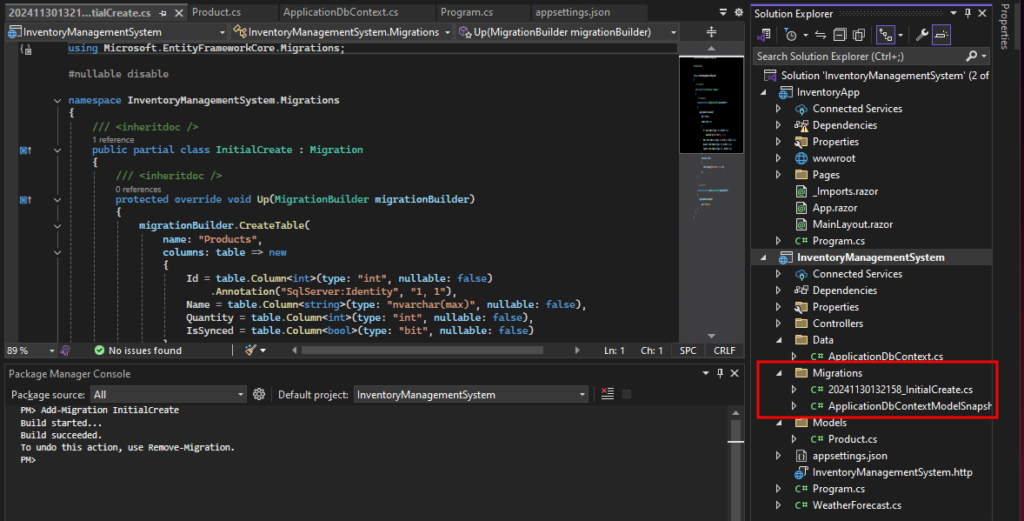
Add-Migration InitialCreateThis will generate the necessary database schema for the Products table based on the Product model.
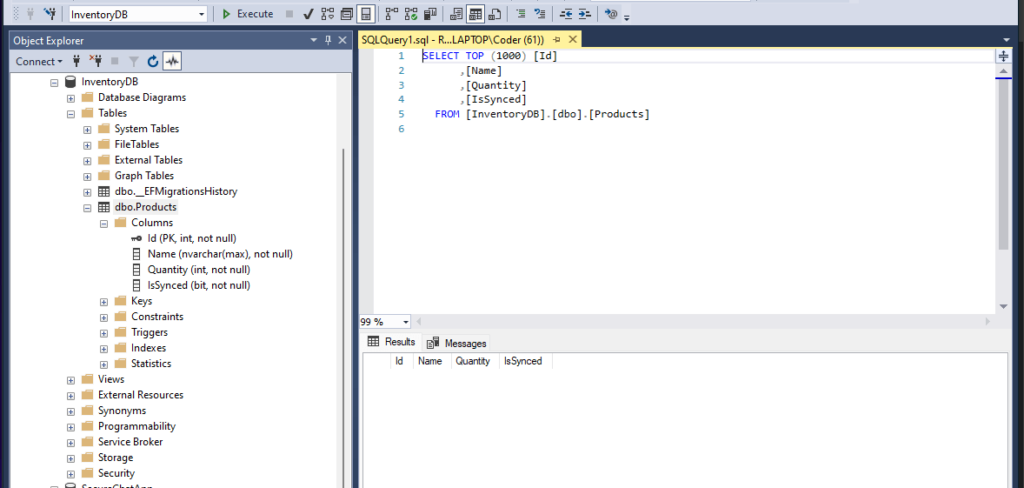
Update-DatabaseThis will execute the schema created in the previous step and create an actual database table.
IV. Write the API Endpoints
- In the Backend project, create a
Controllersfolder. - Add a new file
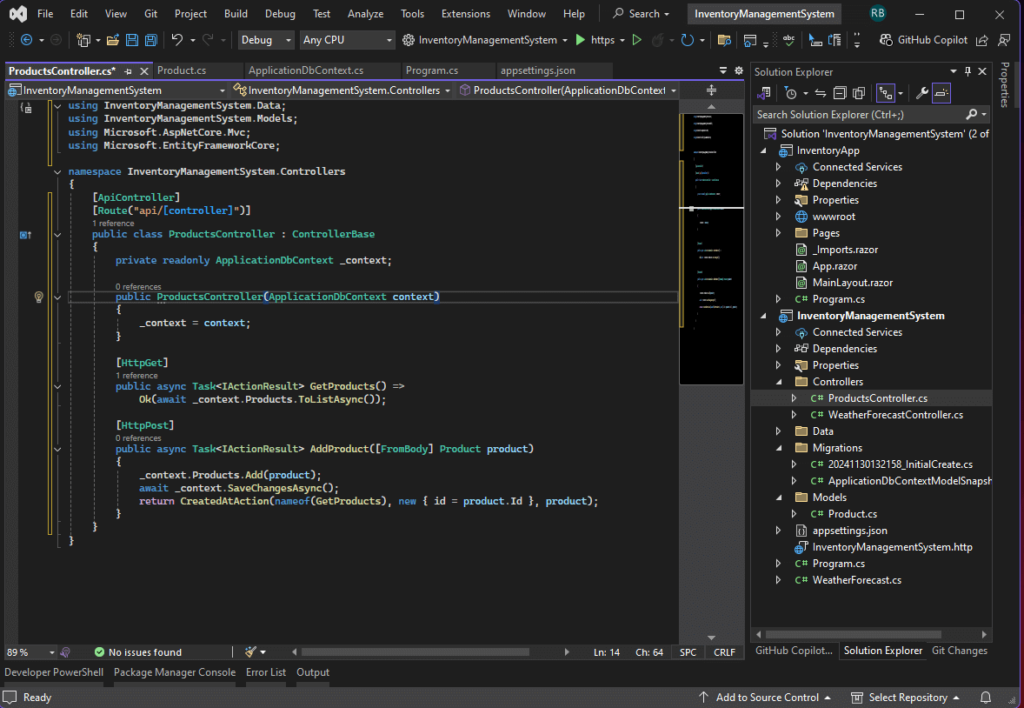
ProductsController.csand write the following code:
[ApiController]
[Route("api/[controller]")]
public class ProductsController : ControllerBase
{
    private readonly ApplicationDbContext _context;

    public ProductsController(ApplicationDbContext context)
    {
        _context = context;
    }

    [HttpGet]
    public async Task<IActionResult> GetProducts() =>
        Ok(await _context.Products.ToListAsync());

    [HttpPost]
    public async Task<IActionResult> AddProduct([FromBody] Product product)
    {
        _context.Products.Add(product);
        await _context.SaveChangesAsync();
        return CreatedAtAction(nameof(GetProducts), new { id = product.Id }, product);
    }
}
V. Create the Blazor Frontend
The frontend of our inventory management system will allow users to:
- View a list of products.
- Add new products.
- Handle offline storage and synchronization.
Step 1: Set Up Local Storage
1. Install the Blazored.LocalStorage package:
Install-Package Blazored.LocalStorage2. Register Blazored LocalStorage
- Open
Program.csin the Frontend project. - Register the local storage service:
builder.Services.AddBlazoredLocalStorage();
Step 2: Create the ProductService
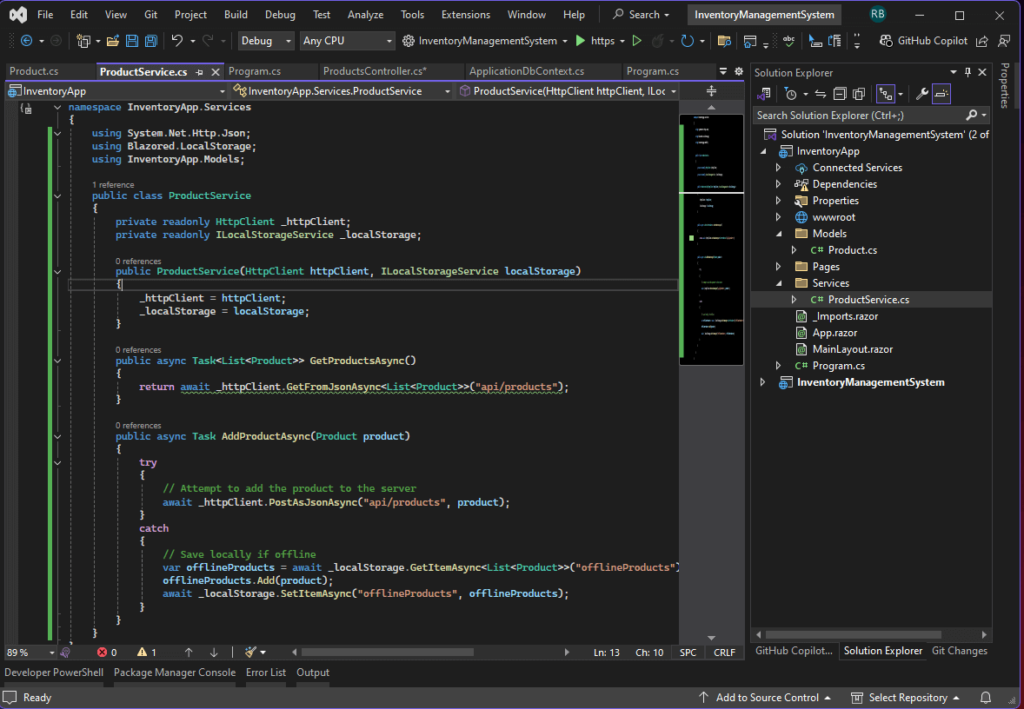
In the Frontend project, we will create a service to handle API calls and manage offline storage.
- Create a
Servicesfolder in the Frontend project. - Inside the
Servicesfolder, add a new class calledProductServiceand define it as follows:
using System.Net.Http.Json;
using Blazored.LocalStorage;

public class ProductService
{
    private readonly HttpClient _httpClient;
    private readonly ILocalStorageService _localStorage;

    public ProductService(HttpClient httpClient, ILocalStorageService localStorage)
    {
        _httpClient = httpClient;
        _localStorage = localStorage;
    }

    public async Task<List<Product>> GetProductsAsync()
    {
        return await _httpClient.GetFromJsonAsync<List<Product>>("https://localhost:7297/api/products");
    }

    public async Task AddProductAsync(Product product)
    {
        try
        {
            // Attempt to add the product to the server
            await _httpClient.PostAsJsonAsync("https://localhost:7297/api/products", product);
        }
        catch
        {
            // Save locally if offline
            var offlineProducts = await _localStorage.GetItemAsync<List<Product>>("offlineProducts") ?? new List<Product>();
            offlineProducts.Add(product);
            await _localStorage.SetItemAsync("offlineProducts", offlineProducts);
        }
    }
}
3. Create Models folder in the Frontend and create Product properties
namespace InventoryApp.Models
{
    public class Product
    {
        public int Id { get; set; }
        public string Name { get; set; }
        public int Quantity { get; set; }
        public bool IsSynced { get; set; }
    }
}
Step 3: Register the ProductService
- Open
Program.csin the Frontend project. - Register the
ProductServiceandBlazored.LocalStorage:
builder.Services.AddScoped<ProductService>();
builder.Services.AddBlazoredLocalStorage();
Step 4: Include bootstrap CDN
Open wwwroot/index.html and include the following script in the header section.
 <link href="https://maxcdn.bootstrapcdn.com/bootstrap/4.5.2/css/bootstrap.min.css" rel="stylesheet" />
 <script src="https://code.jquery.com/jquery-3.5.1.slim.min.js"></script>
 <script src="https://cdn.jsdelivr.net/npm/bootstrap@4.5.2/dist/js/bootstrap.bundle.min.js"></script>
Step 5: Create the Products Page
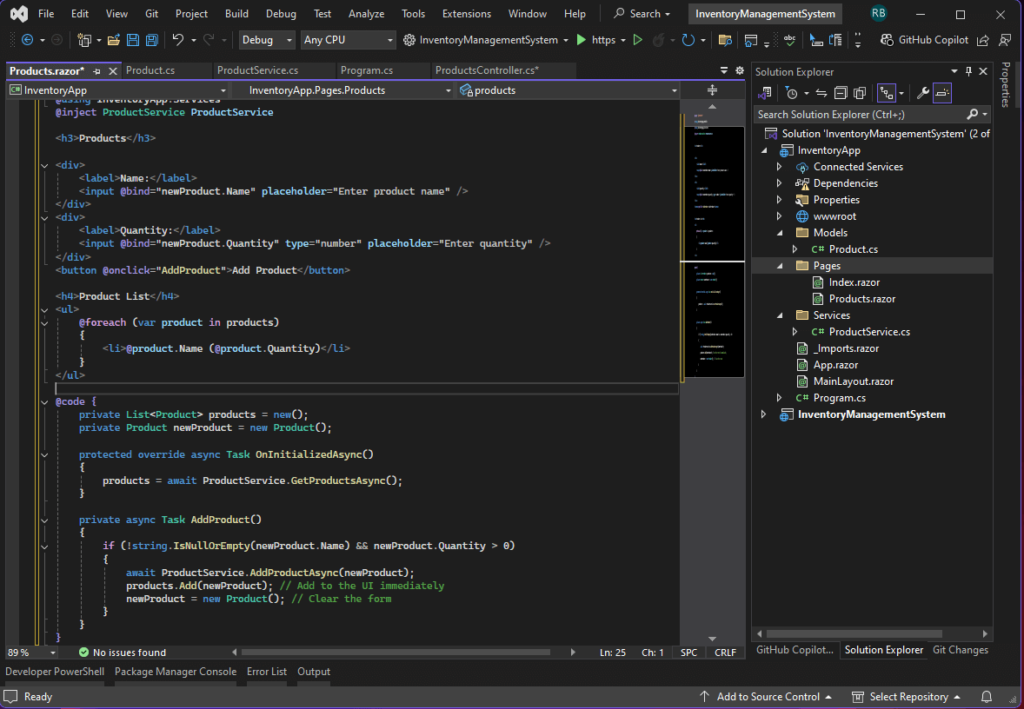
- Open the
Pagesfolder in the Frontend project. - Add a new Razor component named
Products.razorwith the following content:
@page "/products"
@using InventoryApp.Models
@using InventoryApp.Services
@inject ProductService ProductService

<div class="container mt-5">
    <!-- Add Product Form -->
    <div class="row">
        <div class="col-md-6 offset-md-3">
            <h3 class="text-center">Add New Product</h3>
            <form>
                <div class="form-group">
                    <label for="productName">Name:</label>
                    <input id="productName" @bind="newProduct.Name" placeholder="Enter product name" class="form-control" />
                </div>
                <div class="form-group">
                    <label for="productQuantity">Quantity:</label>
                    <input id="productQuantity" @bind="newProduct.Quantity" type="number" placeholder="Enter quantity" class="form-control" />
                </div>
                <button type="button" class="btn btn-primary btn-block" @onclick="AddProduct">Add Product</button>
            </form>
        </div>
    </div>

    <!-- Product List -->
    <div class="row mt-5">
        <div class="col-md-8 offset-md-2">
            <h3 class="text-center">Product List</h3>
            @if (products.Count > 0)
            {
                <div class="card-deck">
                    @foreach (var product in products)
                    {
                        <div class="card text-center mb-4">
                            <div class="card-body">
                                <h5 class="card-title">@product.Name</h5>
                                <p class="card-text">Quantity: @product.Quantity</p>
                            </div>
                        </div>
                    }
                </div>
            }
            else
            {
                <p class="text-center text-muted">No products added yet.</p>
            }
        </div>
    </div>
</div>

@code {
    private List<Product> products = new();
    private Product newProduct = new Product();

    protected override async Task OnInitializedAsync()
    {
        products = await ProductService.GetProductsAsync();
    }

    private async Task AddProduct()
    {
        if (!string.IsNullOrEmpty(newProduct.Name) && newProduct.Quantity > 0)
        {
            await ProductService.AddProductAsync(newProduct);
            products.Add(newProduct); // Add to the UI immediately
            newProduct = new Product(); // Clear the form
        }
    }
}
Step 5: Add Navigation to the Products Page
- Open
Shared/NavMenu.razorin the Frontend project. - Add a navigation link to the products page:
<header>
    <nav class="navbar navbar-expand-lg" style="color: #fff; background-color: #007bff; border-color: #007bff;">
        <div class="container">
            <NavLink class="navbar-brand text-white" href="/">InventoryApp</NavLink>
            <button class="navbar-toggler" type="button" data-toggle="collapse" data-target="#navbarNav" aria-controls="navbarNav" aria-expanded="false" aria-label="Toggle navigation">
                <span class="navbar-toggler-icon" style="background-image: url('data:image/svg+xml;charset=utf8,%3Csvg xmlns%3D%27http://www.w3.org/2000/svg%27 viewBox%3D%270 0 30 30%27%3E%3Cpath stroke%3D%27rgba%28255%2C 255%2C 255%2C 1%29%27 stroke-width%3D%272%27 stroke-linecap%3D%27round%27 stroke-miterlimit%3D%2710%27 d%3D%27M4 7h22M4 15h22M4 23h22%27/%3E%3C/svg%3E');"></span>
            </button>
            <div class="collapse navbar-collapse" id="navbarNav">
                <ul class="navbar-nav ml-auto">
                    <li class="nav-item">
                        <NavLink class="nav-link text-white" href="/">Home</NavLink>
                    </li>
                    <li class="nav-item">
                        <NavLink class="nav-link text-white" href="/products">Products</NavLink>
                    </li>
                    <li class="nav-item">
                        <NavLink class="nav-link text-white" href="/about">About</NavLink>
                    </li>
                </ul>
            </div>
        </div>
    </nav>
</header>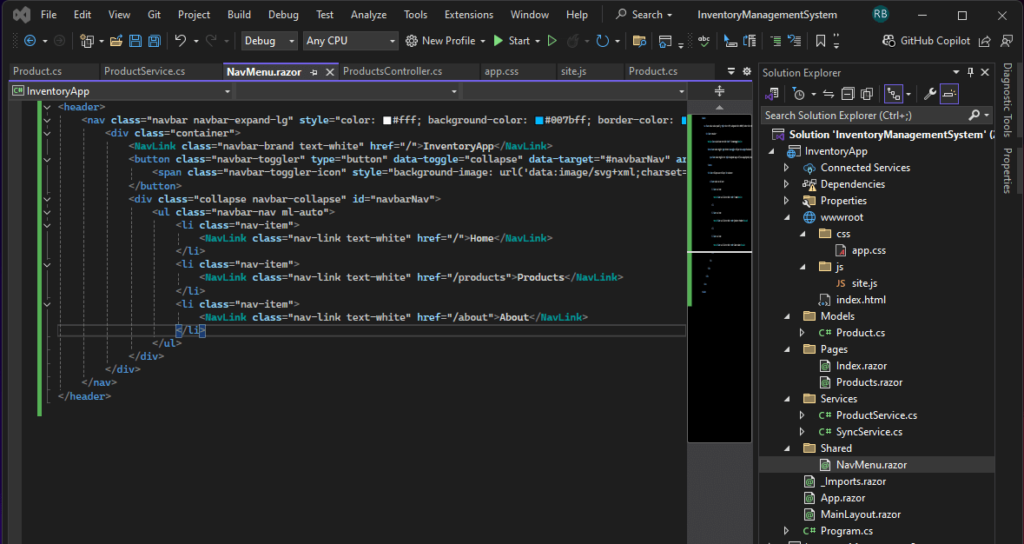
VI. Add Offline Storage
Offline storage allows the app to save data locally when disconnected. Here’s how:
Save Unsynced Data. To do that, modify the ProductService and create a method to store unsynced products locally:
public async Task SaveProductLocallyAsync(Product product)
{
    var offlineProducts = await _localStorage.GetItemAsync<List<Product>>("offlineProducts") ?? new List<Product>();
    offlineProducts.Add(product);
    await _localStorage.SetItemAsync("offlineProducts", offlineProducts);
}
VII. Sync Data Between Offline and Online
Sync offline data when the internet connection is restored:
1. Modify ProductService class and Add a method to retrieve offline data:
public async Task<List<Product>> GetOfflineProductsAsync() =>
    await _localStorage.GetItemAsync<List<Product>>("offlineProducts") ?? new List<Product>();
2. Add a sync method:
 public async Task SyncOfflineDataAsync()
 {
     var offlineProducts = await GetOfflineProductsAsync();
     foreach (var product in offlineProducts)
     {
         await _httpClient.PostAsJsonAsync("https://localhost:7297/api/products", product);
     }
     await _localStorage.RemoveItemAsync("offlineProducts");
 }
3. Create SyncService.cs inside Services folder and add use this code.
using System.Threading.Tasks;
using Microsoft.JSInterop;

namespace InventoryApp.Services
{
    public static class SyncService
    {
        private static IServiceProvider _serviceProvider;

        // Configure the service provider for DI
        public static void Configure(IServiceProvider serviceProvider)
        {
            _serviceProvider = serviceProvider;
        }

        // JSInvokable method to be called from JavaScript
        [JSInvokable("SyncData")]
        public static async Task SyncData()
        {
            var productService = _serviceProvider.GetService<ProductService>();
            if (productService != null)
            {
                await productService.SyncOfflineDataAsync();
            }
        }
    }
}
4. Use JavaScript to detect connectivity changes and invoke Blazor functions.To do that, create a site.js file inside wwwroot/js folder and add this event.
window.addEventListener('online', () => {
    DotNet.invokeMethodAsync('InventoryApp', 'SyncData');
});
When connectivity changes to online this event will trigger SyncData method in SyncService.cs class.
5. Open wwwroot/index.html and include script.
<script src="js/site.js"></script>How to Find the Assembly Name
- Check Your
.csprojFile: Open the.csprojfile of your Blazor application. Look for the<AssemblyName>tag. For example.
<Project Sdk="Microsoft.NET.Sdk.BlazorWebAssembly">
    <PropertyGroup>
        <AssemblyName>InventoryApp</AssemblyName>
        <TargetFramework>net7.0</TargetFramework>
    </PropertyGroup>
</Project>- If the
<AssemblyName>tag is present, its value is your assembly name. - If it’s missing, the default assembly name is the project name (e.g.,
InventoryApp).
If you’re unsure about the assembly name during development, you can use console.log in JavaScript to verify whether the method is being successfully invoked.
window.addEventListener('online', () => {
    DotNet.invokeMethodAsync('InventoryApp', 'SyncData')
        .then(() => console.log('SyncData invoked successfully'))
        .catch(err => console.error('Error invoking SyncData:', err));
});
VIII. Test the Application
Before testing you app, set the CORS in you backend application. Open program.cs and add the following entry.
Take note of the URL(https://localhost:7185). This is the port for my front-end application, but it might be different on your end.
builder.Services.AddCors(options =>
{
    options.AddPolicy("AllowBlazorApp",
        builder => builder.WithOrigins("https://localhost:7185") // Replace with your Blazor app's URL
                          .AllowAnyHeader()
                          .AllowAnyMethod());
});


var app = builder.Build();

app.UseCors("AllowBlazorApp");
Follow these steps to test the application and verify its offline functionality and data synchronization.
1. Run Both Backend and Frontend Projects
To test the app, you need both the frontend (InventoryApp) and backend (InventoryManagementSystem) running simultaneously:
- In Visual Studio, right-click on the solution and select Properties.
- Under Startup Project, choose Multiple startup projects.
- Set both
InventoryAppandInventoryManagementSystemto Start. - Click OK, then press F5 to run both projects.
2. Test Offline Behavior
- Open the application in your browser.
- Simulate going offline:
- Open Developer Tools (
F12) in your browser. - Go to the Network tab and select Offline from the throttling options.
- Open Developer Tools (
- Add a product using the form while offline.
- Verify that the product appears in the app’s list (stored locally).
3. Reconnect and Verify Data Sync
- Re-enable the network in the Developer Tools by switching Offline back to Online/No Throttling.
- The app should automatically sync with the server.
- Verify the data by checking the database:
- Use your database tool (e.g., SQL Server Management Studio) to query the
Productstable:SELECT * FROM Products;
- Use your database tool (e.g., SQL Server Management Studio) to query the
- Confirm the product you added while offline is now stored in the database.
Testing is now complete! You’ve verified the app’s ability to work offline and sync data seamlessly once the connection is restored.
IX. Download the Complete Code
To download the free source code from this tutorial, click the button below.
Important Notes:
- Ensure you have 7-Zip installed to extract the file. You can download 7-Zip here if you don’t already have it.
- Use the password freecodespot when prompted during extraction.
What’s Next?
Congratulations! You’ve built a fully functional inventory system with offline and online support. Expand it further by:
- Adding user authentication.
- Implementing role-based access control.
- Creating advanced inventory reports.
Let us know how your project turns out!
