Securing an application from unauthorized access is crucial, especially when dealing with internal tools, APIs, or admin dashboards. One effective approach is implementing IP whitelisting or blacklisting middleware in ASP.NET Core. This middleware allows you to restrict access based on predefined IP addresses, ensuring that only trusted sources can interact with your application.
In this tutorial, we will create custom middleware to enforce IP restrictions, providing examples of both whitelisting (allow-only) and blacklisting (deny-specific) approaches.
Advantages of IP Whitelisting and Blacklisting
- Enhanced Security – Prevents unauthorized access by limiting connections to specific IPs.
- Control Over Access – Allows or denies specific users based on their IP addresses.
- Protection Against Attacks – Reduces exposure to brute-force attacks and unwanted requests.
- Flexible Configuration – Easily update allowed or denied IPs without modifying core application logic.
Before we start, ensure you have the following:
- Visual Studio 2022 or later
- .NET 8 SDK installed
- Basic knowledge of ASP.NET Core middleware
Setting Up the Project
Follow these steps to create an ASP.NET Core Web API project using Visual Studio 2022.
1. Open Visual Studio 2022 and click on Create a new project.
2. Select ASP.NET Core Web API from the available templates and click Next.

3. Enter the Project Name as IPFilterMiddlewareDemo and choose a location to save the project.
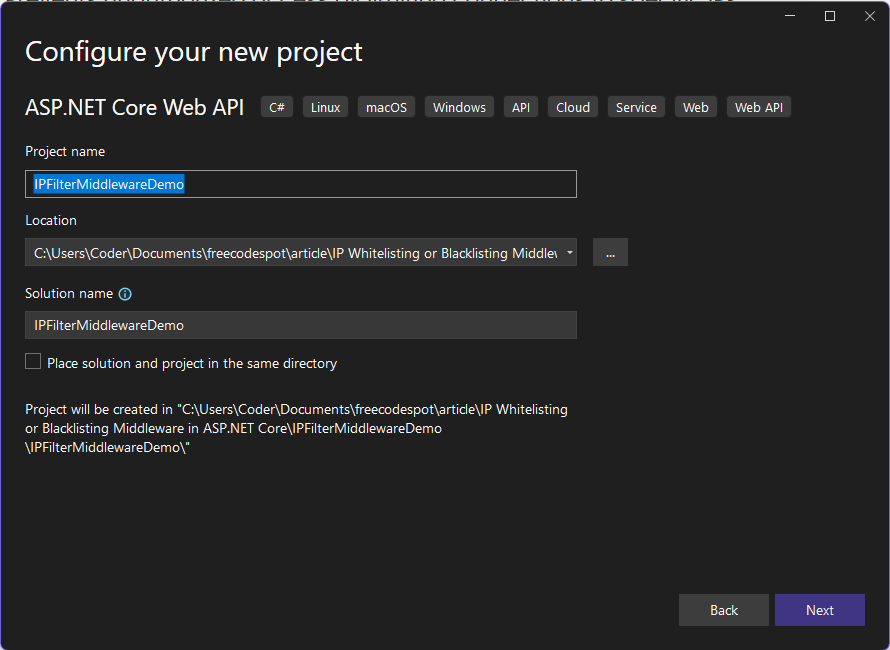
4. Click Next, then select .NET 8 (Long-Term Support) as the framework.

5. Click Create to generate the project.
Creating the Middleware
We will create a custom middleware that checks incoming requests and allows or blocks them based on a list of permitted or denied IP addresses.
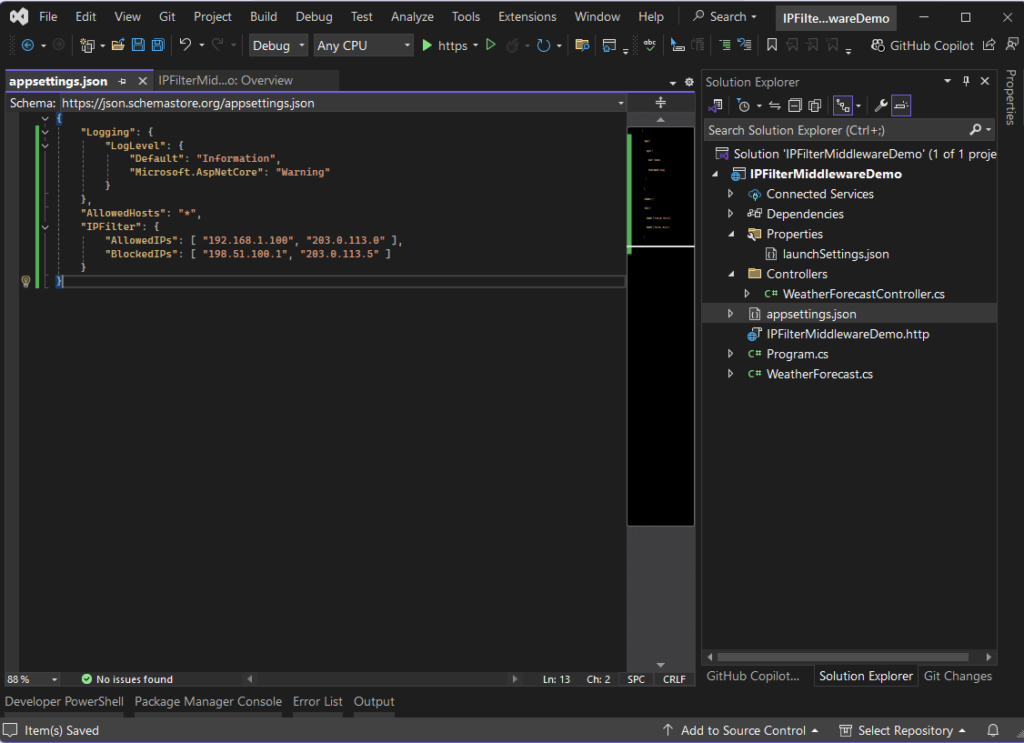
Step 1: Define Allowed and Blocked IPs
Inside the appsettings.json, add a configuration section for IP filtering:
"IPFilter": {
  "AllowedIPs": ["192.168.1.100", "203.0.113.0"],
  "BlockedIPs": ["198.51.100.1", "203.0.113.5"]
}
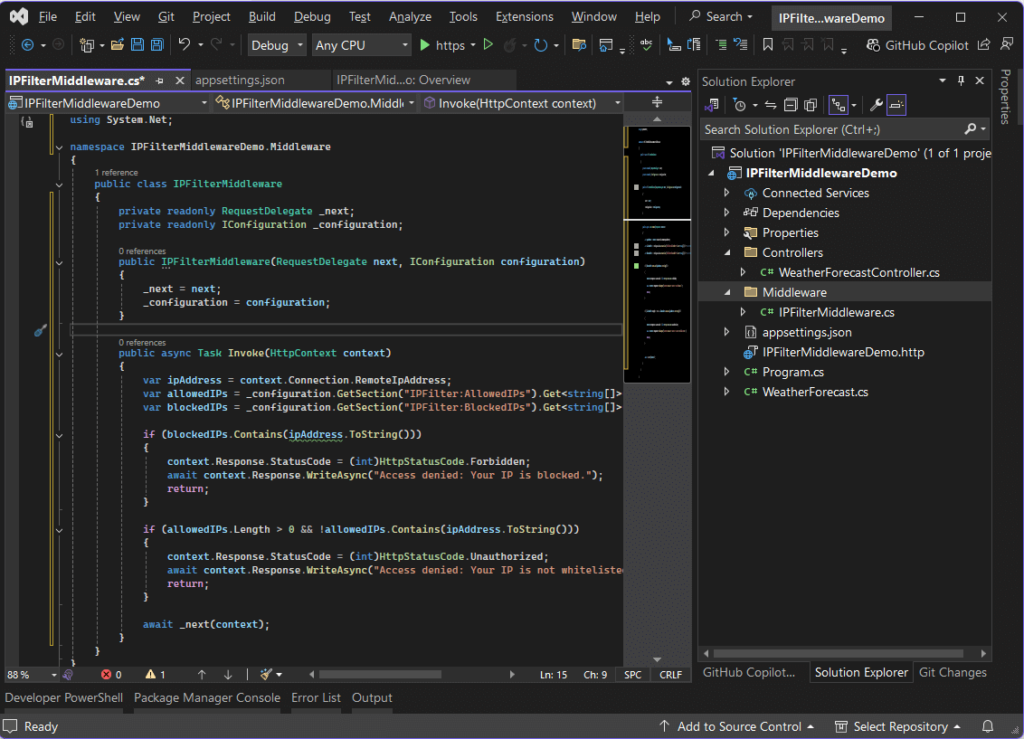
Step 2: Create the Middleware Class
Create a new file IPFilterMiddleware.cs inside a Middleware folder
using System.Net;

namespace IPFilterMiddlewareDemo.Middleware
{
    public class IPFilterMiddleware
    {
        private readonly RequestDelegate _next;
        private readonly IConfiguration _configuration;

        public IPFilterMiddleware(RequestDelegate next, IConfiguration configuration)
        {
            _next = next;
            _configuration = configuration;
        }

        public async Task Invoke(HttpContext context)
        {
            var ipAddress = context.Connection.RemoteIpAddress;
            var allowedIPs = _configuration.GetSection("IPFilter:AllowedIPs").Get<string[]>() ?? new string[0];
            var blockedIPs = _configuration.GetSection("IPFilter:BlockedIPs").Get<string[]>() ?? new string[0];

            if (blockedIPs.Contains(ipAddress.ToString()))
            {
                context.Response.StatusCode = (int)HttpStatusCode.Forbidden;
                await context.Response.WriteAsync("Access denied: Your IP is blocked.");
                return;
            }

            if (allowedIPs.Length > 0 && !allowedIPs.Contains(ipAddress.ToString()))
            {
                context.Response.StatusCode = (int)HttpStatusCode.Unauthorized;
                await context.Response.WriteAsync("Access denied: Your IP is not whitelisted.");
                return;
            }

            await _next(context);
        }
    }
}
Step 3: Register Middleware in Program.cs
Modify Program.cs to register the middleware:
var builder = WebApplication.CreateBuilder(args);
builder.Services.AddControllers();
var app = builder.Build();

app.UseMiddleware<IPFilterMiddleware>();

app.MapControllers();
app.Run();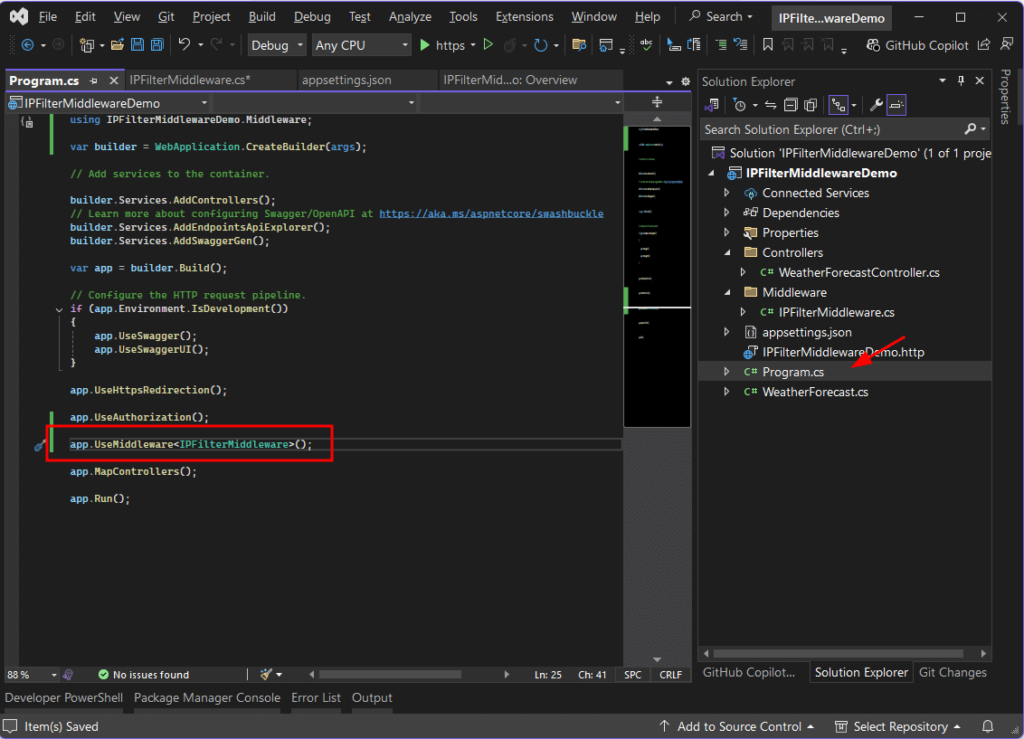
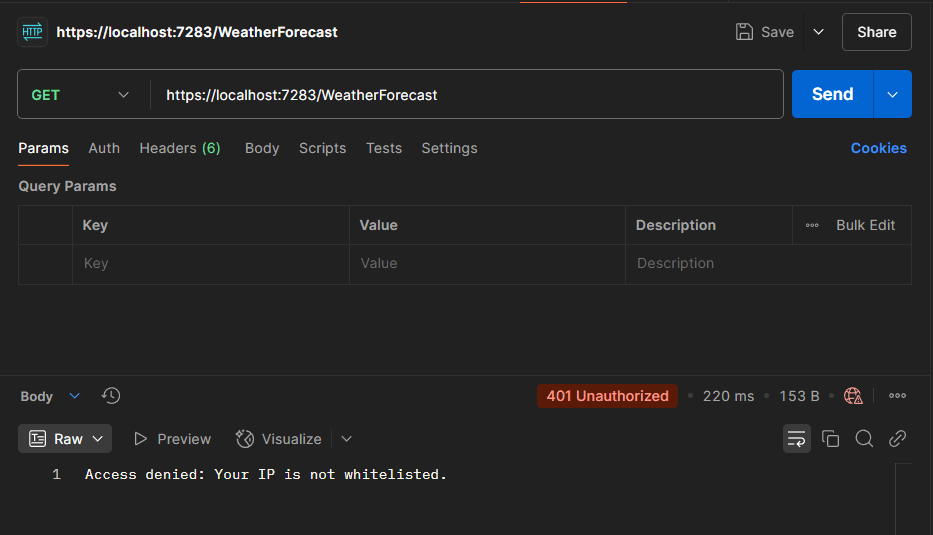
Testing the Implementation
1. Run the API by pressing F5 on your keyboard.
2. Access from Different IPs
- Modify the
appsettings.jsonto include or exclude your IP. - Use Postman or a browser to send requests.
- Observe responses: “Access denied” for blocked or non-whitelisted IPs, normal response for allowed IPs.
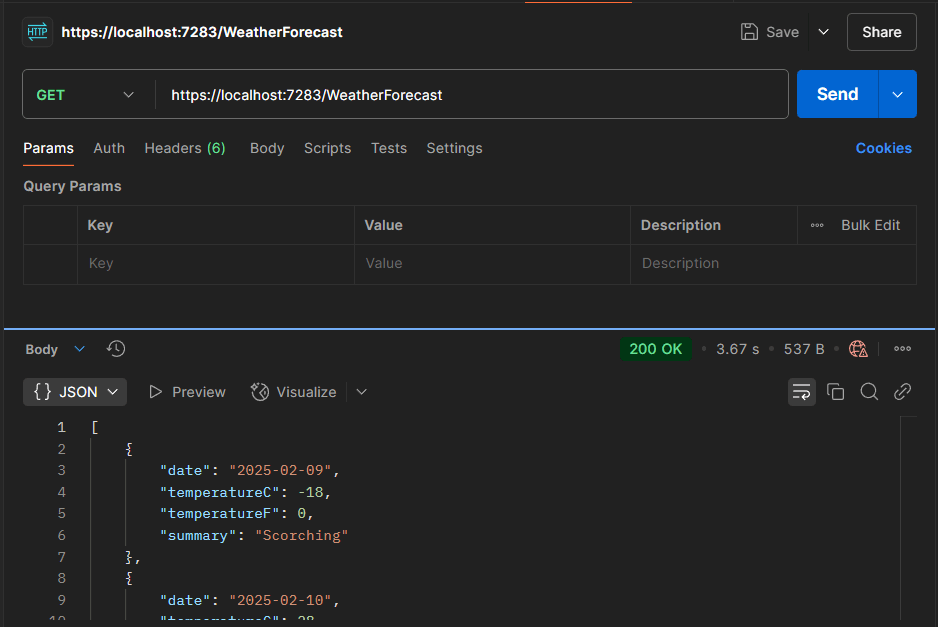
Use the default WeatherForecastController for testing. See the image below.
Here’s the result if you access the API from an IP that is not registered.
Here’s how it looks like when you register your IP. Since we are using localhost register ::1 in your appsettings.json and re-run your postman api request.
Download Source Code
You can download the full source code for this implementation from the following link:
Private File - Access ForbiddenImportant Notes:
Use the password freecodespot when prompted during extraction.
Ensure you have 7-Zip installed to extract the file. You can download 7-Zip here if you don’t already have it.
Summary
In this guide, we created a custom ASP.NET Core middleware to restrict access based on IP addresses. This approach enhances security for internal systems, APIs, and admin dashboards. You can extend this by integrating IP filtering with databases or configuration management tools for dynamic updates.
Stay tuned for more practical ASP.NET Core tutorials!