Efficient debugging and monitoring are essential for maintaining reliable applications. In ASP.NET Core, custom middleware provides a powerful mechanism for tracking HTTP requests and responses. By implementing logging middleware, developers can collect valuable metadata, such as URLs, headers, IP addresses, status codes, and response times. This enhances debugging, ensures compliance with audit trails, and supports performance monitoring.
In this tutorial, we’ll build a custom middleware in ASP.NET Core that logs request and response data into a file. You’ll learn step-by-step how to set up your project, implement the middleware, and test its functionality.
Advantages of Logging Middleware
Logging middleware provides the following key benefits:
- Simplifies Debugging: Analyze request and response logs to identify and fix bugs.
- Improves Monitoring: Track API performance and usage statistics.
- Supports Compliance: Maintain detailed audit trails for regulatory or security needs.
Before starting, ensure you have the following:
- ASP.NET Core SDK 8.0 or higher
- A basic understanding of ASP.NET Core middleware
- An IDE like Visual Studio 2022, Rider, or Visual Studio Code
Setting Up the Project
Let’s start by setting up the ASP.NET Core Web API project.
- Create a New Project
Open Visual Studio and create a new project. Choose ASP.NET Core Web API as the project template. - Name the Project
Name your projectRequestLoggingDemoand click Next. - Choose Framework
Select .NET 8.0 (Long-term Support) as the framework, and ensure the project uses the default settings.
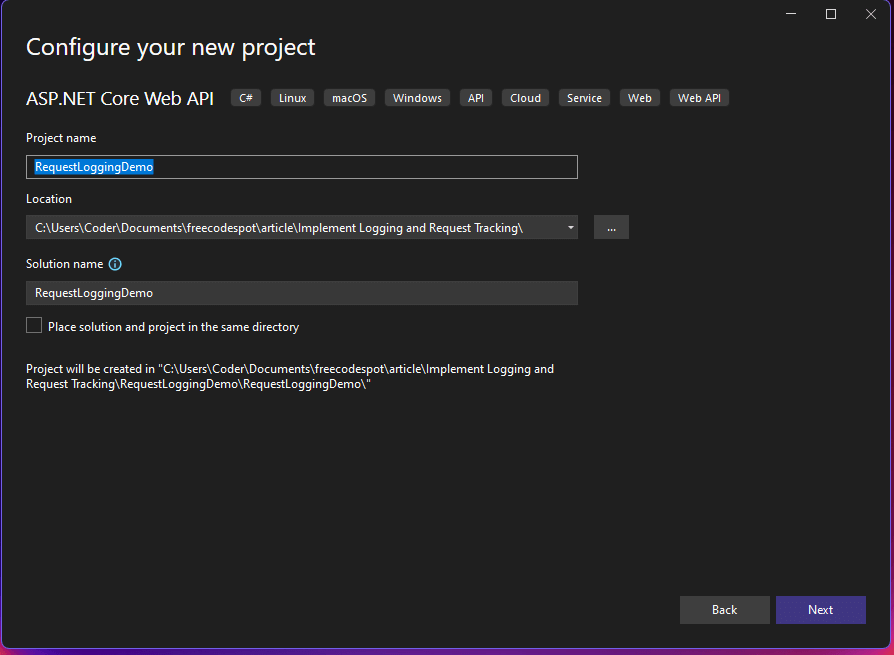
Creating the Project File Structure
For better organization, we’ll add a folder to house our custom middleware.
- In the project’s root directory, create a folder named
Middleware. - Inside the
Middlewarefolder, create a file namedRequestLoggingMiddleware.cs.
Implementing Core Features
Step 1: Writing the Middleware Logic
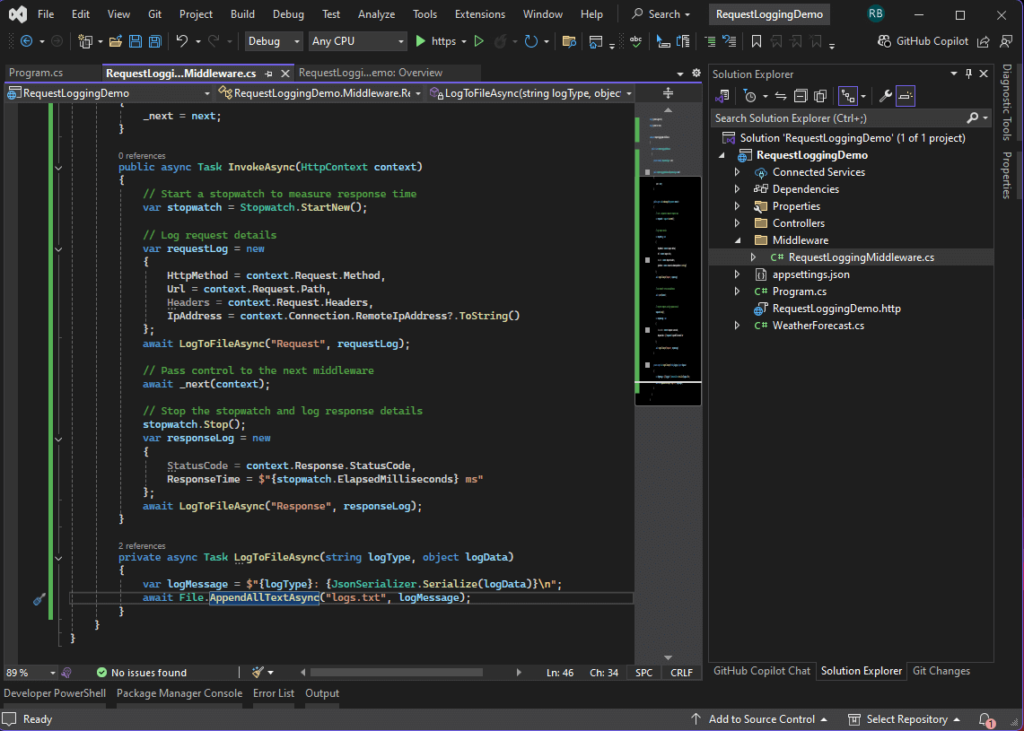
In the RequestLoggingMiddleware.cs file, define a custom middleware class that captures and logs the request and response data.
using System.Diagnostics;
using System.Text.Json;

namespace RequestLoggingDemo.Middleware
{
    public class RequestLoggingMiddleware
    {
        private readonly RequestDelegate _next;

        public RequestLoggingMiddleware(RequestDelegate next)
        {
            _next = next;
        }

        public async Task InvokeAsync(HttpContext context)
        {
            // Start a stopwatch to measure response time
            var stopwatch = Stopwatch.StartNew();

            // Log request details
            var requestLog = new
            {
                HttpMethod = context.Request.Method,
                Url = context.Request.Path,
                Headers = context.Request.Headers,
                IpAddress = context.Connection.RemoteIpAddress?.ToString()
            };
            await LogToFileAsync("Request", requestLog);

            // Pass control to the next middleware
            await _next(context);

            // Stop the stopwatch and log response details
            stopwatch.Stop();
            var responseLog = new
            {
                StatusCode = context.Response.StatusCode,
                ResponseTime = $"{stopwatch.ElapsedMilliseconds} ms"
            };
            await LogToFileAsync("Response", responseLog);
        }

        private async Task LogToFileAsync(string logType, object logData)
        {
            var logMessage = $"{logType}: {JsonSerializer.Serialize(logData)}\n";
            await File.AppendAllTextAsync("logs.txt", logMessage);
        }
    }
}
Step 2: Registering the Middleware
Now, we need to register the middleware in the application pipeline.
- Open the
Program.csfile. - Add the middleware to the application pipeline:
using RequestLoggingDemo.Middleware;

var builder = WebApplication.CreateBuilder(args);

var app = builder.Build();

// Register the custom logging middleware
app.UseMiddleware<RequestLoggingMiddleware>();

app.MapControllers();

app.Run();
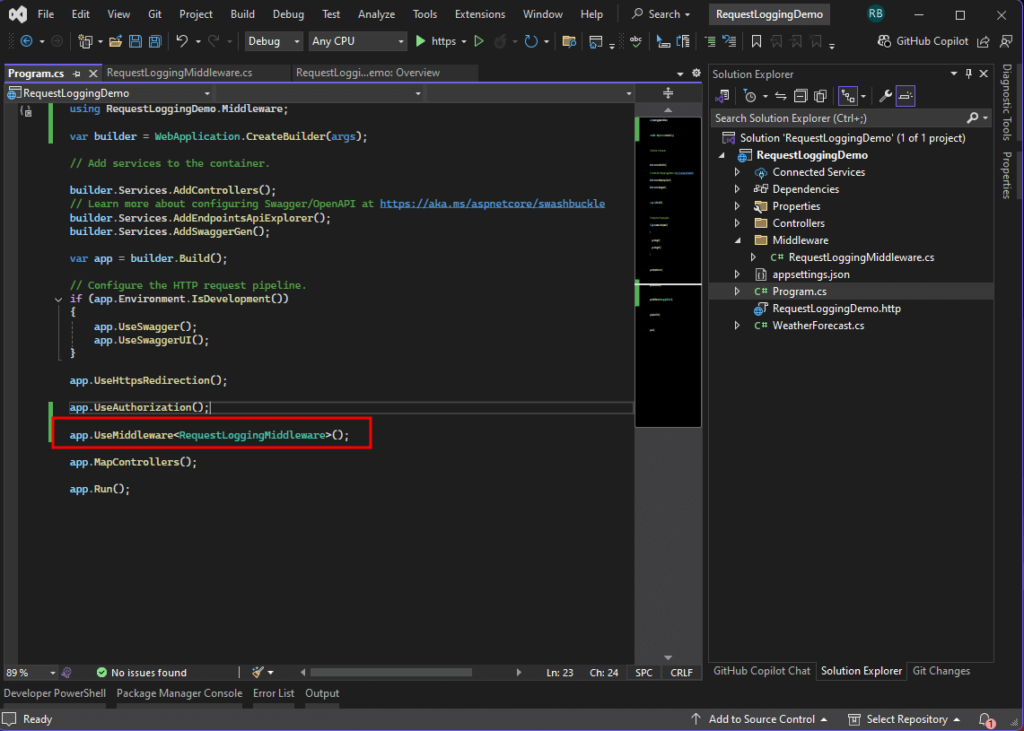
Log to the Database
At this stage, running your app will log requests to a file as expected. However, if you’d like to take it a step further and log the requests to a database, you can enhance your RequestLoggingMiddleware to do so. Here’s how:
1. Add Required Nuget Package.
Use Nuget Package Manager to search add the following packages.
Install-Package Microsoft.EntityFrameworkCore -Version 9.0.0
Install-Package Microsoft.EntityFrameworkCore.SqlServer -Version 9.0.0
Install-Package Microsoft.EntityFrameworkCore.Tools -Version 9.0.0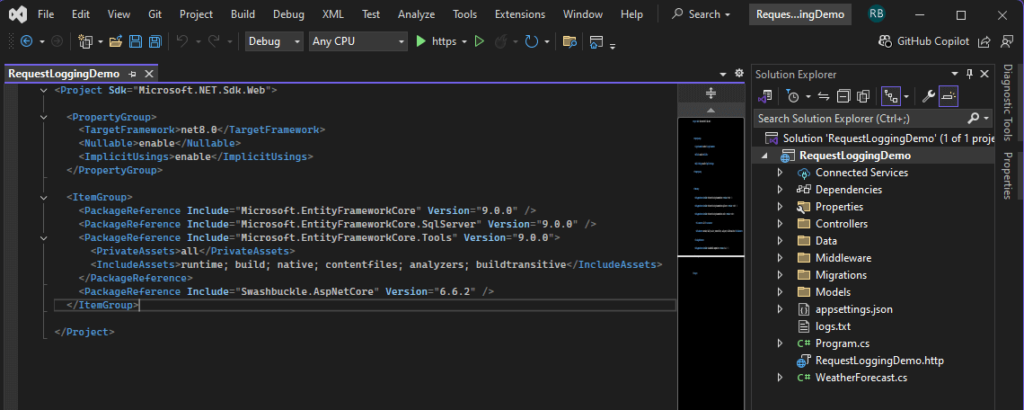
2. Setup Connection String in appsettings.json
  "ConnectionStrings": {
      "DefaultConnection": "Server=TESTSERVER;Database=RequestLogsDB;User Id=freecode;Password=freecode;TrustServerCertificate=True;MultipleActiveResultSets=true"
  }
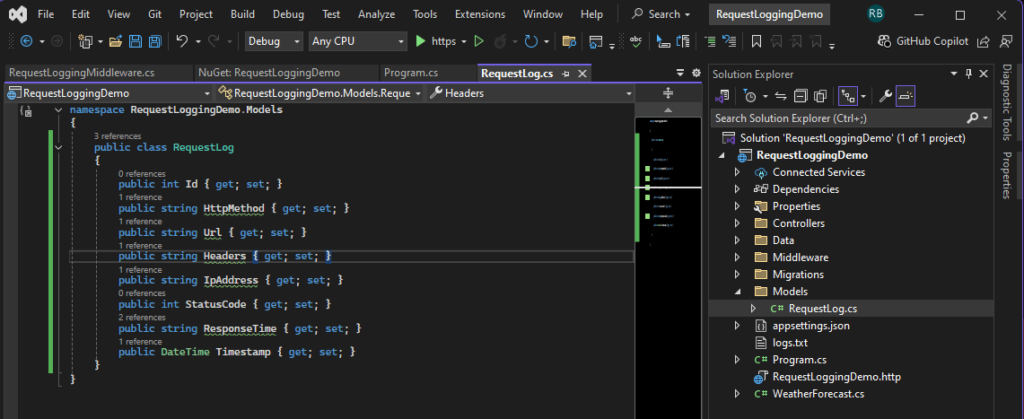
2. Create and define a RequestLog model inside Models folder
namespace RequestLoggingDemo.Models
{
    public class RequestLog
    {
        public int Id { get; set; }
        public string HttpMethod { get; set; }
        public string Url { get; set; }
        public string Headers { get; set; }
        public string IpAddress { get; set; }
        public int StatusCode { get; set; }
        public string ResponseTime { get; set; }
        public DateTime Timestamp { get; set; }
    }
}
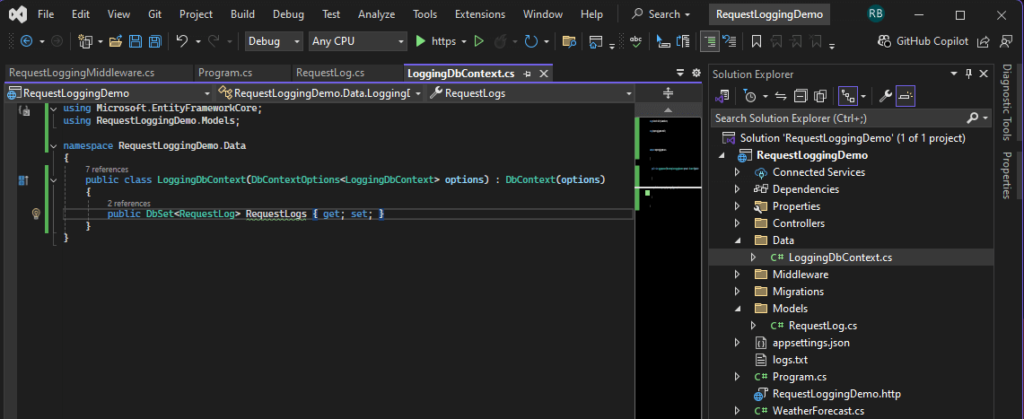
3. Create a LoggingDbContext class inside Data folder for database access
using Microsoft.EntityFrameworkCore;
using RequestLoggingDemo.Models;

namespace RequestLoggingDemo.Data
{
    public class LoggingDbContext(DbContextOptions<LoggingDbContext> options) : DbContext(options)
    {
        public DbSet<RequestLog> RequestLogs { get; set; }
    }
}
4. Register the Context in Startup.cs or Program.cs
Configure the application to use the LoggingDbContext in the dependency injection container.
builder.Services.AddDbContext<LoggingDbContext>(options =>
    options.UseSqlServer(builder.Configuration.GetConnectionString("DefaultConnection")));
5. Adding and Applying Migrations
The command below will create a migration file with column declared in the RequestLog model properties.
Add-Migration InitialCreate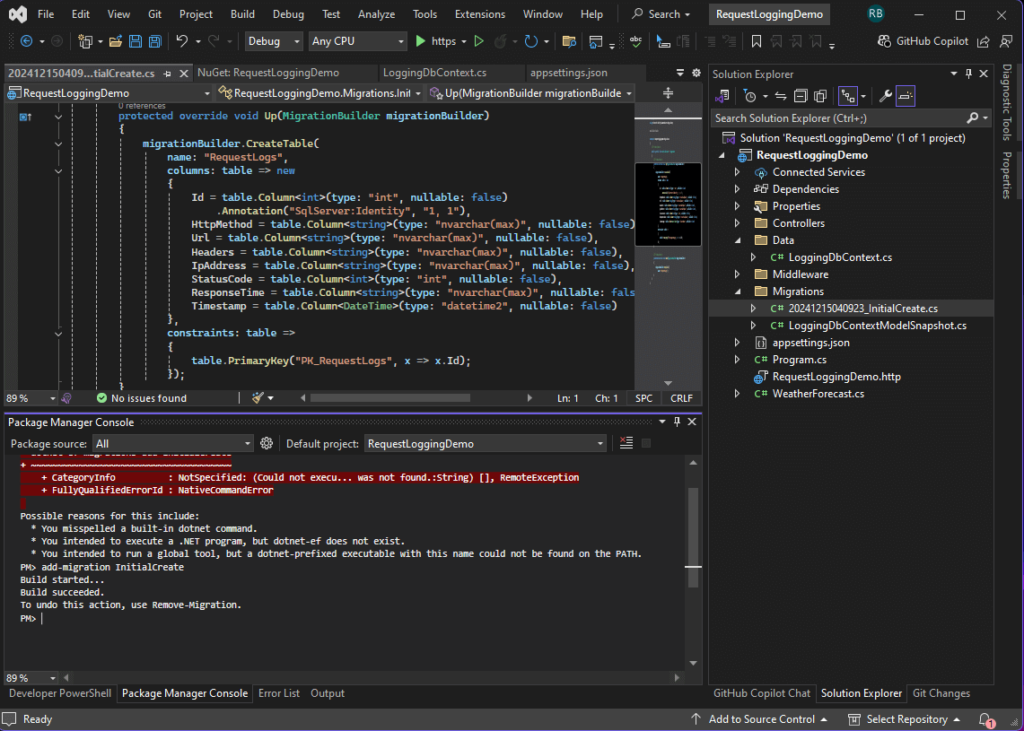
Run the command below to run the migration and create the database schema.
Update-Database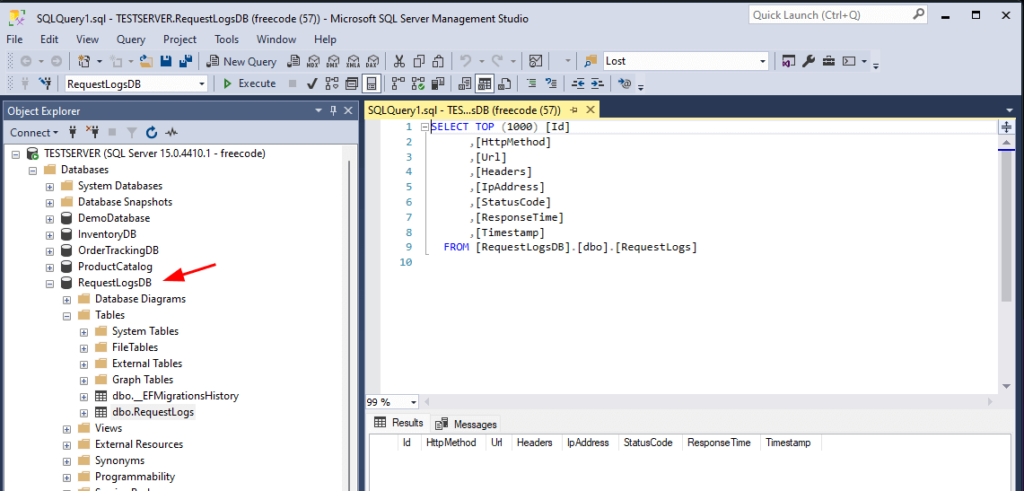
6. Open the middleware class RequestLoggingMiddleware.cs, then add IServiceScopedFactory in the constructor.
We need to add IServiceScopeFactory to the constructor to resolve scoped services (like LoggingDbContext) correctly within a singleton middleware.
  private readonly RequestDelegate _next;

  private readonly IServiceScopeFactory _scopeFactory;

  public RequestLoggingMiddleware(RequestDelegate next, IServiceScopeFactory scopeFactory)
  {
      _next = next;
      _scopeFactory = scopeFactory;
  }
7. Create a method named LogToDatabaseAsync
private async Task LogToDatabaseAsync(LoggingDbContext dbContext, string logType, RequestLog logData)
  {
      if (logType == "Request")
      {
          await dbContext.RequestLogs.AddAsync(logData);
      }
      else if (logType == "Response")
      {
          dbContext.RequestLogs.Update(logData);
      }

      await dbContext.SaveChangesAsync();
  }
8. Inside InvokeAsync we can call the method like this.
 using (var scope = _scopeFactory.CreateScope())
 {
     var dbContext = scope.ServiceProvider.GetRequiredService<LoggingDbContext>();
     await LogToDatabaseAsync(dbContext, "Request", requestLog);
 }
This is the full modified middleware code.
using RequestLoggingDemo.Data;
using RequestLoggingDemo.Models;
using System.Diagnostics;
using System.Text.Json;

namespace RequestLoggingDemo.Middleware
{
    public class RequestLoggingMiddleware
    {
        private readonly RequestDelegate _next;

        private readonly IServiceScopeFactory _scopeFactory;

        public RequestLoggingMiddleware(RequestDelegate next, IServiceScopeFactory scopeFactory)
        {
            _next = next;
            _scopeFactory = scopeFactory;
        }

        public async Task InvokeAsync(HttpContext context)
        {
            // Start a stopwatch to measure response time
            var stopwatch = Stopwatch.StartNew();

            // Log request details
            var requestLog = new RequestLog
            {
                HttpMethod = context.Request.Method,
                Url = context.Request.Path,
                Headers = JsonSerializer.Serialize(context.Request.Headers),
                IpAddress = context.Connection.RemoteIpAddress?.ToString(),
                ResponseTime = "",
                Timestamp = DateTime.UtcNow
            };
            await LogToFileAsync("Request", requestLog);

            // Log request to the database
            using (var scope = _scopeFactory.CreateScope())
            {
                var dbContext = scope.ServiceProvider.GetRequiredService<LoggingDbContext>();
                await LogToDatabaseAsync(dbContext, "Request", requestLog);
            }

            // Pass control to the next middleware
            await _next(context);

            // Stop the stopwatch and log response details
            stopwatch.Stop();
            var responseLog = new
            {
                StatusCode = context.Response.StatusCode,
                ResponseTime = $"{stopwatch.ElapsedMilliseconds} ms"
            };

            // Log response to the database
            using (var scope = _scopeFactory.CreateScope())
            {
                var dbContext = scope.ServiceProvider.GetRequiredService<LoggingDbContext>();
                requestLog.ResponseTime = $"{stopwatch.ElapsedMilliseconds} ms";
                await LogToDatabaseAsync(dbContext, "Response", requestLog);
            }

            await LogToFileAsync("Response", responseLog);
        }

        private async Task LogToFileAsync(string logType, object logData)
        {
            var logMessage = $"{logType}: {JsonSerializer.Serialize(logData)}\n";
            await File.AppendAllTextAsync("logs.txt", logMessage);
        }

        private async Task LogToDatabaseAsync(LoggingDbContext dbContext, string logType, RequestLog logData)
        {
            if (logType == "Request")
            {
                await dbContext.RequestLogs.AddAsync(logData);
            }
            else if (logType == "Response")
            {
                dbContext.RequestLogs.Update(logData);
            }

            await dbContext.SaveChangesAsync();
        }
    }
}
Testing the Implementation
Once everything is set up, you can test the middleware by following these steps:
- Run the Application
Start the application using Visual Studio. The default launch URL will open in your browser. - Send HTTP Requests
Use tools like Postman, curl, or a browser to send GET, POST, or other HTTP requests to the API. - Check the Logs
Open thelogs.txtfile in the project directory. You should see entries for every request and response, similar to the following:
Request: {"HttpMethod":"GET","Url":"/weatherforecast","Headers":{"Accept":["*/*"]},"IpAddress":"127.0.0.1"}
Response: {"StatusCode":200,"ResponseTime":"45 ms"}
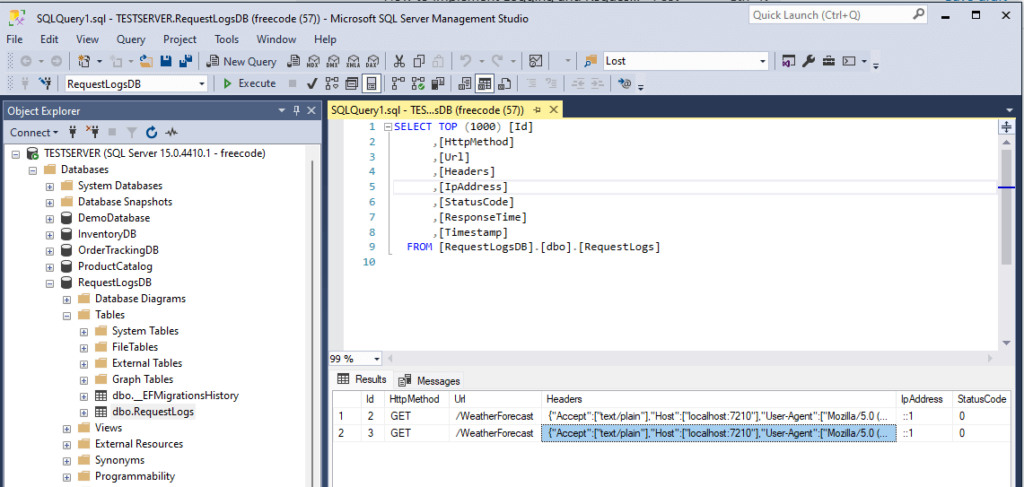
4. Check RequestLogs table
Open the table and verify if the data were successfully inserted.
Extending the Middleware
Our middleware can be enhanced with additional functionality:
- Integrate with Logging Frameworks
Replace manual file logging with libraries like Serilog, NLog, or Elasticsearch for more robust logging capabilities. - Filter Logs
Add logic to only log specific requests or responses, such as those with error codes (e.g.,500 Internal Server Error).
Download Source Code
You can download the complete source code for this tutorial here.
Password: freecodespot
Steps to Download:
- Click the link to download the zipped project files.
- Extract the contents to your preferred location.
- Open the solution in Visual Studio and run the application.
If you encounter any issues, ensure you’re using .NET 8.0 or later and have the required dependencies installed.
Summary
In this tutorial, we created a custom logging middleware in ASP.NET Core. This middleware logs HTTP requests and responses, including metadata like URLs, headers, client IPs, status codes, and response times. We tested the middleware and explored how it can be extended for advanced scenarios such as database logging or integration with third-party logging frameworks.
If you’d like to implement a more comprehensive logging system, consider exploring NLog for .NET Core to integrate a structured logging solution in your applications. For more tutorials like this, check out other posts on FreeCodeSpot!