This tutorial will guide you on How to publish ASP NET Core 3.0 in Azure App Service. Azure also offers a free trial on hosting Web Application, which I used in this tutorial. If you also want to try it yourself, you may go ahead and register for the Azure free trial.
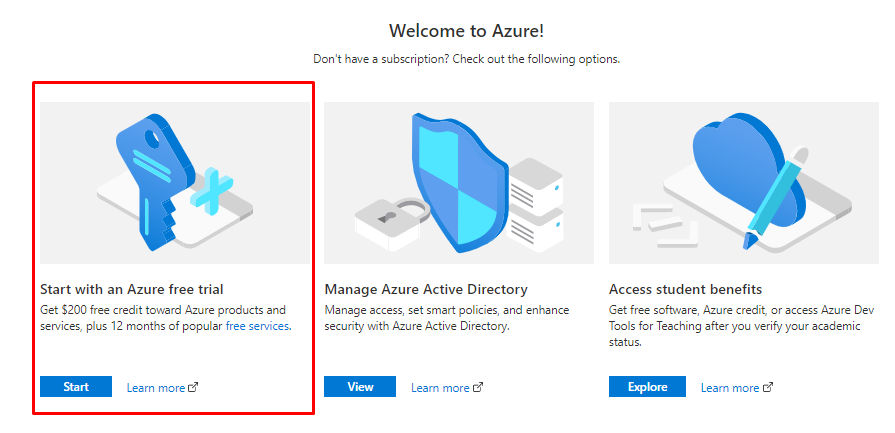
Once you register for this plan, you will receive $200 credits that you can use to try out Azure services. You will also have 12 months of free service, which you can check out here. link
This is the pricing table for Azure plans on windows:
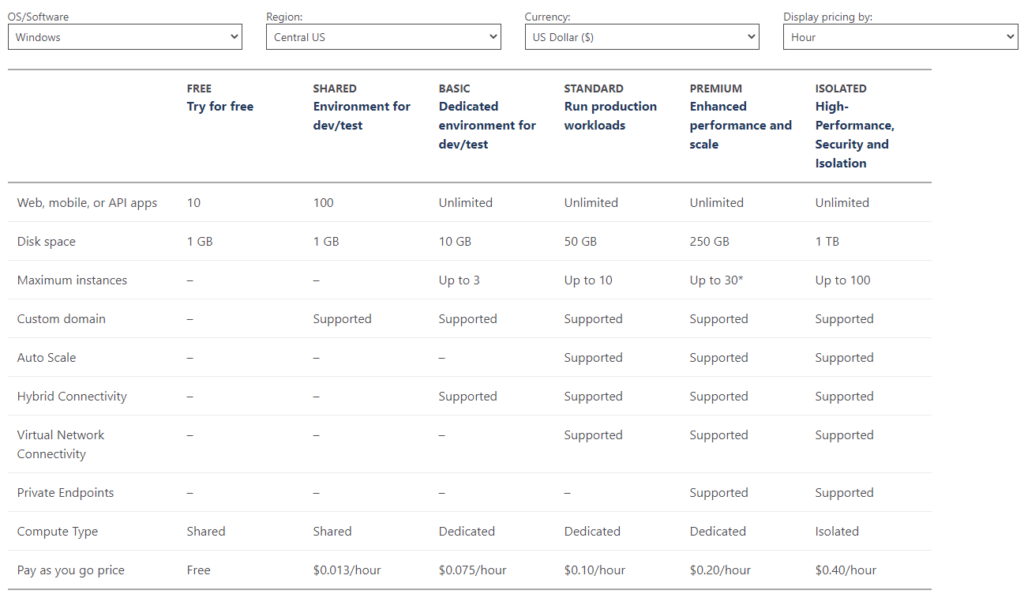
You can also see pricing for Linux using this link. If you already have created your account on azure. Let’s start configuring our Azure web app service.
Create ASP.NET MVC web Application using .NET 5
I. Configure Azure Web App Services
- Login to azure portal. Then create an App Services.

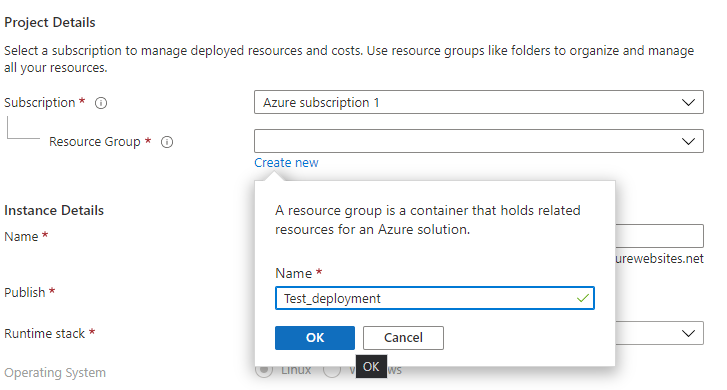
2. From the App Service Details. Create a new Group. As shown below.
3. Provide name for you App Service. For example I name mine as testapplication111.
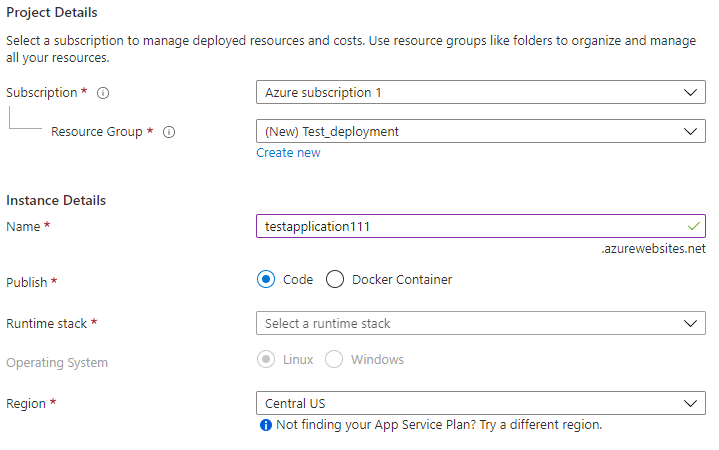
4. Now select what runtime are you going to use. In this case I will choose .NET Core 3.1 (TLS).
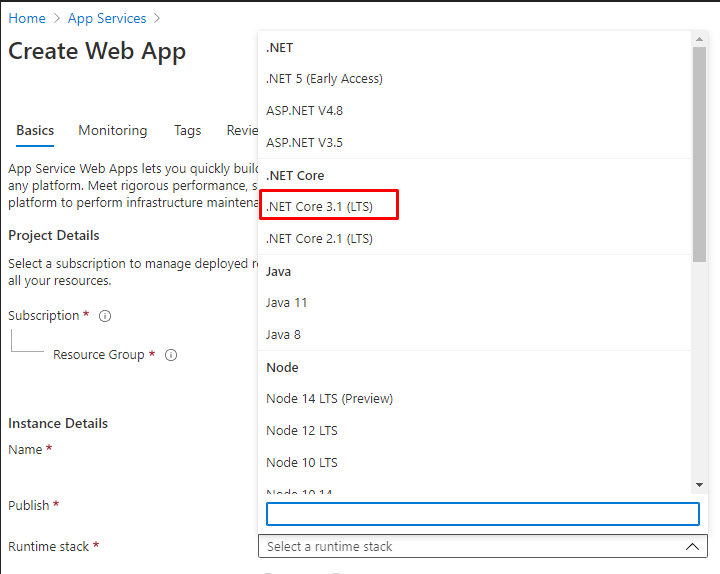
5. Now that you have set your application’s runtime. You are now ready to create your app service. You also the option to choose next for additional options.

6. Once you are done reviewing all the available options and created the app service. You will reach to this View. See the image below.
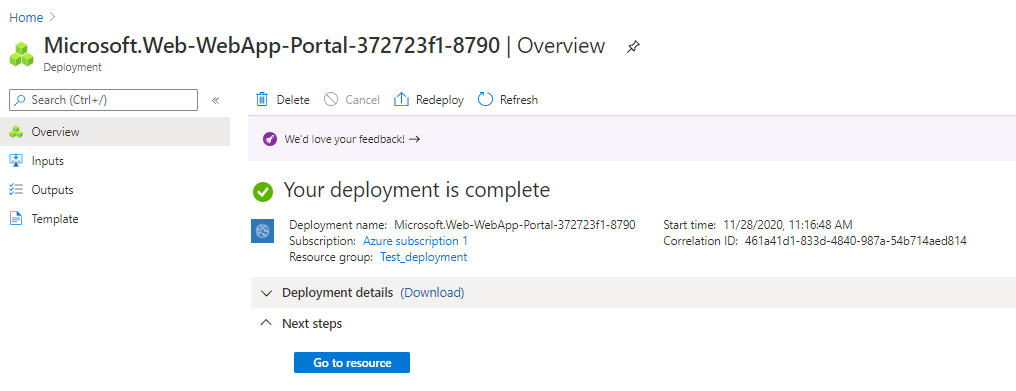
7. By this point, you have successfully created your app service. Click on Go to resource to view the app dashboard. Once you are on the board, you may browse your app to check if your app works.
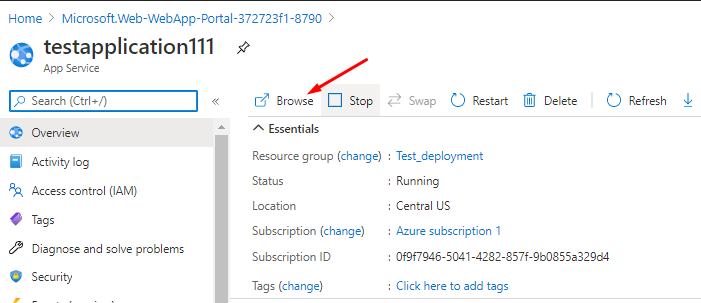
Web App Deployment
Now that we have successfully created your Azure App Service, what remains for us to do is to create a test ASP.NET Core Web Application.
There are different way to deploy your Web Application in azure. Go to your App service dashboard and select Deployment Center under Deployment menu.
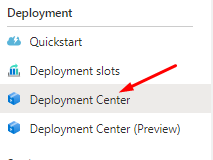
Here we are given an option on how you can deploy your project. But in this tutorial, we will use the Visual Studio publish option to deploy our test Web Application. This is to show you that there are other options for the deployment of apps.

II. Deploy App Using Visual Studio
- Open you ASP.NET Core Web Application. Then navigate to Build » publish TestApp. TestApp is the sample project I created.
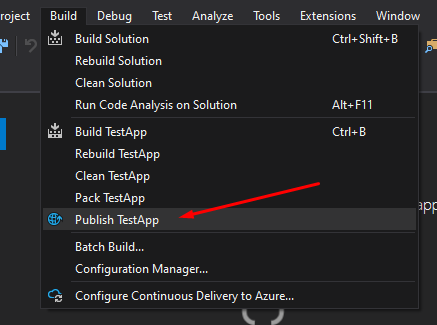
2. Now, a form will prompt asking you to choose option for publish. Select Azure in the option.
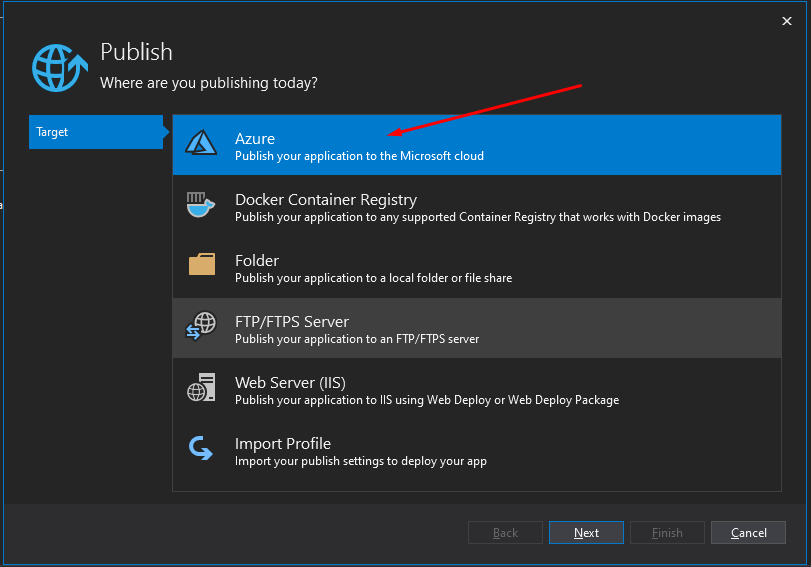
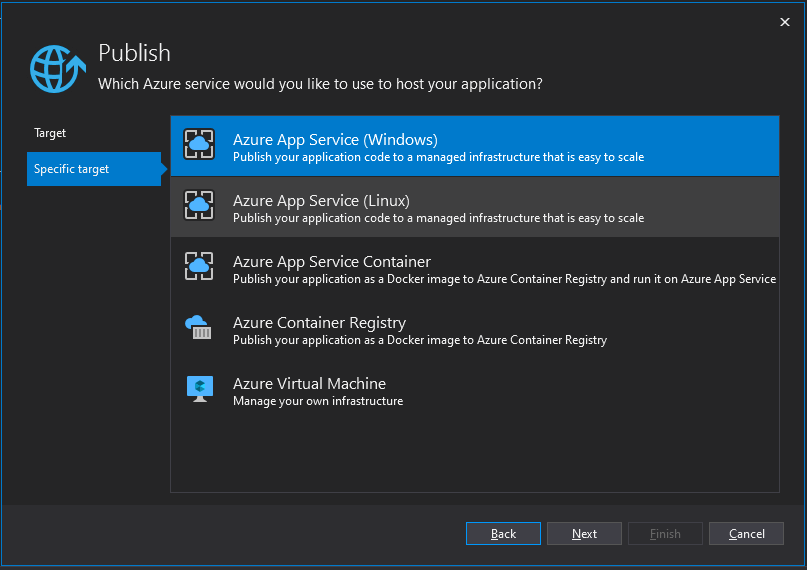
3. You will be prompted to choose target platform. Which in my case it’s Azure App Service(Windows). Click next to proceed.
4. Make sure to log in to your Microsoft account to see the app service you created awhile ago. Then select Finish to proceed with deployment. See the image below.
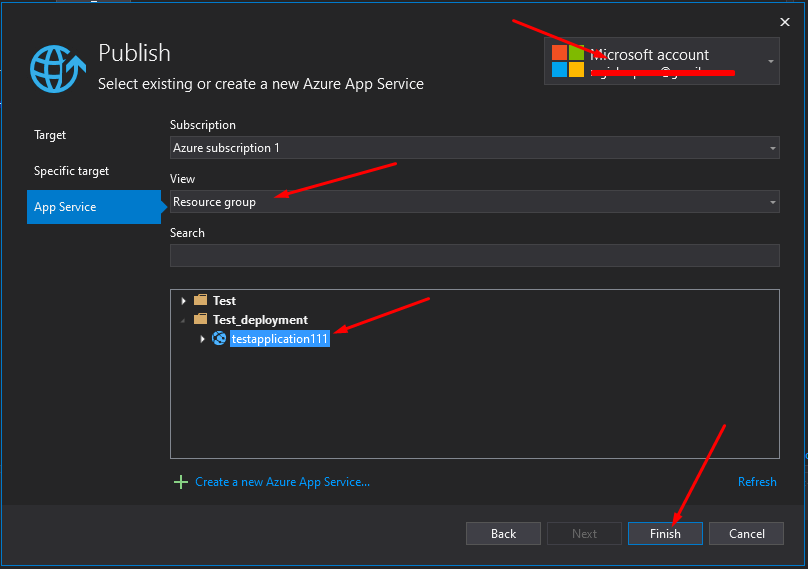
5. Last step would be to publish your application. See the image below.
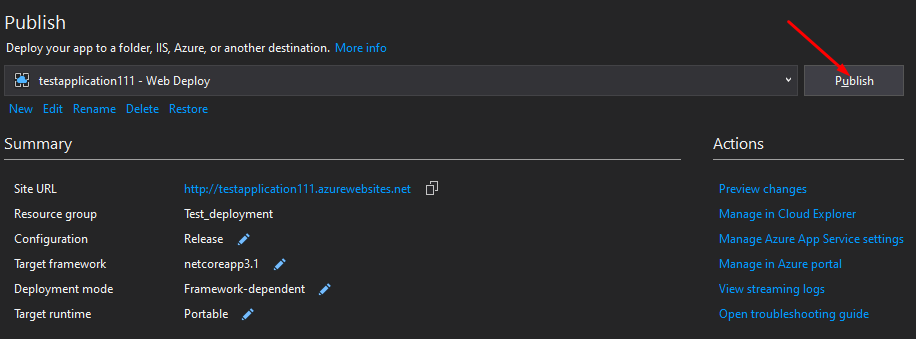
After publishing, your website will automatically open in your browser. This time you have successfully deploy your app to Azure using .Net Core 3.1(TLS).
Summary
This article shows you How to publish ASP NET Core 3.0 in Azure App Service. We also have learned that aside from deploying web apps using Visual Studio, there are also available options like deployment using repositories like GitHub, BitBucket, etc.
Hopefully this article will guide you on your future projects. Continue exploring. Happy Coding.
Detailed reference can refer here —
Pricing — https://azure.microsoft.com/en-in/pricing/details/app-service/windows/
Documentation — https://docs.microsoft.com/en-us/azure/app-service/
For more ASP.NET Core tutorial you may visit my blog page to search for my latest tutorials.
