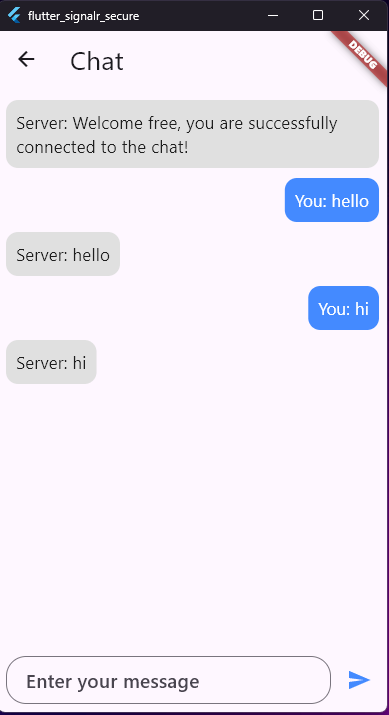
In this tutorial, we’ll walk you through the steps of connecting a Flutter application to a secure ASP.NET Core Web API project that uses SignalR with JWT-based client authentication. By the end of this guide, you’ll have a Flutter app capable of user login, authenticated SignalR connection, and real-time chat messaging capabilities.
Note: The ASP.NET Core Web API project used for this demo can be downloaded from the article on Secure SignalR Connection with JWT. Follow the download instructions in that article, and once downloaded, make sure to build and run the API locally (using
https://localhost:7003/as the base URL) to connect successfully with the Flutter app.
Before starting, make sure you have the following installed and set up:
- Visual Studio 2022 or later for developing the ASP.NET Core API
- Flutter SDK and an editor like Visual Studio Code for Flutter development
- Basic knowledge of ASP.NET Core, SignalR, and Flutter
- The downloaded and running ASP.NET Core Web API project with SignalR configured and JWT authentication enabled
Step 1: Setting Up the Flutter Project
1. Create a new Flutter project by running.
flutter create flutter_signalr_secure2. Open the project in your editor.
3. Add the necessary packages to pubspec.yaml for SignalR and HTTP communication:
dependencies:
  flutter:
    sdk: flutter
  signalr_netcore: ^1.4.0 # for SignalR connections
  http: ^1.2.2 # for making HTTP requests
Step 2: Create a Login Screen for JWT Generation
To secure the SignalR connection, the user must first log in to the app to obtain a JWT. Create a login screen where the user inputs their credentials and retrieves the token.
1. In your Flutter project, create a new Dart file named login_screen.dart.
2. Implement the UI for username and password input, and add a function to handle login requests to the backend API:

import 'package:flutter/material.dart';
import 'package:flutter_signalr_secure/chat_screen.dart';
import 'package:http/http.dart' as http;
import 'dart:convert';

class LoginScreen extends StatefulWidget {
  @override
  _LoginScreenState createState() => _LoginScreenState();
}

class _LoginScreenState extends State<LoginScreen> {
  final TextEditingController _usernameController = TextEditingController();
  final TextEditingController _passwordController = TextEditingController();
  bool _isLoading = false; // Loading state
  String? _errorMessage;

  Future<void> _login() async {
    setState(() {
      _isLoading = true;
      _errorMessage = null; // Reset error message
    });

    final response = await http.post(
      Uri.parse('https://localhost:7003/api/auth/login'),
      headers: {'Content-Type': 'application/json'},
      body: jsonEncode({
        'username': _usernameController.text,
        'password': _passwordController.text,
      }),
    );

    setState(() {
      _isLoading = false;
    });

    if (response.statusCode == 200) {
      final token = jsonDecode(response.body)['token'];
      Navigator.push(
        context,
        MaterialPageRoute(
          builder: (context) => ChatScreen(token: token), // Pass the token
        ),
      );
    } else {
      setState(() {
        _errorMessage =
            'Login failed. Please check your username and password.';
      });
    }
  }

  @override
  Widget build(BuildContext context) {
    return Scaffold(
      appBar: AppBar(title: Text('Login')),
      body: Center(
        child: SingleChildScrollView(
          padding: const EdgeInsets.all(16.0),
          child: Column(
            crossAxisAlignment: CrossAxisAlignment.stretch,
            children: [
              Text(
                'Welcome Back',
                textAlign: TextAlign.center,
                style: TextStyle(fontSize: 24.0, fontWeight: FontWeight.bold),
              ),
              SizedBox(height: 16.0),
              TextField(
                controller: _usernameController,
                decoration: InputDecoration(
                  labelText: 'Username',
                  border: OutlineInputBorder(
                    borderRadius: BorderRadius.circular(12.0),
                  ),
                  filled: true,
                  fillColor: Colors.grey[200],
                  contentPadding: EdgeInsets.symmetric(horizontal: 16.0),
                ),
              ),
              SizedBox(height: 16.0),
              TextField(
                controller: _passwordController,
                decoration: InputDecoration(
                  labelText: 'Password',
                  border: OutlineInputBorder(
                    borderRadius: BorderRadius.circular(12.0),
                  ),
                  filled: true,
                  fillColor: Colors.grey[200],
                  contentPadding: EdgeInsets.symmetric(horizontal: 16.0),
                ),
                obscureText: true,
              ),
              if (_errorMessage != null) ...[
                SizedBox(height: 12.0),
                Text(
                  _errorMessage!,
                  style: TextStyle(color: Colors.red),
                  textAlign: TextAlign.center,
                ),
              ],
              SizedBox(height: 20.0),
              _isLoading
                  ? Center(child: CircularProgressIndicator())
                  : ElevatedButton(
                      onPressed: _login,
                      style: ElevatedButton.styleFrom(
                        padding: EdgeInsets.symmetric(vertical: 16.0),
                        shape: RoundedRectangleBorder(
                          borderRadius: BorderRadius.circular(12.0),
                        ),
                      ),
                      child: Text(
                        'Login',
                        style: TextStyle(fontSize: 18.0),
                      ),
                    ),
            ],
          ),
        ),
      ),
    );
  }
}
Step 3: Connect to SignalR with JWT Authentication
Now that we have a JWT token, we can use it to authenticate our SignalR connection. Create a new Dart file called signalr_service.dart and initialize the SignalR connection using the token.
import 'package:signalr_netcore/http_connection_options.dart';
import 'package:signalr_netcore/hub_connection.dart';
import 'package:signalr_netcore/hub_connection_builder.dart';

class SignalRService {
  HubConnection? _hubConnection;

  Future<void> startConnection(String token) async {
    _hubConnection = HubConnectionBuilder()
        .withUrl('https://localhost:7003/chathub', options: HttpConnectionOptions(
          accessTokenFactory: () async => token,
        ))
        .build();
    await _hubConnection?.start();
  }

  void receiveMessages() {
    _hubConnection?.on('ReceiveMessage', (message) {
      print('Received: ${message?[0]}');
    });
  }

  void sendMessage(String user, String message) {
    _hubConnection?.invoke('SendMessage', args: [user, message]);
  }

  Future<void> stopConnection() async {
    await _hubConnection?.stop();
  }
}
Step 4: Building a Chat Screen
Finally, we can build the chat screen in Flutter. The screen will allow users to input messages, send them to the server, and display incoming messages in real-time.
1. Create a new Dart file named chat_screen.dart.
2. Implement the chat UI with text input for sending messages

import 'package:flutter/material.dart';
import 'signalr_service.dart';

class ChatScreen extends StatefulWidget {
  final String token;
  ChatScreen({required this.token});

  @override
  _ChatScreenState createState() => _ChatScreenState();
}

class _ChatScreenState extends State<ChatScreen> {
  final TextEditingController _messageController = TextEditingController();
  List<String> messages = [];
  late SignalRService signalRService;

  void _sendMessage() {
    String message = _messageController.text;
    if (message.isNotEmpty) {
      setState(() {
        messages.add("You: $message"); // Add the sent message to the list
      });
      signalRService.sendMessage('user', message);
      _messageController.clear();
    }
  }

  @override
  void initState() {
    super.initState();
    signalRService = SignalRService();
    signalRService.startConnection(widget.token);

    // Receive messages from SignalR and add them to the chat
    signalRService.receiveMessages((receivedMessage) {
      setState(() {
        messages.add(
            "Server: $receivedMessage"); // Add received message to the list
      });
    });
  }

  @override
  Widget build(BuildContext context) {
    return Scaffold(
      appBar: AppBar(title: Text('Chat')),
      body: Column(
        children: [
          Expanded(
            child: ListView.builder(
              padding: EdgeInsets.all(8.0),
              itemCount: messages.length,
              itemBuilder: (context, index) {
                bool isUserMessage = messages[index].startsWith("You: ");
                return Align(
                  alignment: isUserMessage
                      ? Alignment.centerRight
                      : Alignment.centerLeft,
                  child: Container(
                    margin: EdgeInsets.symmetric(vertical: 5.0),
                    padding: EdgeInsets.all(10.0),
                    decoration: BoxDecoration(
                      color:
                          isUserMessage ? Colors.blueAccent : Colors.grey[300],
                      borderRadius: BorderRadius.circular(12.0),
                    ),
                    child: Text(
                      messages[index],
                      style: TextStyle(
                        color: isUserMessage ? Colors.white : Colors.black87,
                      ),
                    ),
                  ),
                );
              },
            ),
          ),
          Padding(
            padding: const EdgeInsets.all(8.0),
            child: Row(
              children: [
                Expanded(
                  child: TextField(
                    controller: _messageController,
                    decoration: InputDecoration(
                      hintText: 'Enter your message',
                      border: OutlineInputBorder(
                        borderRadius: BorderRadius.circular(20.0),
                      ),
                      contentPadding: EdgeInsets.symmetric(
                          horizontal: 20.0, vertical: 10.0),
                    ),
                    onSubmitted: (_) => _sendMessage(),
                  ),
                ),
                SizedBox(width: 8.0),
                IconButton(
                  icon: Icon(Icons.send, color: Colors.blueAccent),
                  onPressed: _sendMessage,
                ),
              ],
            ),
          ),
        ],
      ),
    );
  }
}
Step 5: Modifying main.dart to Open the Login Screen
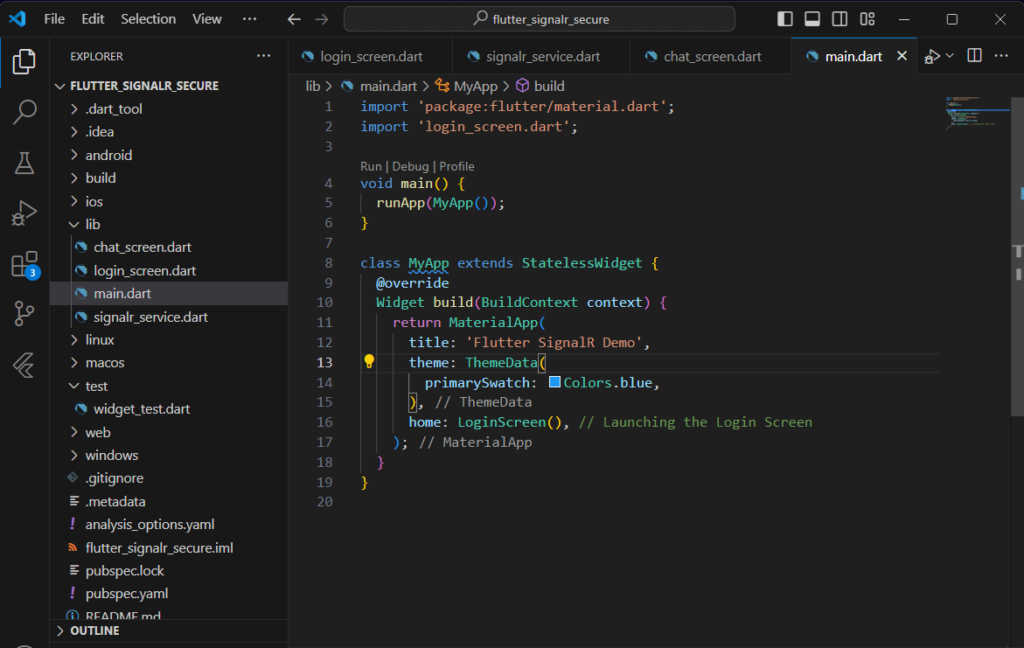
To launch the login screen when the app starts, you need to update the main.dart file to initialize and display LoginScreen.
1. Open the main.dart file in your Flutter project.
2. Replace its content with the following code:

import 'package:flutter/material.dart';
import 'login_screen.dart';

void main() {
  runApp(MyApp());
}

class MyApp extends StatelessWidget {
  @override
  Widget build(BuildContext context) {
    return MaterialApp(
      title: 'Flutter SignalR Demo',
      theme: ThemeData(
        primarySwatch: Colors.blue,
      ),
      home: LoginScreen(), // Launching the Login Screen
    );
  }
}
Download Source Code
To download free source code from this tutorial, you can use the button below.
Note: Extract the file using 7Zip and use password: freecodespot
Step 6: Testing the Application
1. Ensure your ASP.NET Core Web API with SignalR is running and accessible.
2. Run your Flutter application.
flutter run3. Log in using the credentials set up on your API.
4. After a successful login, you should be able to send messages via the chat screen, and messages sent from one instance should be displayed in real-time on other connected devices.
Summary
In this article, we created a secure connection between a Flutter app and an ASP.NET Core SignalR Web API. We built a login screen to generate JWT tokens for authenticated SignalR connections, implemented a service to manage SignalR communication with JWT authentication, and created a real-time chat interface in Flutter. This setup provides a foundation for adding more complex real-time features to your app.
